
Bypass FRP Gionee Max – Google Account Remove With New Way
Bypass FRP GIONEE Max is very easy, if you cant reach to your device anyhow, and unable to remember your previously signed Gmail account, so follow steps from here to get your device back in working condition without having any FRP lock.
You can add and remove frp protection easily from your own device if you know your device previously synced Gmail Account, but if you have forgotten your Gmail ID and also you have performed a Hard Reset process on your phone, then you will not be able to access in your phone until you follow this below frp method for bypass google account.
Warning: This Article is only for educational purpose, try this frp method only to bypass frp your Own Phone.
Let’s Start to Bypass FRP GIONEE Max:
Step 1: Connect WiFi, and from the same (WiFi screen), tap to > Manually Add a Network.
Step 2: Tap to > Mic icon > Deny.
![]()
Step 3: Tap to > Mic icon > Deny & Don’t Ask Again.
![]()
Step 4: Tap to > Mic icon > Allow Bypass FRP GIONEE Max.
![]()
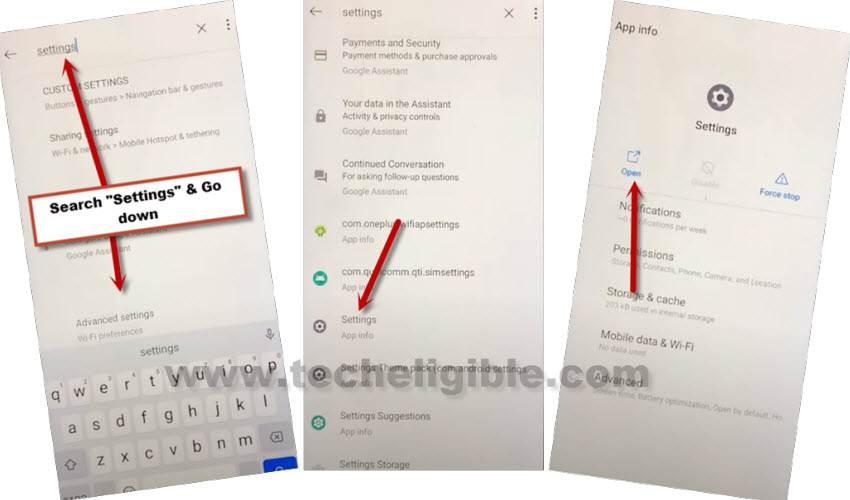
Step 5: Go to “Permission”, and hit over “Search icon” from top corner.
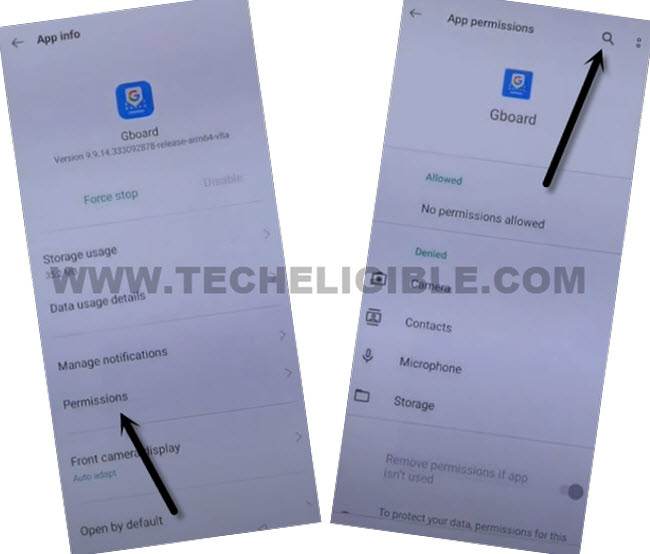
Step 6: Type in search area “Settings “, and then go to down, and hit on > Settings (App info) > Open.
Note: Try to add (Space) after typing (Settings), because sometimes (Settings app (App info))option does not appear, so do add (Space) after settings.
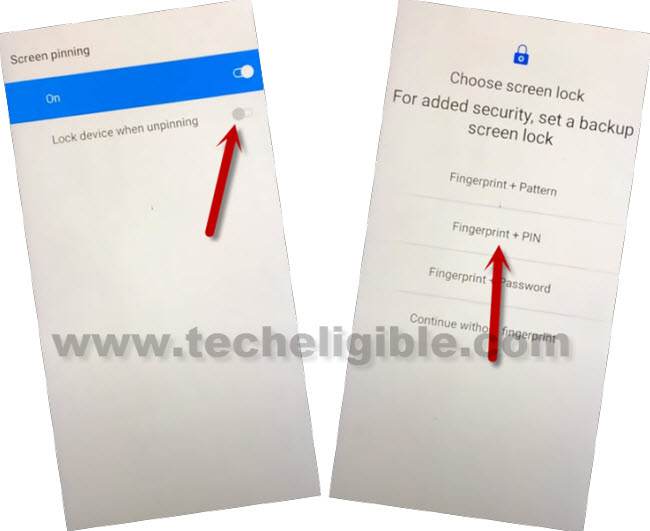
Step 7: Go to > Security > Screen Pinning > Turn on.

Step 8: Turn on “Lock Device When Unpinning”, and then tap to “Face Authentication + PIN”.
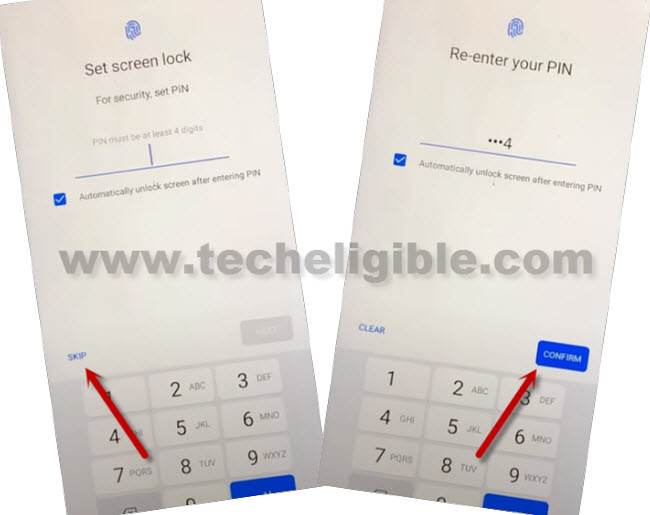
Step 9: You can now Setup any 4 digits pin code, and then tap to “Confirm”.
Note: Do remember this PIN code, we will use this later on while completing setup wizard.
Step 10: By tapping on back arrow few times, get back to (Settings).
Step 11: Tap on > Apps & Notification > See all APPS.
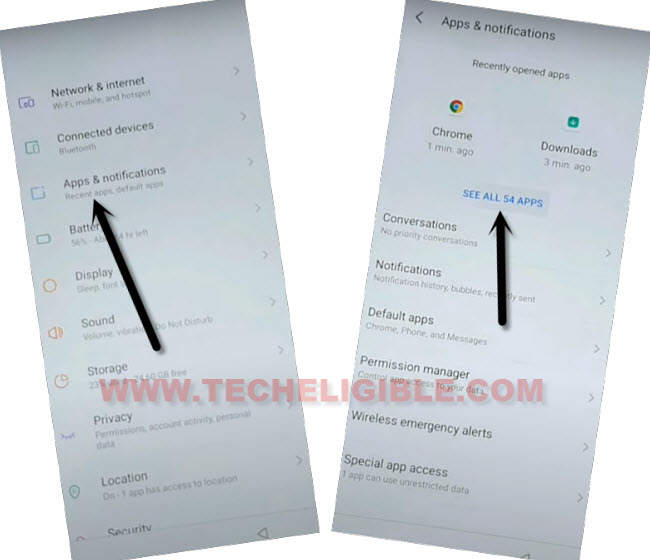
Step 12: Hit on “3 Dots” from top corner, and then select “Show System App”.
![]()
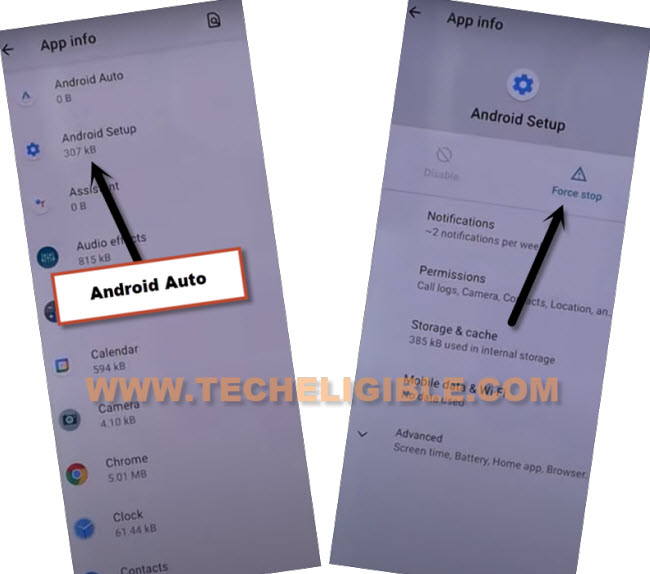
Step 13: Find and tap on settings gear icon “Android Setup”, and then tap to “Force Stop”.
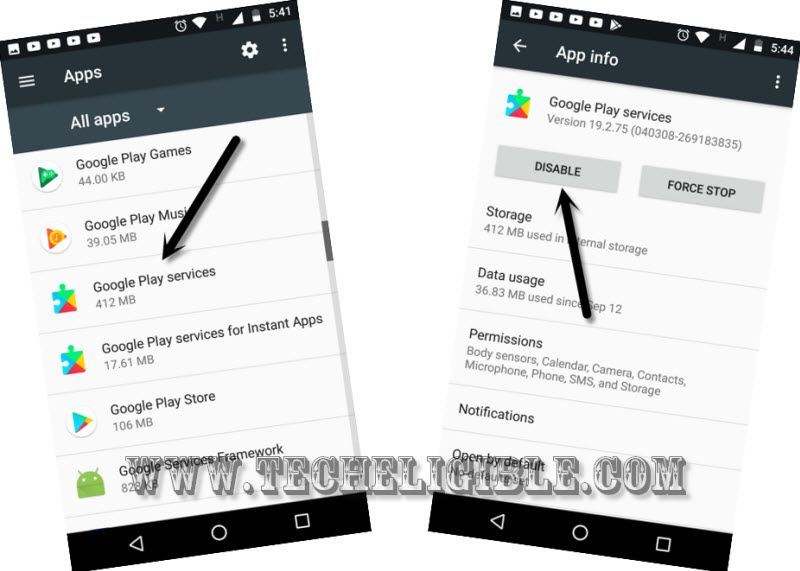
Step 14: Tap to > Google Play Services > Disable.
Go back to Hello Home-Screen:
Step 15: Get back to (Hello) screen by tapping on back arrow several times.
Step 16: Go to > Start > Don’t Copy.
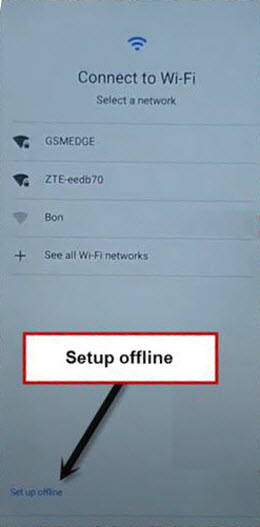
Step 17: Wait on loading screen few 20-30 seconds, after that tap on “Back Arrow” sometimes to get back to (Connect to WiFi) screen.
Step 18: There you must see “Setup Offline” option at the bottom left corner.
Step 19: We have to enable back the disabled (Google Play Services).
Repeat Steps to Reach Device Settings:
Step 20: Tap to > Mic icon > Allow.
![]()
Step 21: Go to “Permission”, and hit over “Search icon” from top corner.
Step 22: Type in search area “Settings”, and then go to down, and hit on > Settings > Open.
Step 23: Go to > Apps & Notification > See All Apps.
Step 24: Tap to > Google Play Services > Enable.
Step 25: Go to > Storage & Cache > Clear Storage > Clear All Data.
Step 26: Get back to (Connect to WiFi) screen again.
Step 27: Tap to > Setup Offline > Continue.

Step 28: After that you will see there a (loading…) screen, and then you will be redirected to the (Google Services) screen.
Now you can easily finish setup wizard, because you are done from Bypass FRP GIONEE Max, and you can now easily add new account for future frp lock. Thank You for visiting us.
Note: While completing setup wizard, you may be asked to enter PIN lock, just enter the same one which you have already entered in previous steps.