
Bypass Google FRP Moto E7i Without PC [Android 10] version
Hey, this tremendous and easiest method will help you to Bypass Google FRP Moto E7i (Android 10), without any PC, without any Paid software, and without any Expertise, you can do this by yourself, we have tried our best to describe you this method in easiest way, so follow steps from below to get into to your device homescreen and setup new google account.
Remember: Do not try this frp bypass method on a stolen phone, this is a serious crime, if you are trying this method on a stolen phone, you may also be jailed, so return this device to its real owner.
Lets Start to Bypass Google FRP Moto E7i:
Step 1: First of all, connect WiFi, and get back to (Hi there) homescreen same as described in below screen shot.
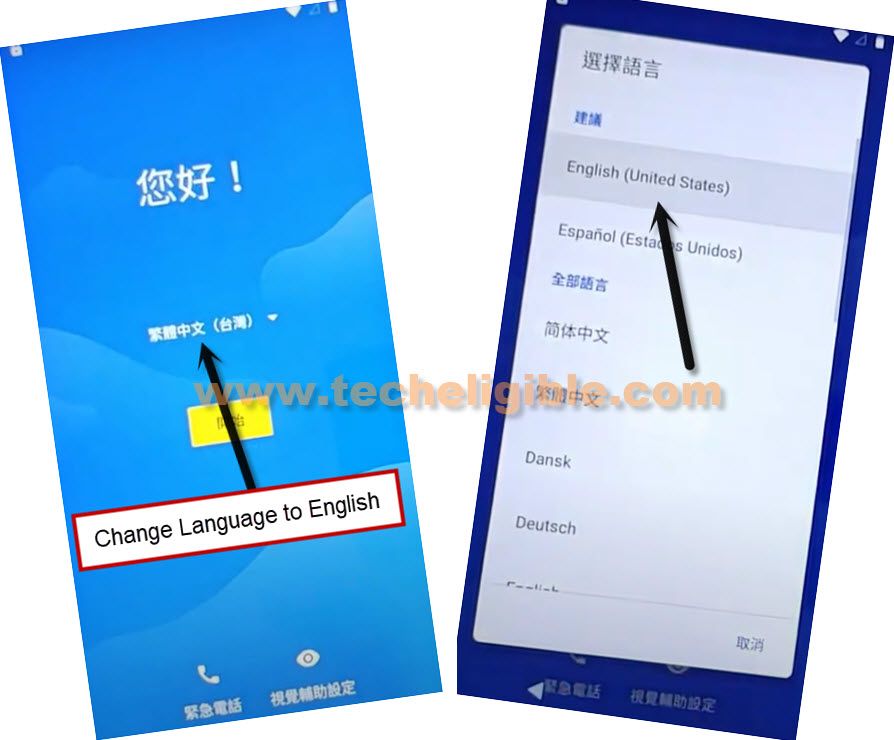
Step 2: Change device language to “Chinese Language” same as shown in below shot.
Note: If you don’t find same language, you can choose any other language as well except (English).
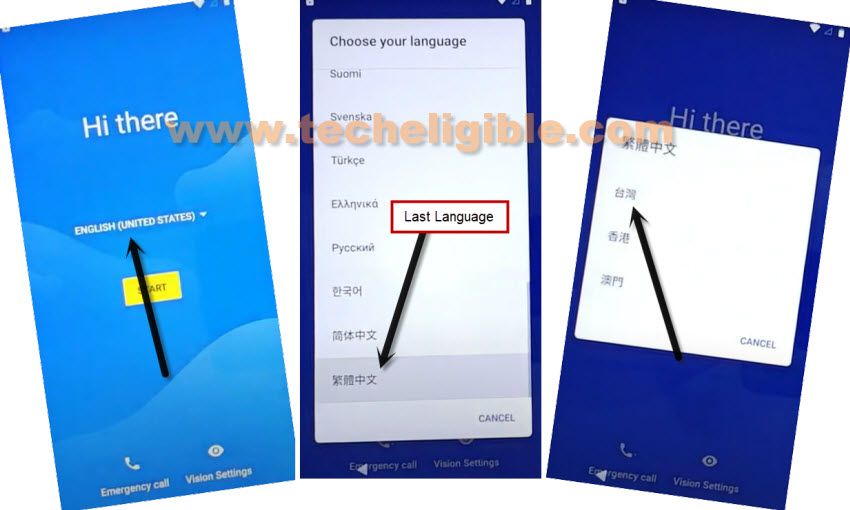
Step 3: Tap to “Yellow button” from center, and then tap on > Bottom Left option> Bottom Left option.
Step 4: Tap to “Center Email Field tab” to bring keyboard, and long tap “world icon”, and tap last option from popup window.
![]()
Add Some Languages Keyboards:
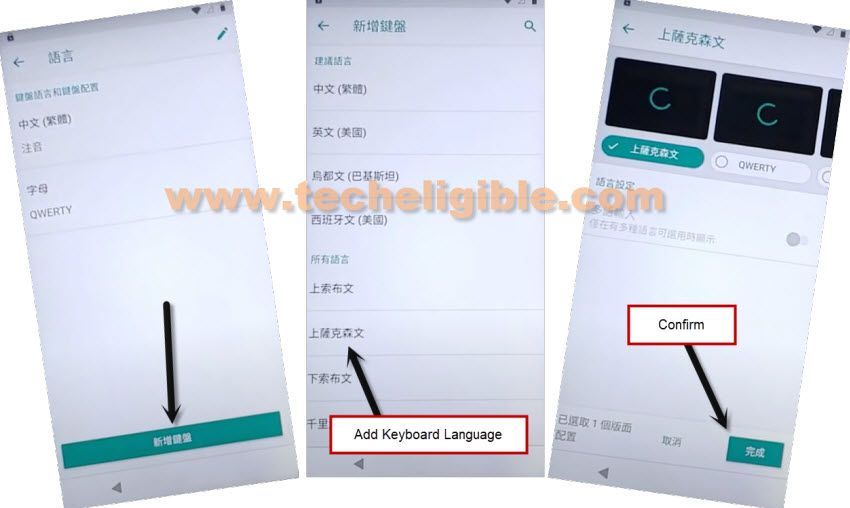
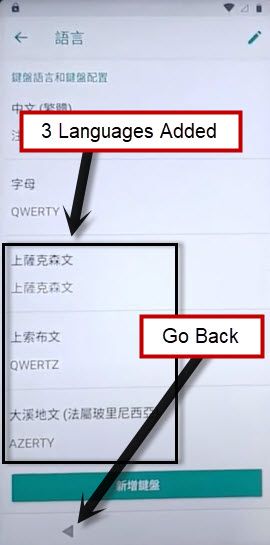
Step 5: By following below image, add any language keyboard.
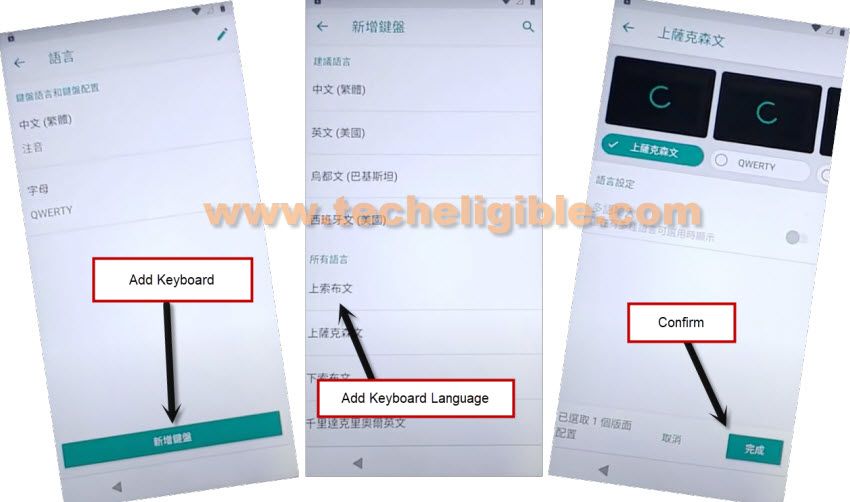
Step 6: Now Tap again on “Add keyboard”, and select any other language, and then tap on “Right Option”.
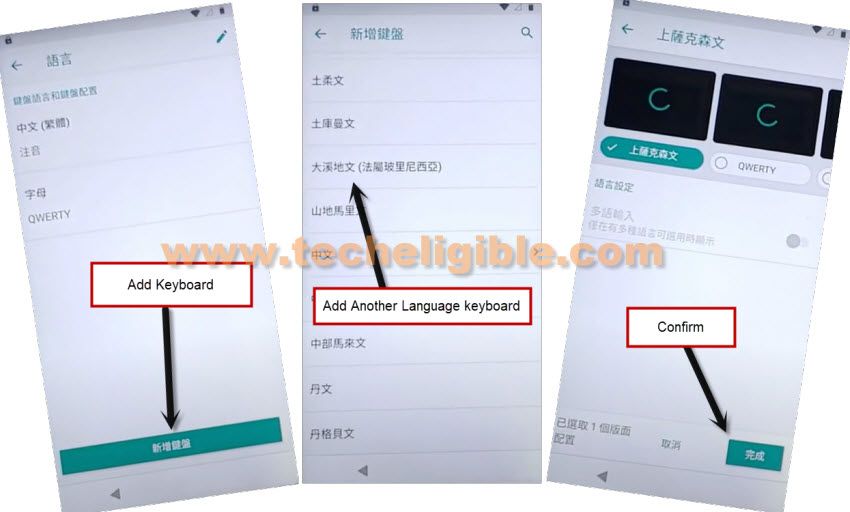
Step 7: This is the last time you are adding 3rd language, tap again on “Add keyboard > Select any random language > Right Option.
Step 8: These 3 keyboards languages will assist you to Bypass Google FRP Moto E7i, if you wanna know how? lets follow below steps.
Step 9: Change device language back to (English), to do that, just get back to first (Hi there) screen by tapping back arrow.
Step 10: Now we have to reach back to “Google Verification Screen”, from there bring keyboard again by tapping on center (Email or Phone) tab, and long press “World icon” to get popup window, from there tap to “Last Option”.
![]()
Step 11: Go to “Add Keyboard” button.
Step 12: Now hit on any language that has an “Arrow Symbol”.

Step 13: Tap on 3 dots > Help & Feedback.
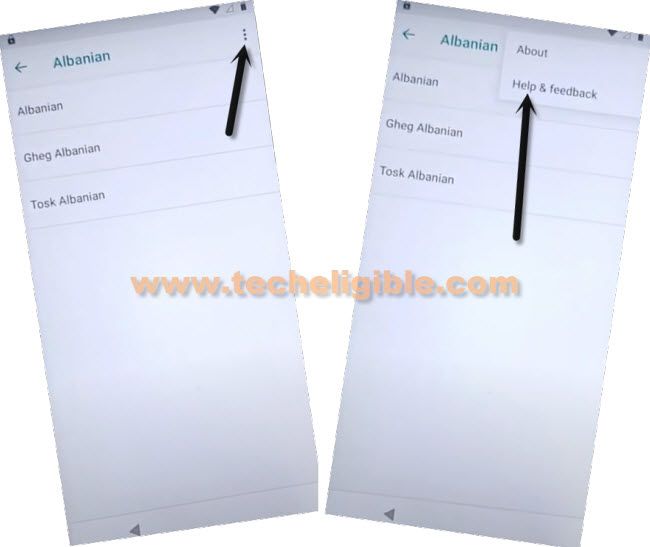
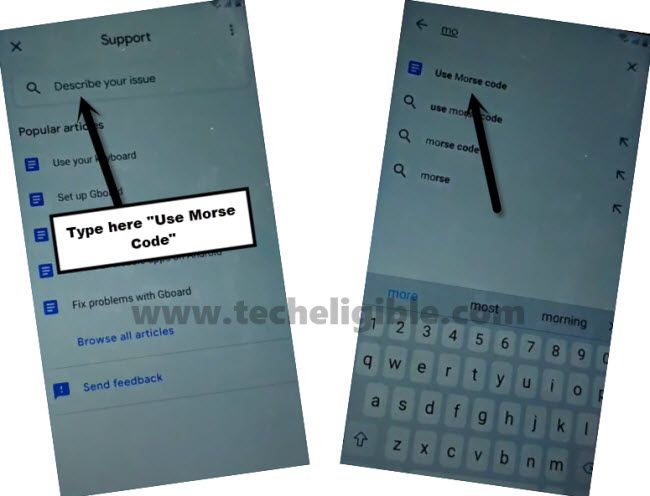
Step 14: Type in search box “Use Morse Code”.
Note: If the keyboard language is changed, just tap once at “World icon” to change language to English.
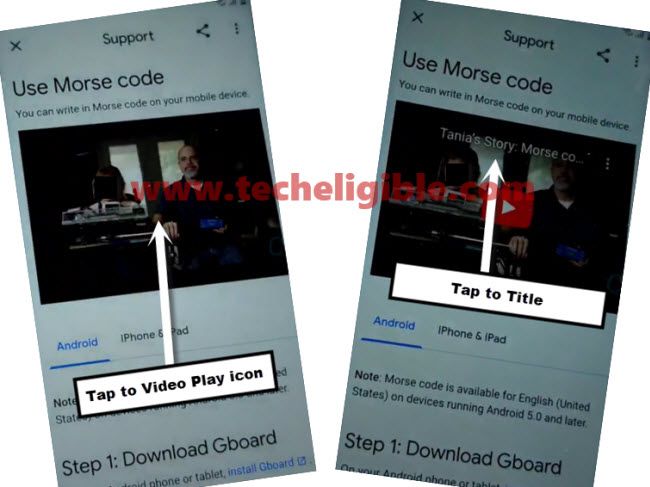
Step 15: From searched result, open “Use Morse Code” article.
Step 16: Play video, and tap to video title to access youtube.com.
Step 17: Drag down youtube video, and hit on “3 dots” from top right corner, and then tap to “Terms & Privacy Policy”.

Step 18: You will see chrome screen, just hit on > Accept & Continue > Next > No Thanks.
Lets Get inside Settings:
Step 19: Search “Download FRP Tools“, and visit our website searched result same as shown in below image.
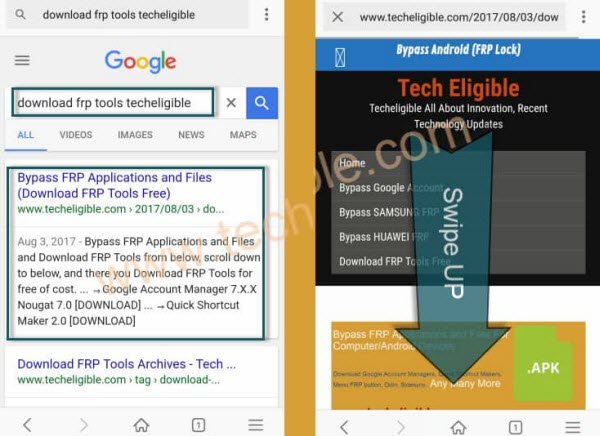
Step 20: Download from there “Quick Shortcut Maker 2.4.0“, once downloading is done, you will get a “OPEN” link at bottom, just tap on that.
Step 21: From chrome popup window, hit on “Settings”, and turn on “Allow from this source” option.
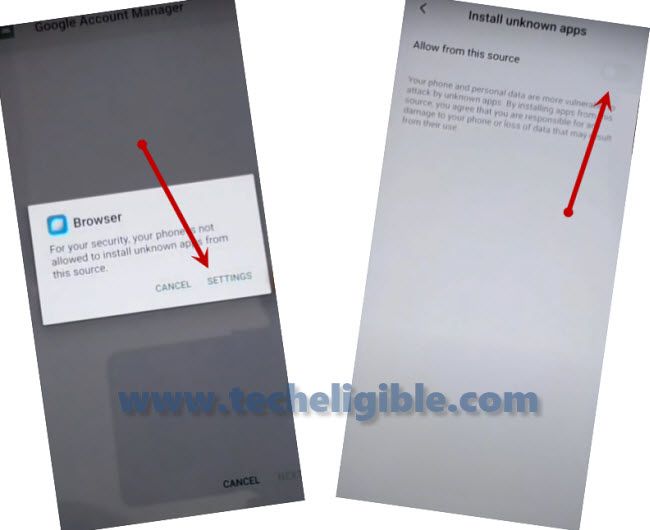
Step 22: Tap to “Back Arrow” from bottom, and then tap on “Install”, and hit on “Open” to access inside quick shortcut maker.
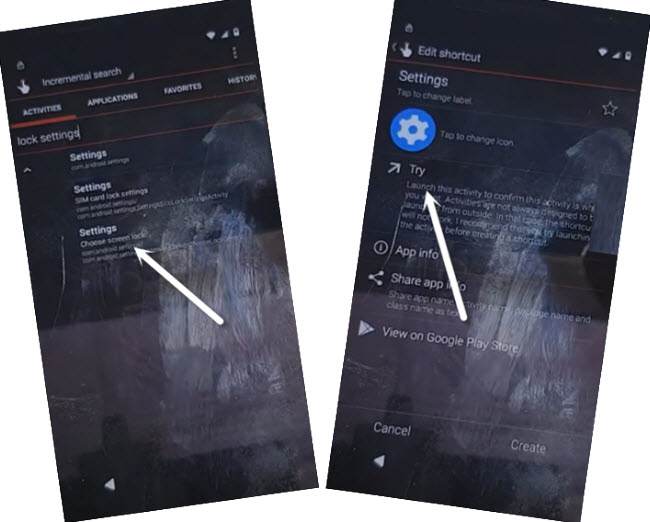
Step 23: Tap to “Activities” from inside top tab of quick shortcut maker, scroll down find and tap to “Settings”, and hit on “TRY”.
Setup Latest PIN Code:
Step 24: Let’s create new PIN to Bypass Google FRP Moto E7i, to do that, just go to > Security > Screen Pinning, and just turn on “Disabled Button”.
![]()
Step 25: Turn on “Lock device when unpinning” option.
Step 26: Tap on “Fingerprint + PIN”.![]()
Step 27: Setup your New PIN there.
Step 28: From (Touch the sensor) screen, just tap on “SKIP”, and tap on “Back Arrow” to go back to Security homepage.
Step 29: There you will see “PIN” underneath (Screen Lock) option, that means you have successfully added new PIN in your device.
Let’s Perform Factory Reset:
Step 30: Turn off device, and then long press “Volume Down + Power” button, keep pressing both keys.
Step 31: Release only “Power” button as soon as you see “Android Logo” at bottom screen.
Step 32: Release also “Volume Down” key as soon as you enter into “Android Recovery Mode”.
Step 33: Select “Wipe data/factory reset” by using (Volume up/down and power) keys.
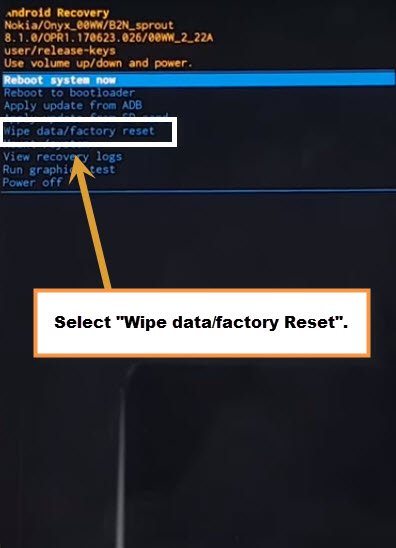
Step 34: Select “Factory Data Reset” option.
Step 35: Now select “Reboot system now”.
Step 36: Now you will get inside your device after factory reset process and restarting process done.
Step 37: From first “Hi there” startup screen, tap to > Start > Skip.
Step 38: Connect WiFi in to your device, and then you will get see next screen of “Checking for update…” just over there, this will take bit longer time, so wait until this is finished.
Step 39: Now tap to “Don’t Copy”, now you will see a screen of “Verify PIN”, so enter your recently setup PIN code to bypass this screen.
Step 40: After your you will have google sign in screen, just tap to > Skip > Skip.
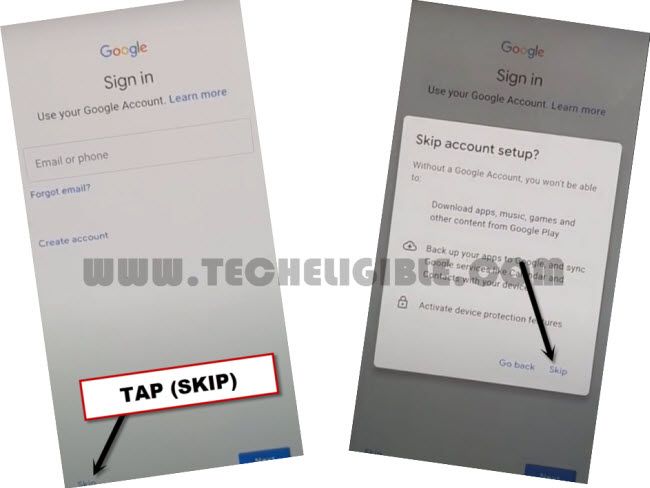
Step 41: Now you can easily finish your setup wizard and reach inside device homescreen, you are all done from google account bypass, thanks for visiting us.
Read More: