
How to Bypass FRP Redmi K40, K40 Ultra With Latest Way
You can apply this new method to Bypass FRP Redmi K40, K40 (Android 12,11) on both MIUI version 12.5 and 13 without using computer and any frp tool, we will just turn on (Second Space) feature in our device, and through this option, you will be able to turn on (OEM unlocking) from developer option, which will allow you remove old added google account.
Note: We highly recommend you to apply this method only on your own device, if you are not owner of this Redmi K40 device, or you found this from some where, you must return this device to its real owner.
| Method 1: Remove FRP Redmi K40, K40 Ultra [MIUI 12.5] |
| Method 2: Remove FRP Redmi K40, K40 Ultra [MIUI 13] |
Method 1: Bypass FRP Redmi K40, K40 Ultra (MIUI 12.5)
1. Lets start method just by switch on device & Connect WiFi.
2. From same (Connect to Network) screen, tap to “Add Network”, after that type over there “www.youtube.com” in SSID field tab, double tap on your typed url, and tap on “Link icon” to access inside youtube website.
![]()
3. Go to > Profile icon > Settings.
![]()
4. Now tap on > About > Youtube terms of services.
Access Directly in Xiaomi Redmi K40 Settings:
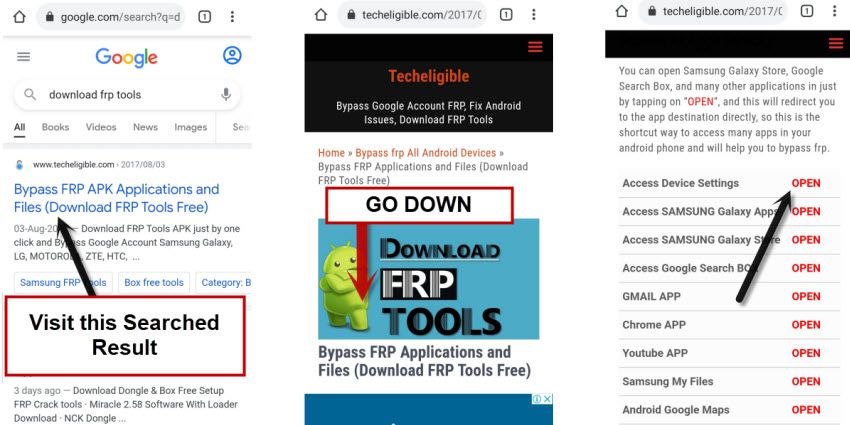
5. Search from top search bar “Download frp tools“, and visit our website searched result.
6. Go down, and tap to “Access device settings“.
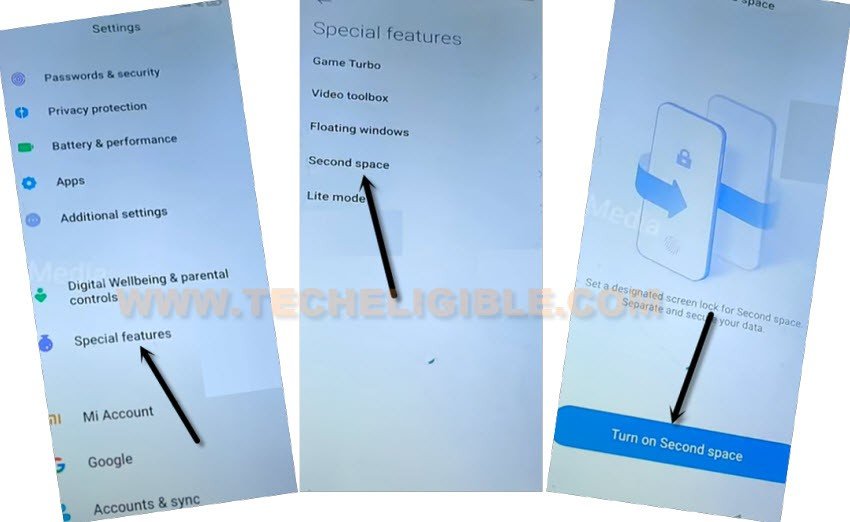
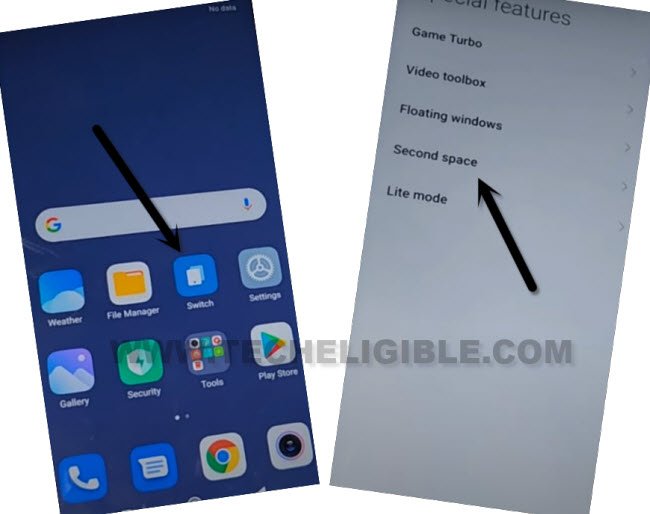
7. Scroll down from settings, and go to > Special Features > Second Space > Turn on second space > Continue.
8. Select “Using a shortcut” option, and hit on > Continue > Skip.
9. Congrats, you are inside your device MENU, but still there are some more steps to be done to completely bypass frp Redmi K40, K40 Ultra.
10. There must be a “Switch” icon on your screen menu, just tap on that (Switch) icon.
11. Go again to > Second Space > Turn on second space > Continue.
12. You will get back to (Home-screen) again.
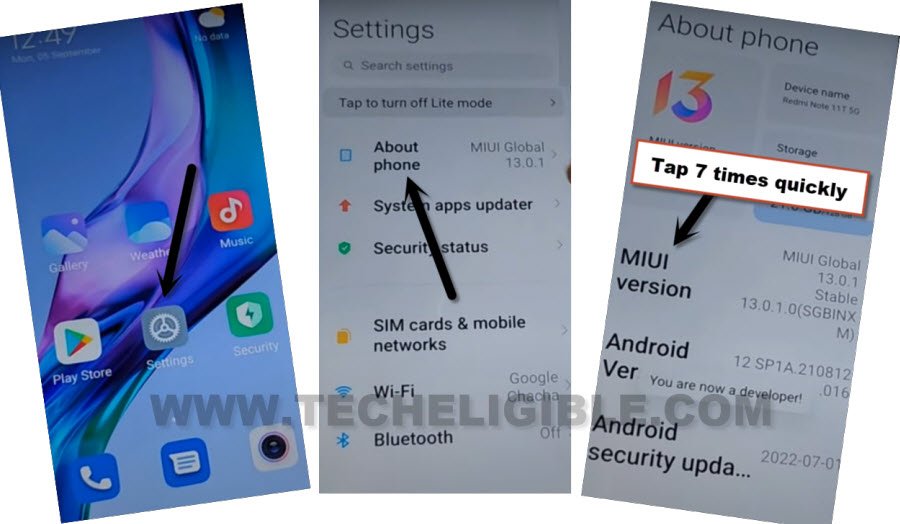
13. Lets try to turn on (Developer Option) from settings, so go to > Settings > About Phone.
14. Tap 7 times quickly on “MIUI Version”, you will see there some popup flashes will appear, and after that the final message will come of (You are now a developer), that means the developer option has been turned on successfully.
15. If you don’t see anything like that after hitting on “MIUI Version”, that means this option is not working, so go back to device “Home-Screen” again.
16. Tap again on > Switch > Front Camera Effects, now turn on “Lift to Open front camera”.
17. Tap once on “Back Arrow”, and then go to “Floating windows”.
18. Scroll down, and select “Minimize an app”.
19. An image will stick on your screen, just drag this image to down, and hit on “Nice” button.
20. Go back to “Settings” again by hitting on “Back Arrow” 2-3 times carefully.
21. Now go to “About Phone”, and tap 7 times quickly on “MIUI Version” to turn on developer option, and we hope, this time will work for you.
22. Go back to > Settings > Additional Settings > Developer option.
23. Turn on “OEM Unlocking” option.
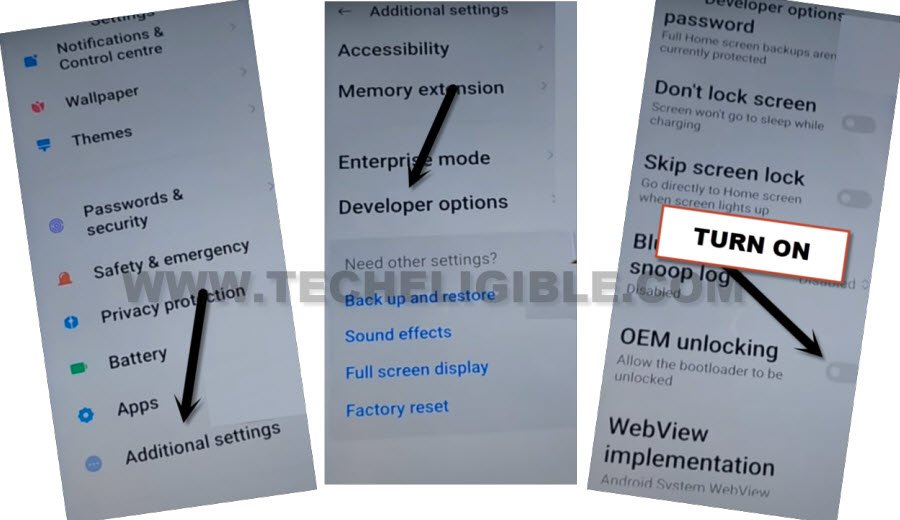
24. Go back once, and again get into “Developer Option”, and see is your OEM unlocking on or off, just make sure, it should be ON.
25. Tap to “Back Arrow” once to get back to (Additional Settings) page, and tap to > Factory reset > Erase all data > Factory Reset.
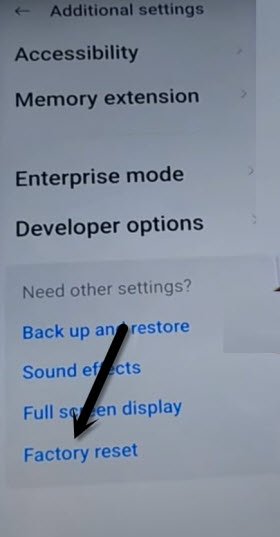
26. Wait over that, and tap to “Next”, wait again, and tap to “OK”.
This is how you can easily bypass google account, if you have latest android version and latest MIUI version device, so follow steps from below.
Method 2: Bypass FRP Redmi K40, K40 Ultra MIUI 13 (Android 11-12)
You can apply this method on a device (Redmi K40 & K40 Pro) MIUI 13, Android 12, and Android 11 version, this is almost same method as above, but starting steps is quite different, in this method, we will turn on talkback, and with this feature, we will reach to youtube and open chrome browser from there.
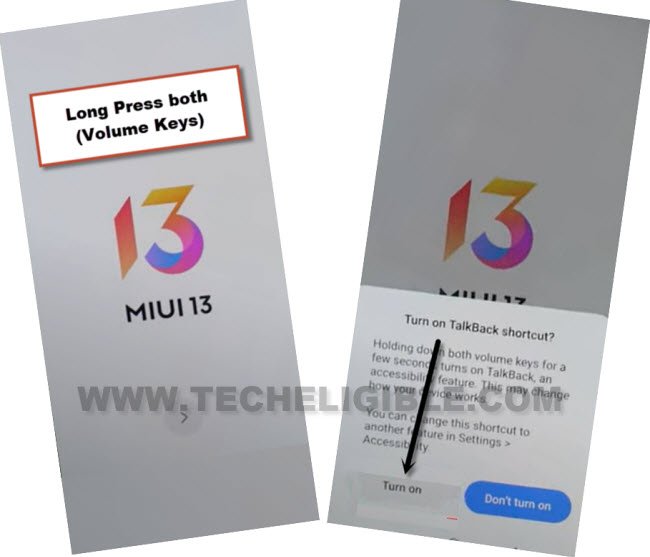
-Turn on phone & enable talkback by long press both keys (Volume UP + Down).
-From the popup, hit on “TURN ON” option to enable talkback.
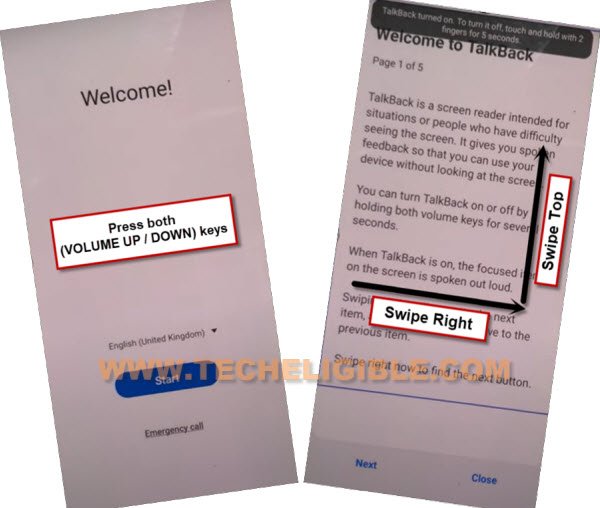
-Press again (Volume UP + Down) keys , and you will see there (talkback turned on).
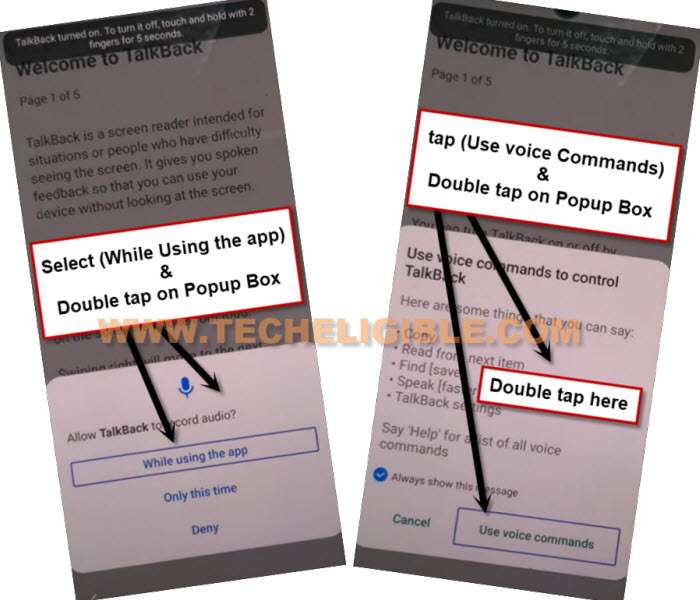
-Long hit again on both (Volume UP + Down) keys, and there you will get a talkback screen, just draw a reverse “L” letter by swiping on screen from right to left.
-Tap once on “while using the app”, now double tap on anywhere on screen.
-Tap once on “Use Command Voice” option, and double tap anywhere on screen.
–Say loudly (Google Assistant) to get (Try Saying) popup window.
-Lets just turn off talkback by long press both (Volume UP + Down).
-Go to “Keyboard” icon and search and access to device “Settings”.
![]()
-From device settings, just tap to > Special Features > Second Space > Turn on Second Space.
-Wait till creating second space is done.
-Tap to “Continue”, and then select “Using a Shortcut”, and tap on > Continue > Skip.
-Tap again on > Switch > Second Space > Go to Second Space.
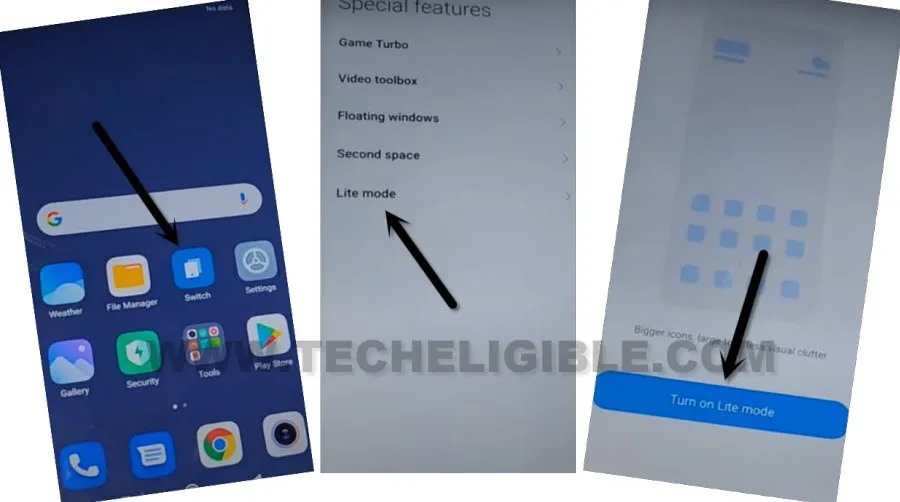
-Now you will get back to homescreen again, tap again on “Switch”, and this time, select last option > Lite Mode > Turn on Lite Mode.
-You are almost done, only we have to turn on (Developer Option), which can only be enabled from settings, and also we need to soft reset our device to permanently delete old synced google account, but these all are same as already described in (Method 1), so click here to follow further steps from Method 2.
Read More: