Remove FRP itel Vision 3 Without App Opening Solution
This is the most updated method to Remove FRP itel Vision 3 without using computer and paid service. In some old process, the (App is not opening), so in old method, you just stuck in mid of the FRP removal method. We’ll use here another android device to share some FRP removal applications from other device to our Itel Vision 3 device, through this way, you can easily setup new google account and finish setup wizard. Follow all steps from below.
Warning: This Article is only for educational purpose, try this frp method only to bypass frp your Own Phone.
Let’s Start to Remove FRP Itel Vision 3:
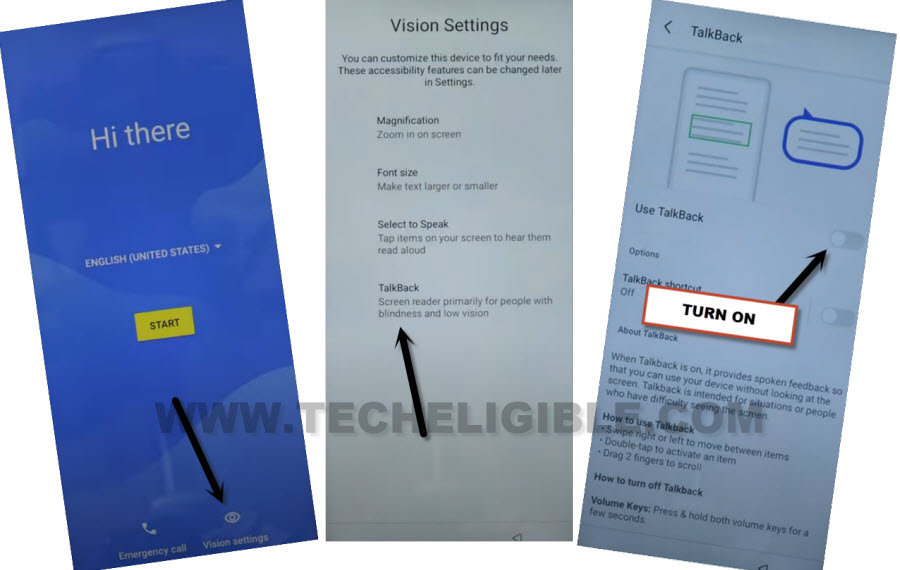
-Connect WiFi & Go back on (Hi there) home-screen.
-Go to > Vision Settings > Talkback > Turn on (Use Talkback) option to enable talkback successfully.
–Lets make a reverse “L” letter on screen by swipe right and then Swipe up.
–Double tap > While using the app > Use Voice Command.
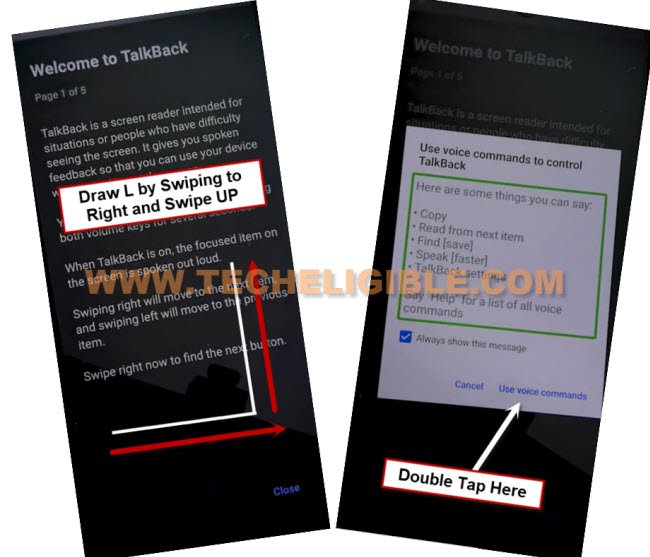
–You must see a green boarder around the screen corner, once you see this, speak loudly “Open Google Assistant”, this will show you new (Try Saying) popup window.
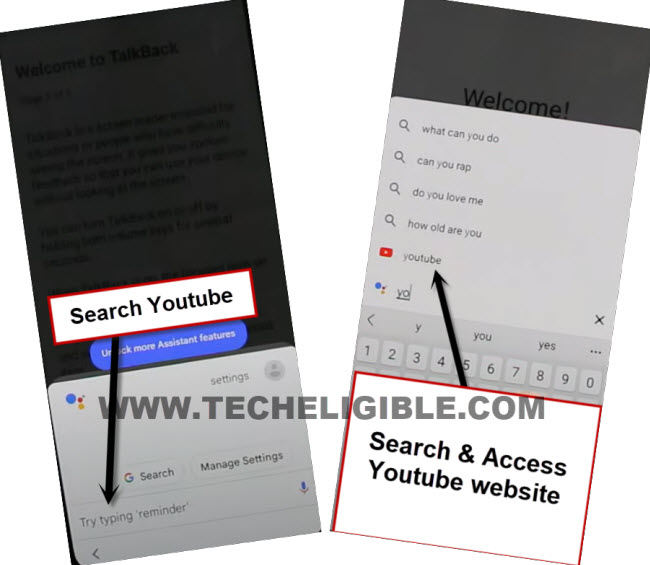
-From popup box, double tap on “Keyboard” icon.
![]()
–Search there “Open Youtube”, and tap to “Youtube” icon from searched result to be redirected inside youtube app directly.
-Double tap on “Profile” icon and go to “Settings” option.
![]()
–Go to > About > Youtube terms of service > Accept & Continue > Next > No Thanks.
Turn off Talback Feature Now:
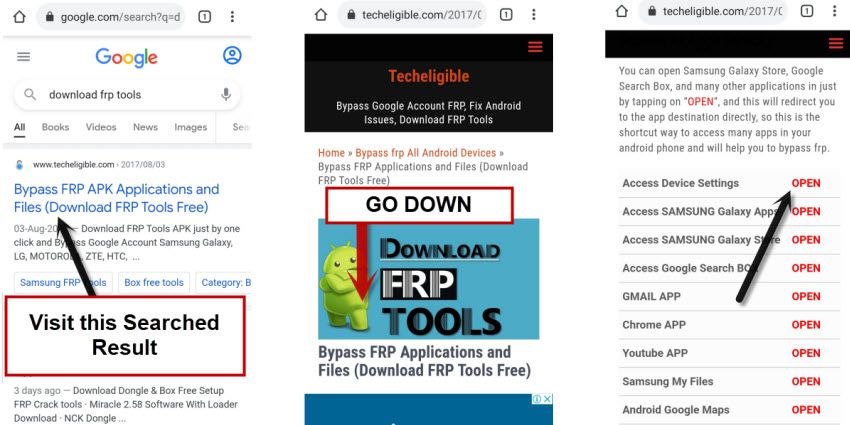
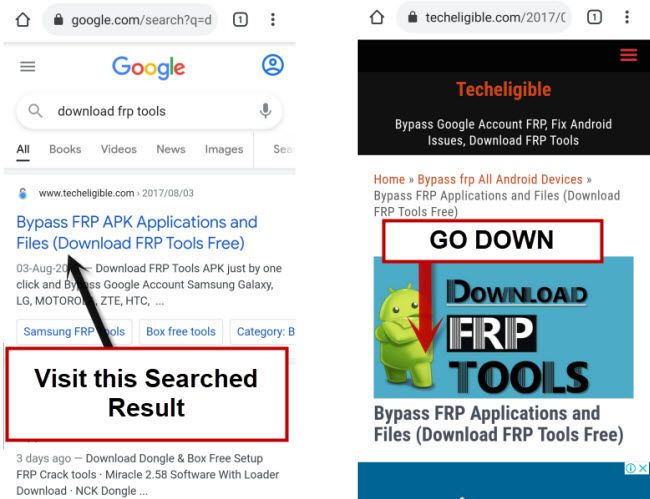
-From chrome browser, search and go to our frp tools page, search in browser with “Download FRP Tools“.
-Access to our website frp tools page by following below image.
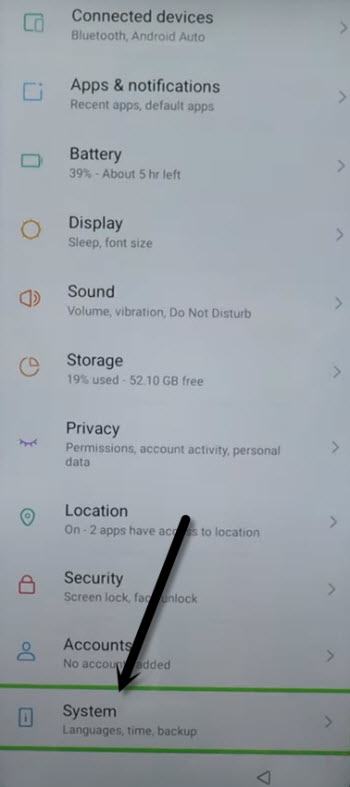
-Scroll down from settings, and tap over “System”.
-Tap over > Accessibility > Talkback, Now turn off “Use Talkback” feature.

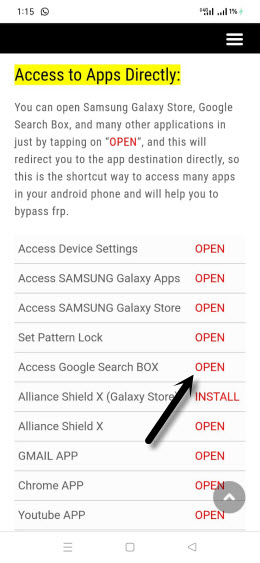
-Go back to our FRP tools page, from there, tap to “Access Google Search Box“, this will launch google app directly.
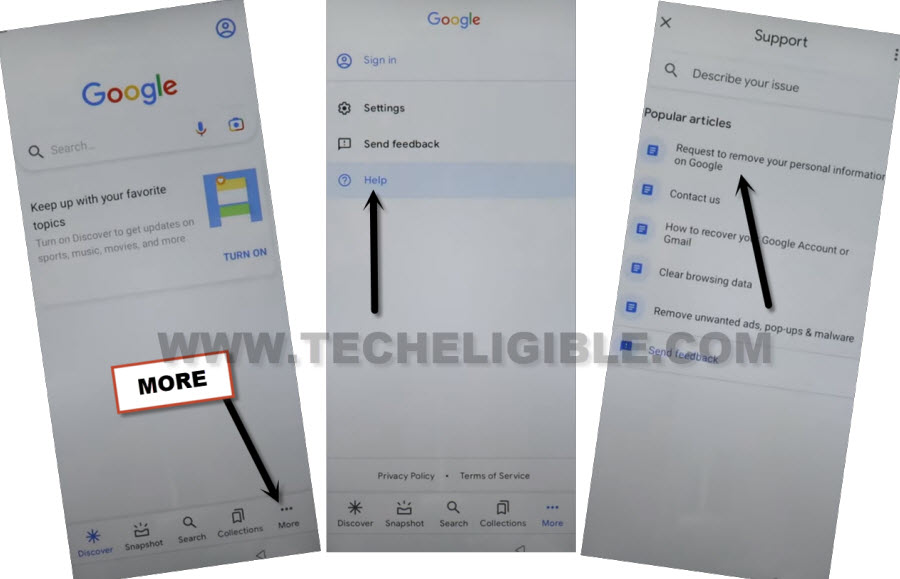
-Tap to > More > Help.
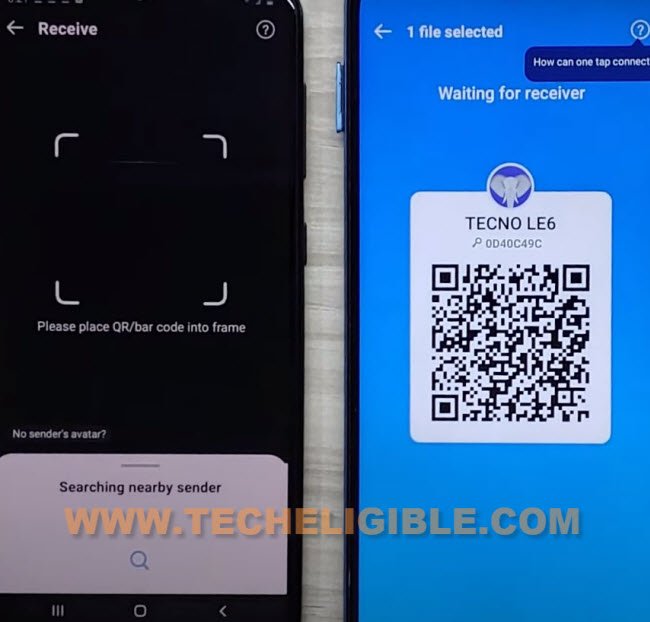
-After that, tap on “Request to remove personal information on google”, now hit on “Share” icon from top right corner, and tap to “Xshare Mini” app.
-You will be displayed a popup of (Allow), just tap on “Allow > While using the app”, and then tap on “Allow” .
-Wait on (Waiting for receiver) screen, you will be displayed a (QR Code) there.
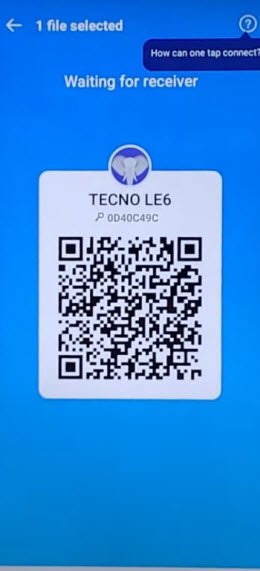
-We’ve to download 3 main apk files in other android device, after that, we will transfer all those 3 downloaded apps to our Itel Vision 3S FRP protected device to Remove FRP itel Vision 3.
Let’s Download 3 Apk Apps in Other Android Device:
-Open chrome or internet browser, and search there “Download FRP Tools” page, and go to our website searched result.
-Afterwards, download from there below 3 applications in your device.
1st: Account Login.
2nd: Activity Launcher.
3rd: Google Account Manager 6.
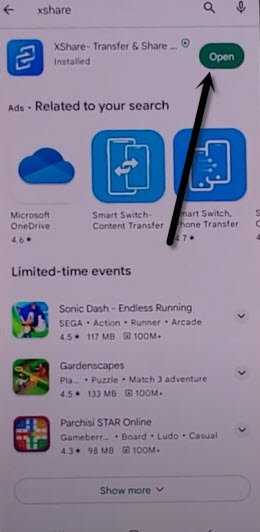
-Now, we have to install & Open “Xshare” application from google play store.
-Tap to > Agree > While using the app.
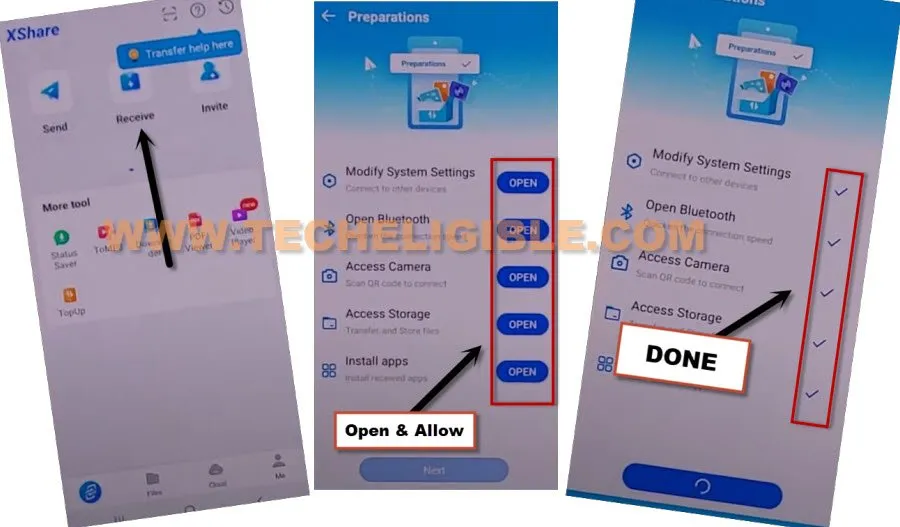
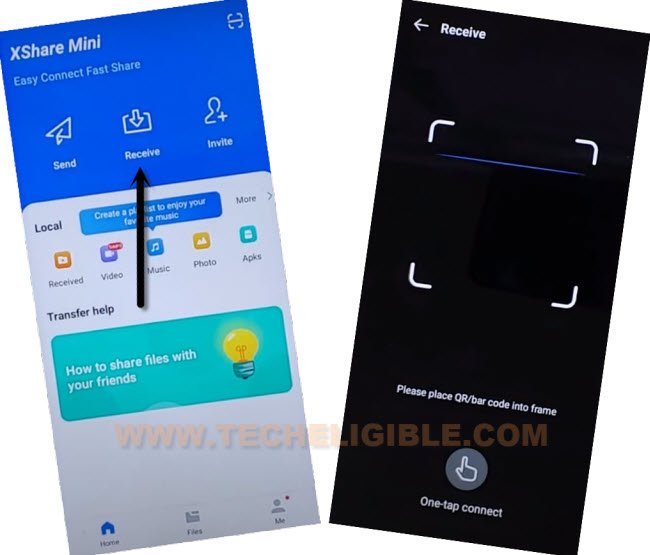
-From xshare screen, tap on “Receive”, you will have there a (Preparation) screen, you have to tap on “Open” button from each option, and then turn on (Allow from this source) option. (See below image).
-You will be shown here a scanning QR code screen, lets scan code from I
tel Vision 3s using this other android device to connect both devices each other.
-After that, the Contact name will be shared to your other android device.
-From Itel device, tap to > Disconnect > Exit > Exit > View.
-Now hit on > Receive > Allow > While using the app.
-Now, the QR Reading screen will come up.
-Keep (Xshare Mini) on a first screen that shows (Send / Receive) option from other android device.

-Let’s transfer all 3 apk apps from other device to our Itel Vision 3s device.
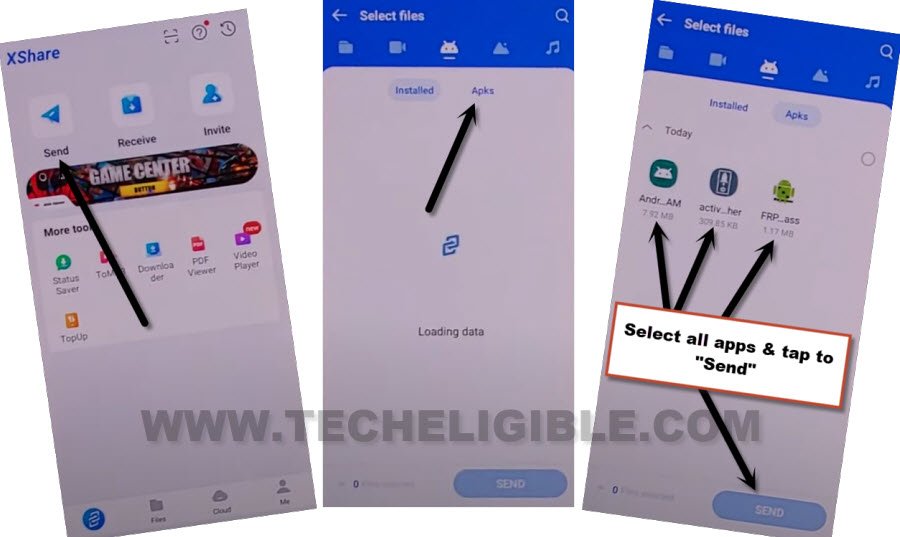
-From other android device, tap on “Send”, and then tap on “Apks”, there you will be displayed 3 downloaded apk files, lets select all 3 apps, and hit on “Send” button.
-Scan QR code from your FRP protected device to transfer these 3 files into Itel Vision 3S device.
-Once all apps transferred successfully, just tap on > Disconnect > Exit > Exit.
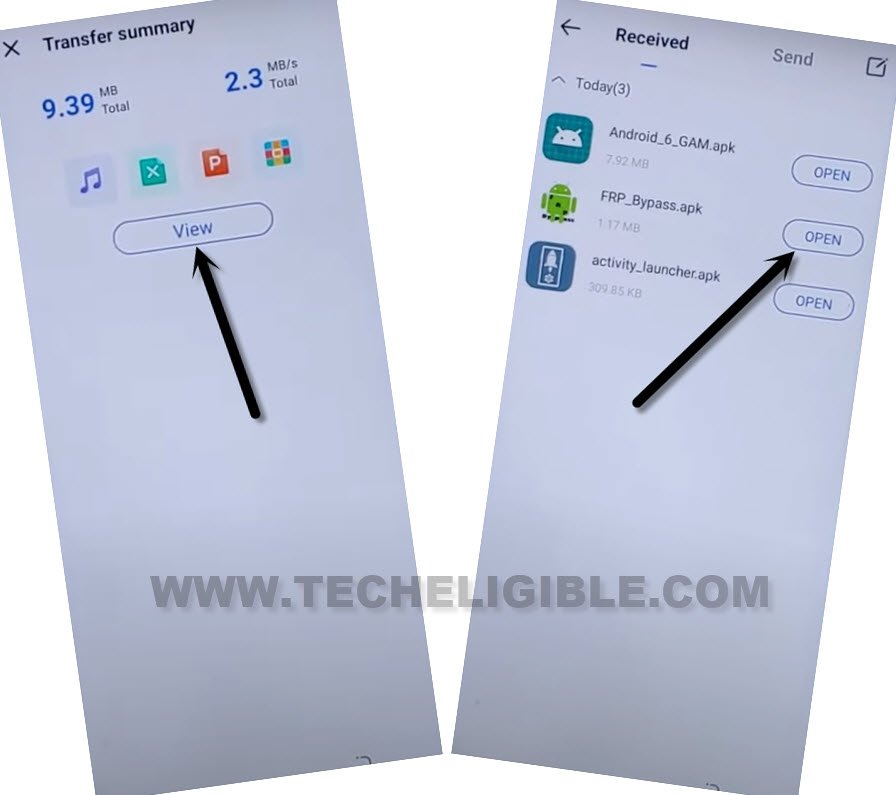
-Afterwards, hit on “View”, do make sure, your WiFi is connected properly, so that, we could easily Remove FRP itel Vision 3.
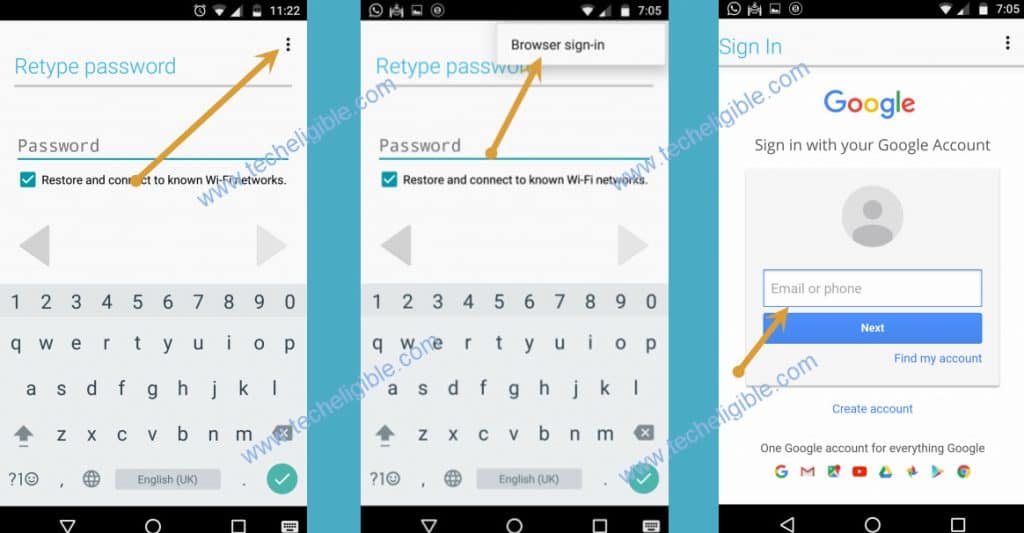
-You will be displayed there all 3 apk apps, we have to open “Account Login” app from there.
-Go to > 3 dots > Browser Sign in.
-Afterwards, Sign with any working Gmail account.
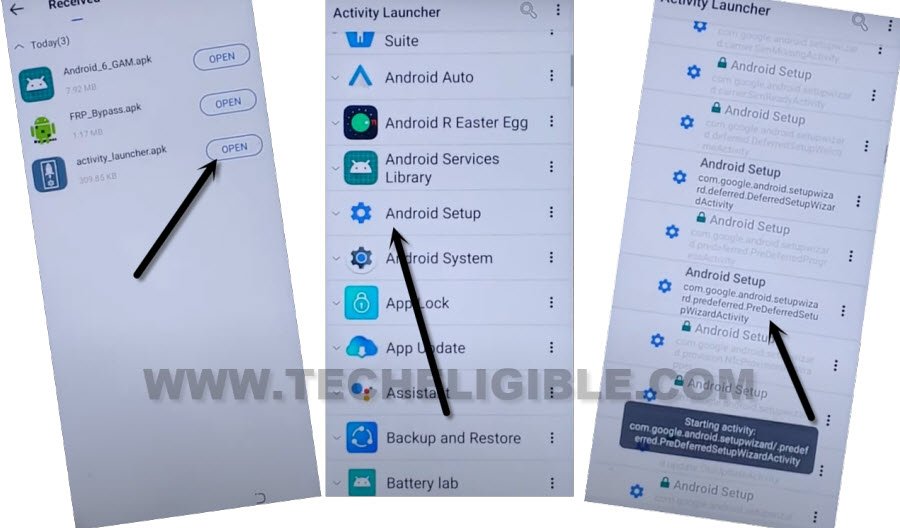
-After signing in, you will get back to (Received) screen in xshare app, now open “Activity Launcher”.
-Let’s open “Android Setup”, and this option will further collapse down and there you will have a list of (Android Setup).
-From that list, find and tap on (com.google.android.seutpwizard.predefferedSetupWizardActivity).
-The (Preparing for Setup…) will come up, after that, you will be redirected inside your device homescreen.
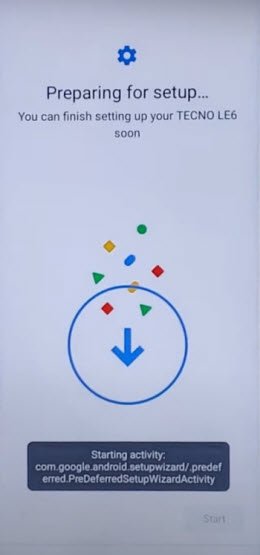
-Now you can easily setup your new google account, and also can setup new pattern or PIN lock, thanks for visiting us.