Remove Google FRP Lenovo P2 By Talkback Feature (NO PC)
Are you stuck on google verification screen. Follow our this free tutorial to get access to your device and completely Remove Google FRP Lenovo P2. We will disable few apps, and install new (Google Play Services) app to sign in with latest google account. After that, you can use back your device with latest FRP Protection.
Warning: Do not try this frp method on a stolen phone, this is a serious crime, if you are trying to bypass frp on a stolen phone, you may also be jailed, this process is for device owner and for educational purpose only.
Let’s Start to Remove Google FRP Lenovo P2:
-Turn on device & Connect WiFi first.
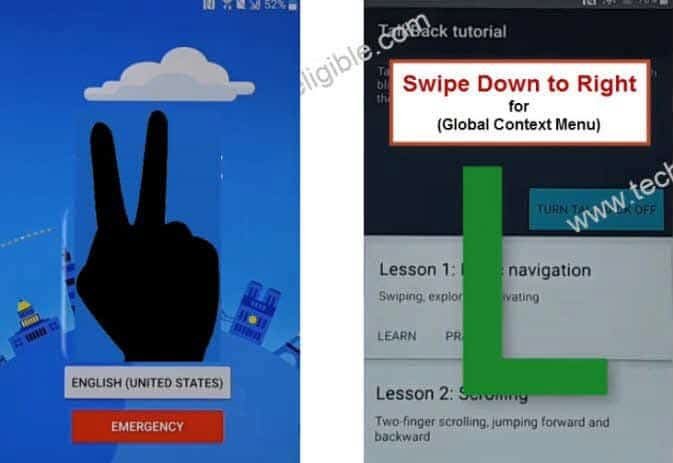
-After that, go back on first (Welcome) page. Long tap for about 1-2 minutes on your screen with 2 fingers until you have a (Talkback) page.
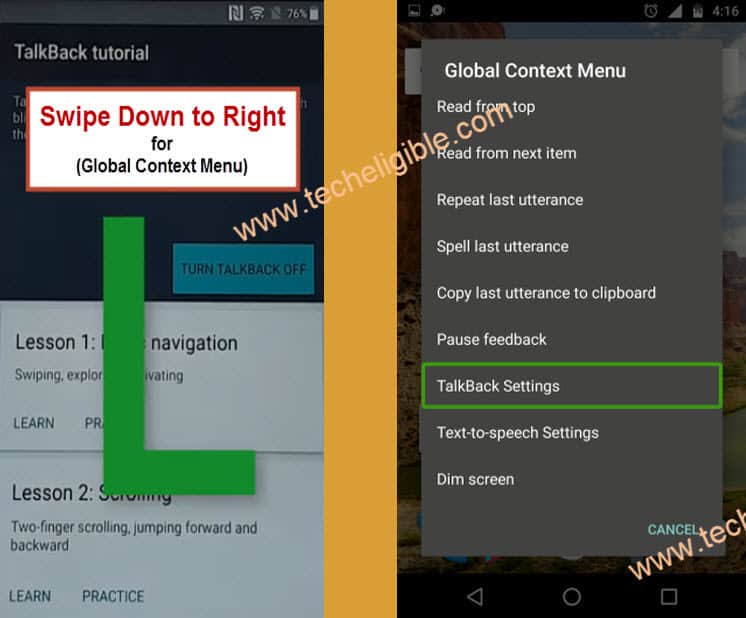
-Swipe “L” shape on (Talkback Tutorial) screen by swipe down and then, swipe right.
-You will be displayed (Global Context Menu) page, just double tap over “Talkback Settings” option from there.
-Let’s disable talkback now by long press both buttons (Volume UP + Volume Down).
-Double hit on “Ok” from suspend talkback popup screen.
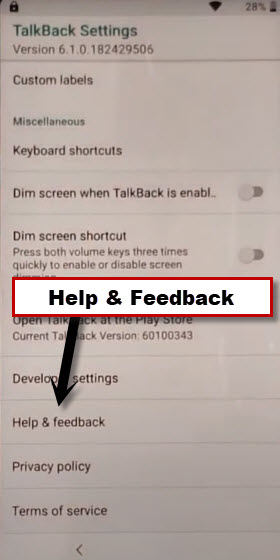
-Go down, and go to “Help & Feedback” option.
-We have to access google chrome browser. So, tap over “Get Started with voice access”.
-Hit on “Play icon” from youtube video, after that, tap to “Video Title” to open google chrome browser.
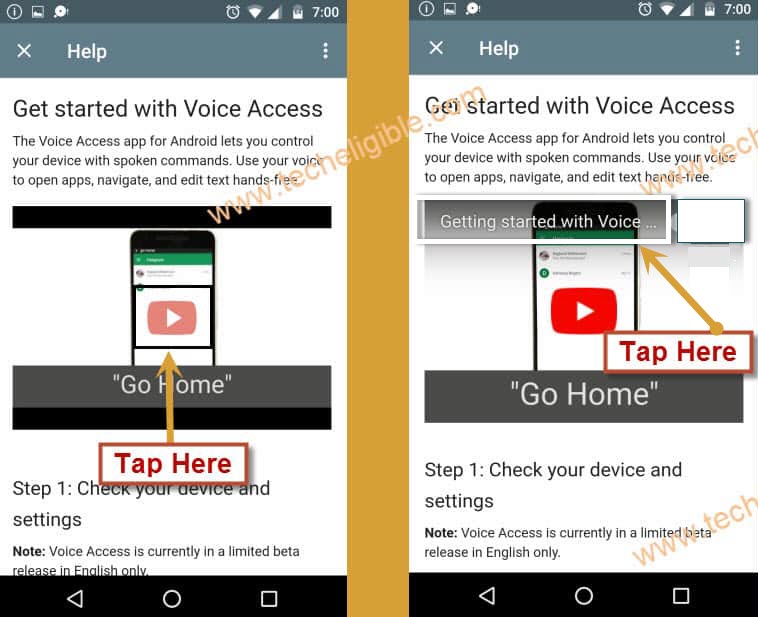
-You will be shown a popup window, just open with “Google Chrome browser”.
-Go to > Accept & Continue > No Thanks. We are now inside google chrome app.
Download FRP Apps for Lenovo P2:
-Search in browser “Download FRP Tools“. Visit our website 1st searched result from there.
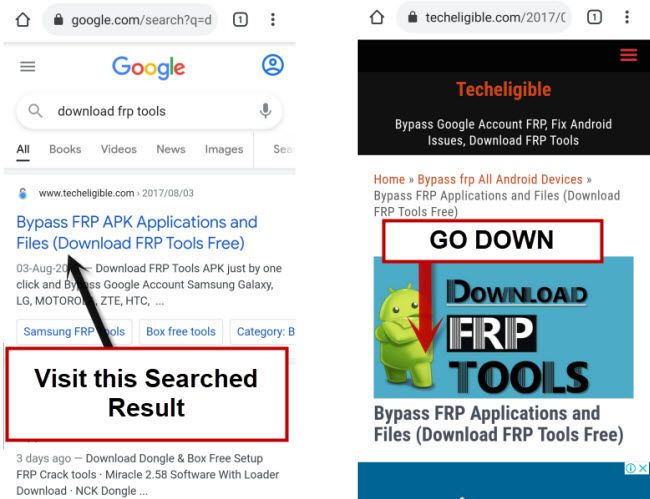
-Download from our frp tools page “Google Play Services”.
-Wait till downloading process is done.
-After that, download 2nd app “Apex Launcher“. Once the downloading is done, you will get “Open” link at the bottom of your browser screen.
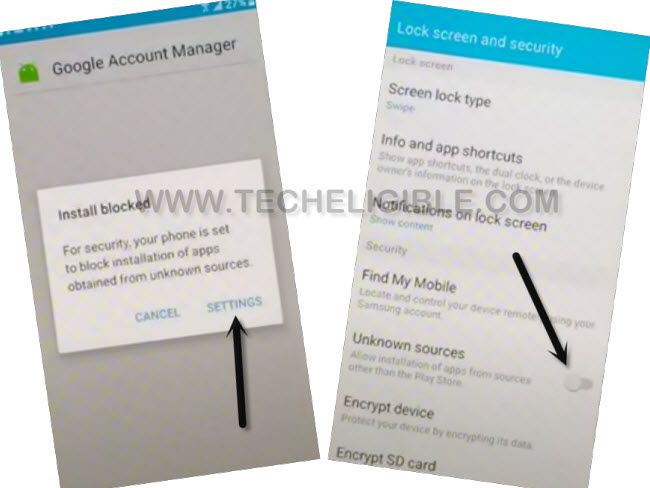
-Tap to “Open”. From popup window, go to “Settings” and turn on “Unknown Sources” option.
-Go back to our frp tools page again. Download again “Apex Launcher“. Once the downloading is done, you will get “Open” link at the bottom of your browser screen. Tap on “Open” link.
-Let’s install this app by tapping over > Install > Next > Open to Remove Google FRP Lenovo P2.
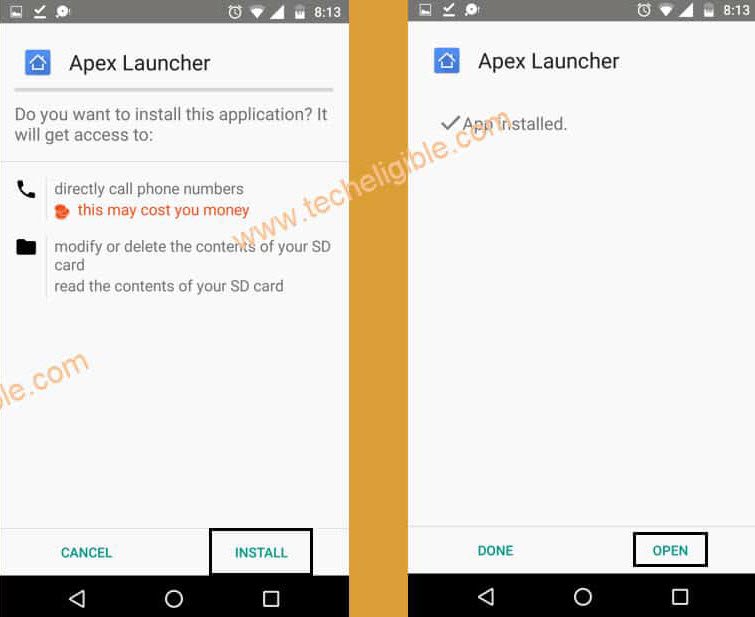
-After launching apex app, you will be taken to your device main home-screen.
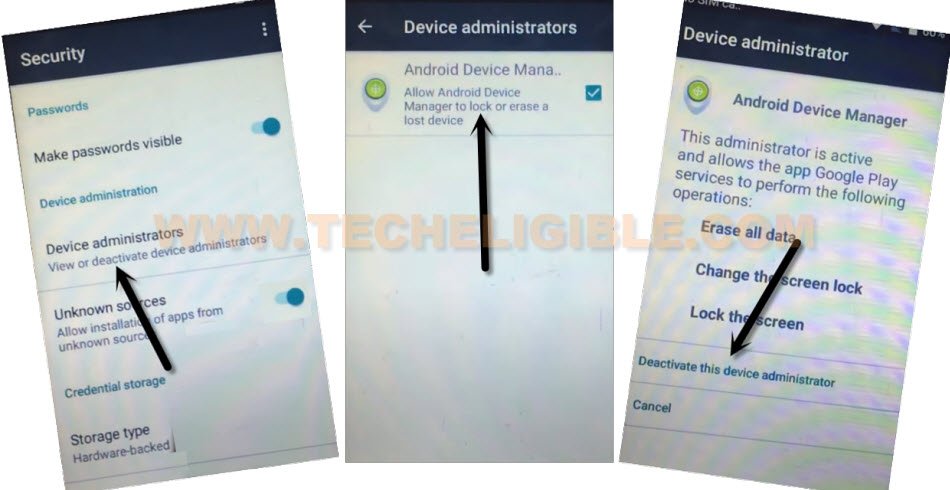
-Go to > Settings > Security > Device Administrator > Android Device Manager > Deactivate this device administrator.
-Go back on your device settings.
-From there, tap to “Apps”.
-Tap on > 3 dots > Show system app.
![]()
-We have to disable (Google Account Manager & Google Play Services) from app list.
-Find and tap to > Google Account Manager > Disable > Disable App.
-Find and tap to > Google Play Services > Storage > Manage Space > Clear all data > Ok.
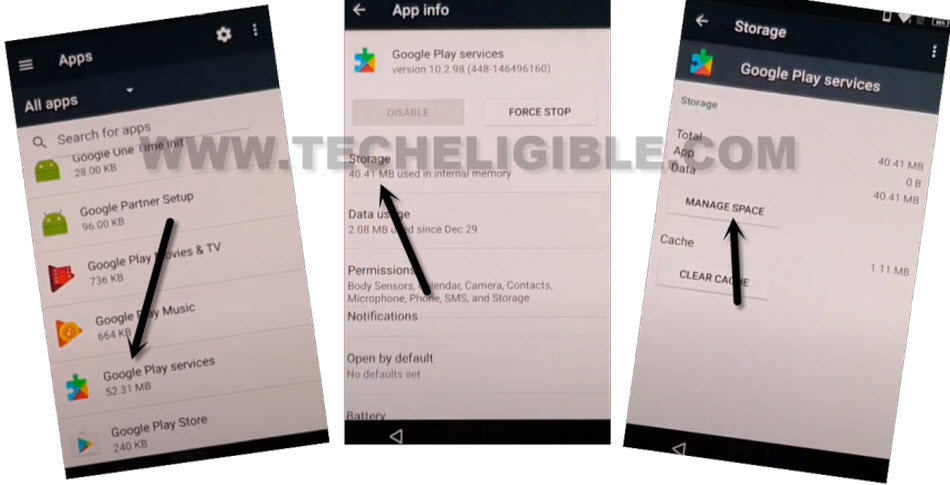
-Go back to “App” list page again. Tap again on > Google Play Services > Clear Cache > Ok.

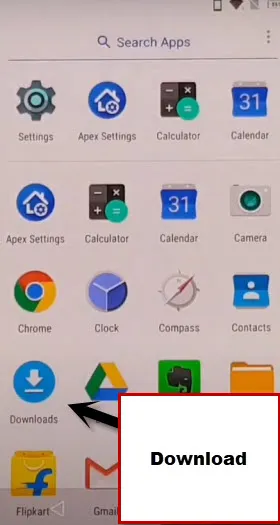
-Now, go back on your device main “MENU” page. From there, tap to “Downloads” to access download folder.
-You will see there already downloaded “Google Play Services” application. Let’s install this app by tapping over > Google Play Services > Next> Install > Done.
-Go back to settings.
Setup New Account:
-We can easily sign in with new account to completely Remove Google FRP Lenovo P2.
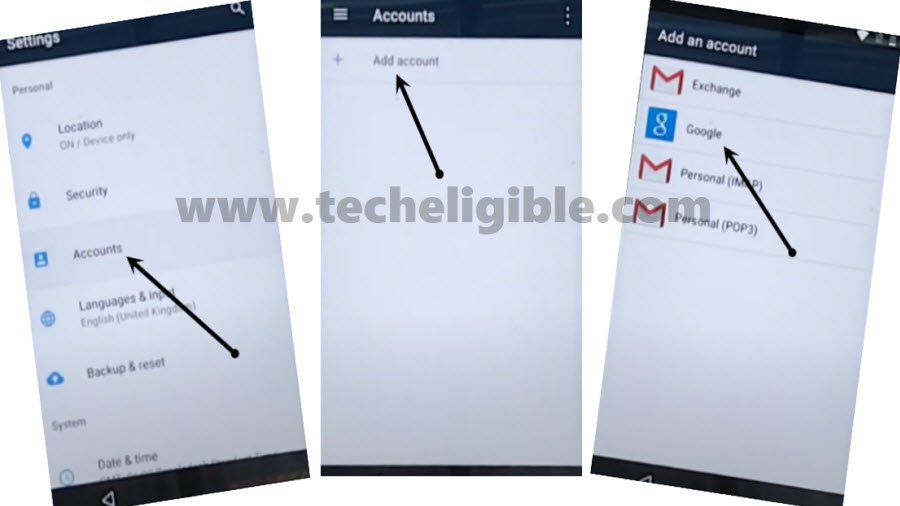
-Go to > Accounts > Add account > Google.
-Sing in with your any valid google account on that screen.
-After that, go back to your device (Settings) page again.
-Enable google android device manager by tapping over > Security > Device Administrator > Android Device Manager > Activate this device administrator.
-After that, go back on “Settings” page. From there, tap over “Apps”.
-Enable back disabled app by finding and tapping on > Google Account Manager > Enable.
-Restart your device & complete initial setup wizard. Thanks for visiting us.