Bypass Google FRP Lock HTC 10 Pro, 10 Evo, 10 , U Play, U11, U Ultra
Bypass Google FRP Lock HTC android nougat 7.0 is very easy, you can remove factory reset protection from your all HTC 10 Pro, 10 Evo, 10 , U Play, U11, U Ultra devices, no need to download any application, no need computer, or otg, its simple an easy method.
You can easily bypass google verification from your device just by disabling “Google Play Services”.
Note: This method would work on HTC Android Nougat 7.0.
• HTC 10
• HTC 10 EVO
• HTC 10 PRO
• HTC U Ultra
• HTC U PLAY
• HTC U 11
Let’s Start to Bypass Google FRP Lock HTC Android 7.0:
STEP-1:
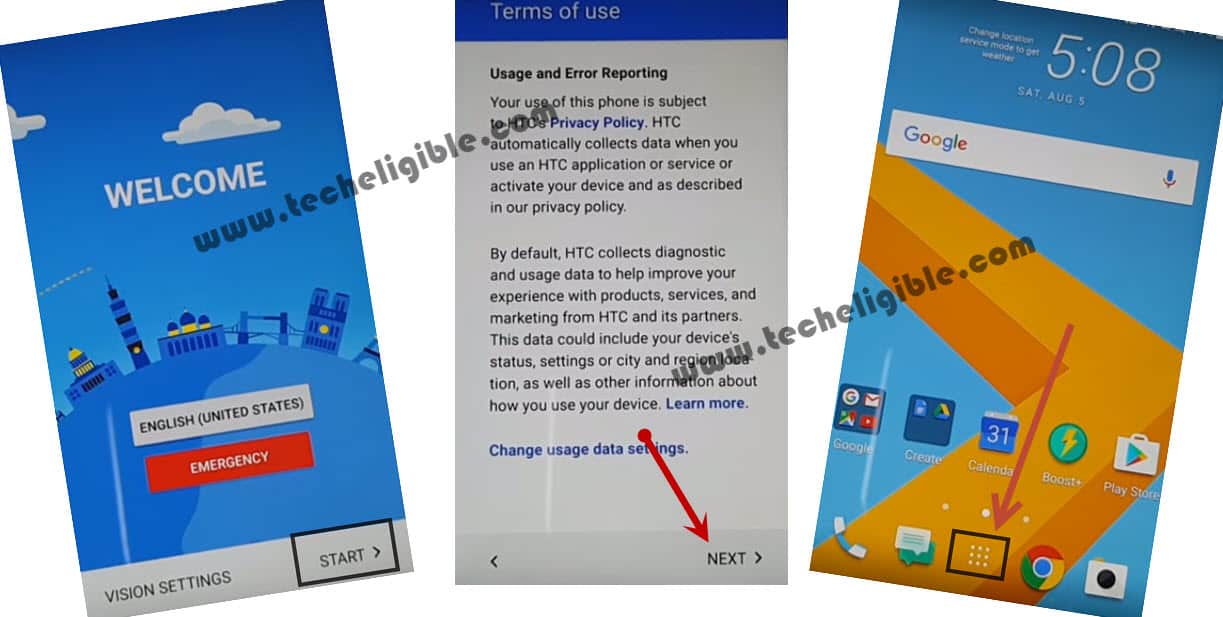
⇒ From very first “Welcome” screen, tap on “START” and then connect “Wi-Fi” in your Htc device.
⇒ After successfully “Wi-Fi” connected, tap on “Next”, and then you will be redirected to the “Verify Your Account”, screen.
⇒ Go back to “Welcome” screen, and “Long Tap” with “Two Fingers” for a minute until you see “TALKBACK” screen.
⇒ Now “Double Tap” on “Use Talkback”.
⇒ After that “Swipe Down to Right” and then double tap on “Talkback Settings”.
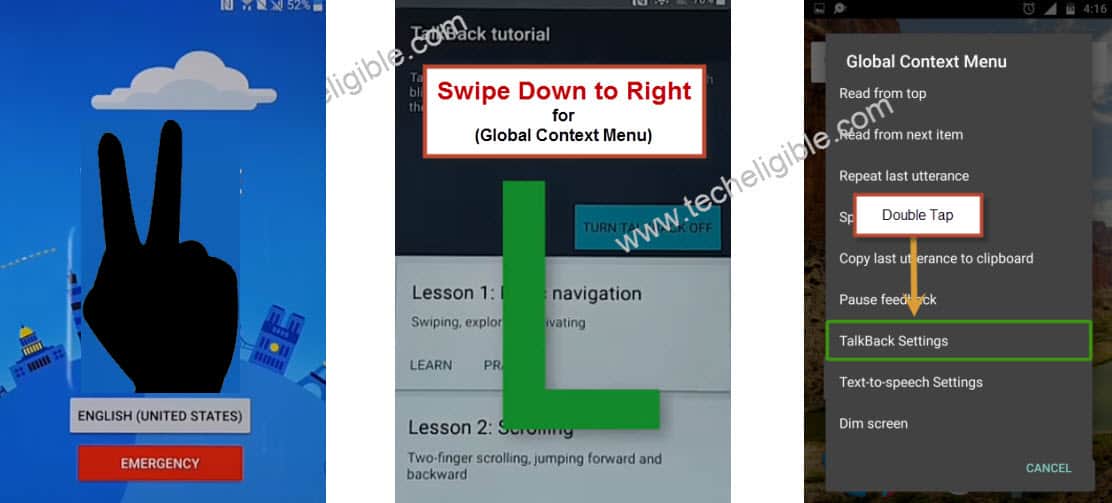
Suspend Talkback Options:
⇒ Press & Hold “Volume UP + Volume DOWN + Power Key” together until you see “Suspend Talkback?” popup.
⇒ After that double tap on “OK”.

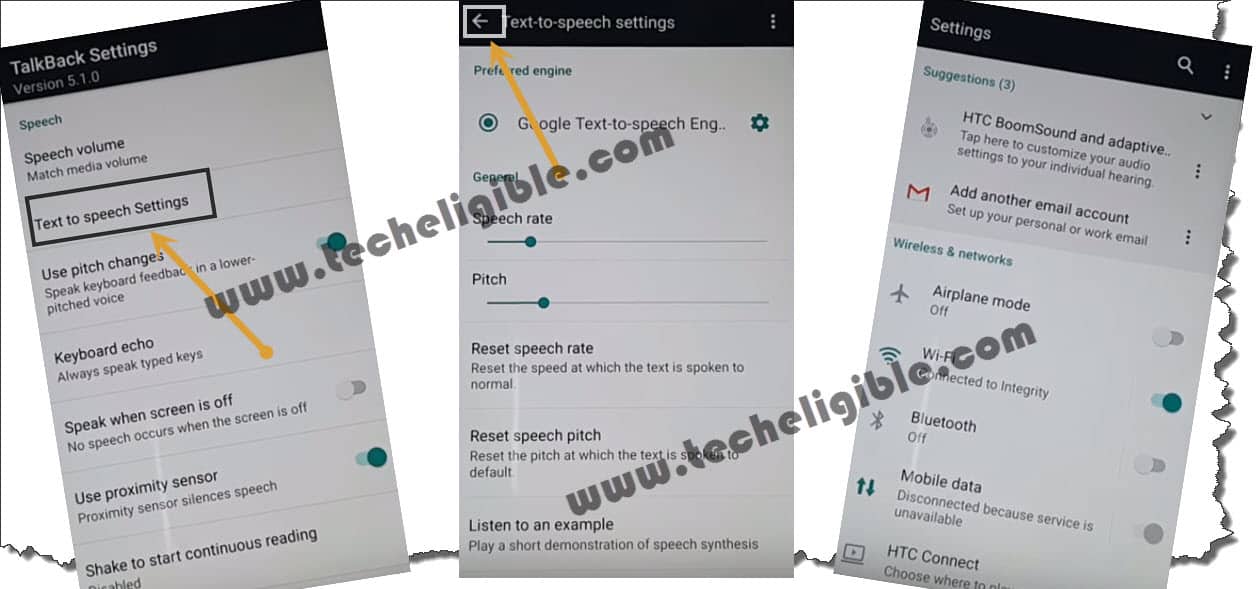
⇒ Tap on “Text-to-speech Settings” to Bypass Google FRP Lock HTC.
⇒ Now tap on “Back Arrow” from top left corner. (You will be taken to “Settings”)
STEP-2:
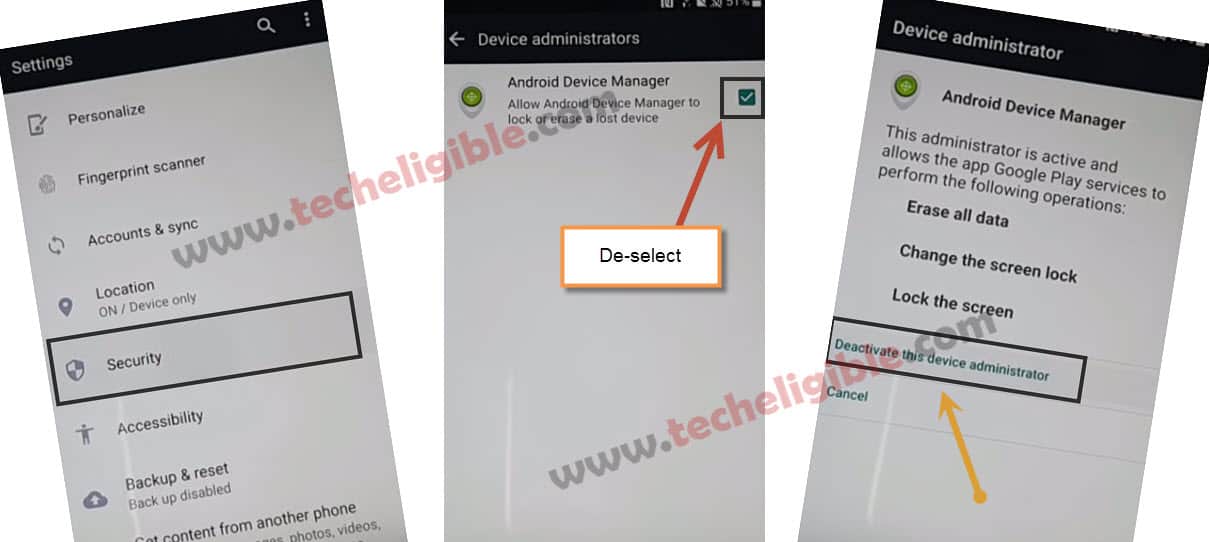
⇒ Tap on “Security”, and then tap on “Device Administrator”.
⇒ Deselect “Android Device Manager” from there.
⇒ Now tap on “Deactivate this device administrator”.
⇒ Go back to “Settings” by tapping 2 times on back key.
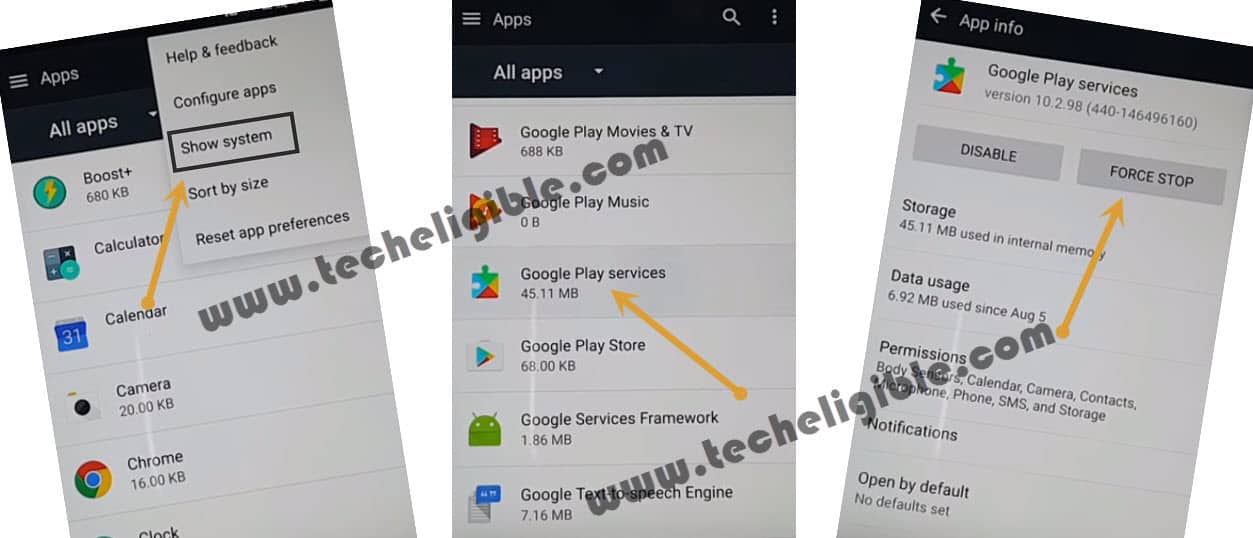
⇒ Tap on “Apps”, then tap on top right corner “3 Dots”, and then select “Show System”.
Disable Google Play Services to Bypass Google FRP Lock HTC:
STEP-3:
⇒ Tap on “Google Play Services”, after that tap on “FORCE STOP” and then “OK”.
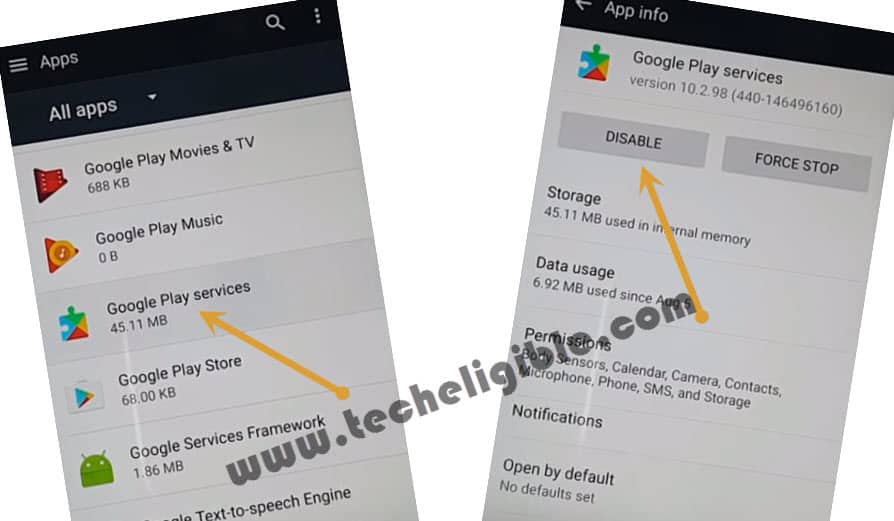
⇒ Again Tap on “Google Play Services”, after that tap on “DISABLE” and then “OK”.
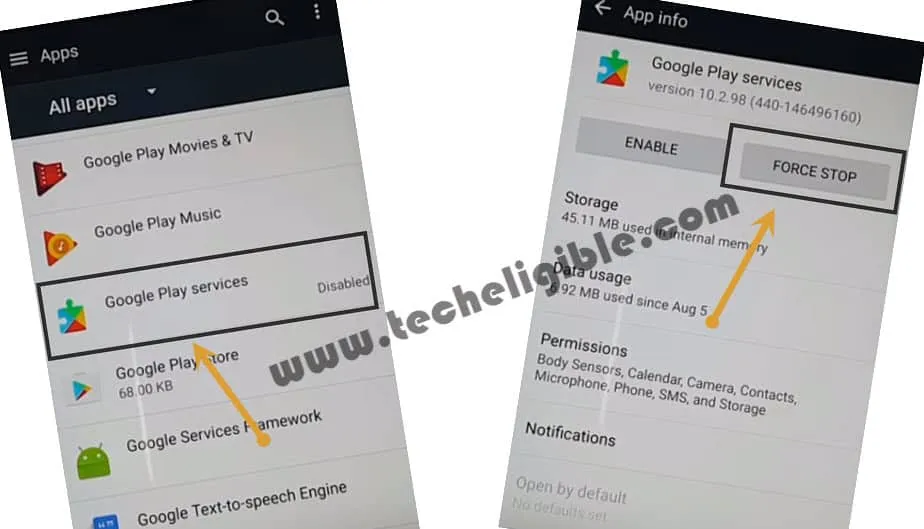
⇒ Now one more time, Tap on “Google Play Services”, after that tap on “FORCE STOP” and then “OK”.
Clear Cache from Google Play Services:
⇒ We have to clear cache from storage, for that tap on “Google Play Services” again.
⇒ And then tap on “STORAGE”, after that tap on “CLEAR CACHE”, then “OK”.
⇒ Now tap on “Manager SPACE” and then “OK”.
⇒ Go back to “APPS” by tapping 2 times on “Back KEY” from HTC Device.
STEP-4:
⇒ Now swipe up from there, and tap on “SETUP” > “FORCE STOP” > “OK”.
⇒ Tap on “STORAGE”, and then tap on “CLEAR CACHE”.

Go Back to Welcome Screen and Complete Initial Setup:
STEP-5:
⇒ By tapping on back key, go back to “Welcome Screen”.
⇒ From there tap on > Start > Next > Next > OK > NEXT > SKIP FOR NOW > ∨ > ∨ > Finish.
⇒ You will get a “Not Sign in” Popup, just tap on “SETUP PHONE” to Bypass Google FRP Lock HTC.
Reboot HTC Device By Pressing Power Key:
⇒ After reboot, you will get a popup of “SUSPEND TALKBACK”, just double tap on “EXIT”.
⇒ Press & Hold “Volume UP + Volume DOWN + Power Key” together until you see “Suspend Talkback?” popup.
⇒ After that double tap on “OK”.
⇒ Now from welcome screen, tap on “START”, and then tap on “NEXT”, after that go to “MENU”.
Data Factory Reset to Successfully Remove FRP:
STEP-6:
⇒ Go to > Settings > Backup & Reset > Factory Data Reset > Reset Phone > OK.
Warning!: Do not “Connect Wi-Fi” while completing initial setup.
⇒ Once you successfully accessed HTC device, go to “Settings”, and add your gmail account there.
Congrats, you have successfully accomplished method to Bypass Google FRP Lock HTC.
HTC Desire M9, M8, 530, 630, 825, A9, HTC 10, Nexus 9
Bypass FRP HTC Desire Series Click Here
Bypass FRP HTC 10 Life Style Click Here