
2 Methods to Remove Google FRP Galaxy Z Fold2 Android 11, 10
Hey, are you still in searching for a working and easy method to Remove Google FRP Galaxy Z Fold2, Z Fold2 (5G) Android 11, Android 10, so follow 2 best methods from here and reach inside your device menu without signing in with forgotten Gmail account, we also have updated method 1 here in this post, and this is the easiest way with one click frp remove from your device.
Warning: This method is only for device owner and for educational purpose only.
| Method 1: Bypass FRP Galaxy Z Fold2 (By One Click) Updated |
| Method 2: Bypass FRP Galaxy Z Fold2 (Android 11) |
Method 1: Remove Google FRP Galaxy Z Fold2 [One Click]
-This is another one of the best way to remove frp with a free PC software (SamFirm), just download from below and start process.
⇒ Samfim A.I.O V3.1 Tool [DOWNLOAD]
Password: 12345678
-Extract the tool from winrar and use above given password for extracting the tool.
-Go to folder and double click on “SamFirm.exe” file to run, now wait for a minute, this will take time in starting up.
-From the popup window of (Could not find path…), just hit on “OK”.
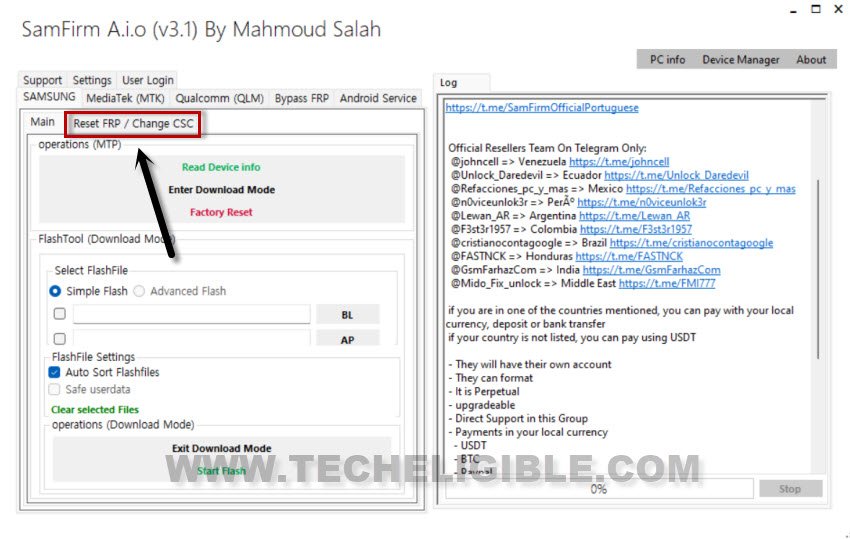
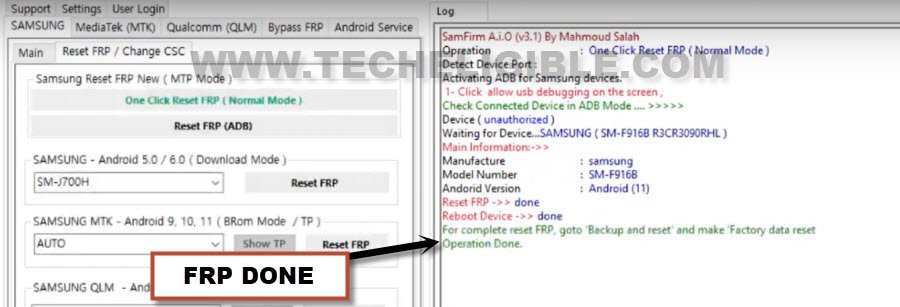
-Now go to the tab > Samsung > Reset FRP / Change CSC.
| Note: If you did not install Samsung USB drivers in your PC yet, then do install driver first, so that you may not face device connecting, if your PC has proper driver installed, your Samsung device will easily be detected by PC, you can download & install drivers from below. ⇒ All in One USB Driver Installer [DOWNLOAD] Pass: techeligible.com |
-Get back to your Galaxy Z Fold2 device, and connect WiFi.
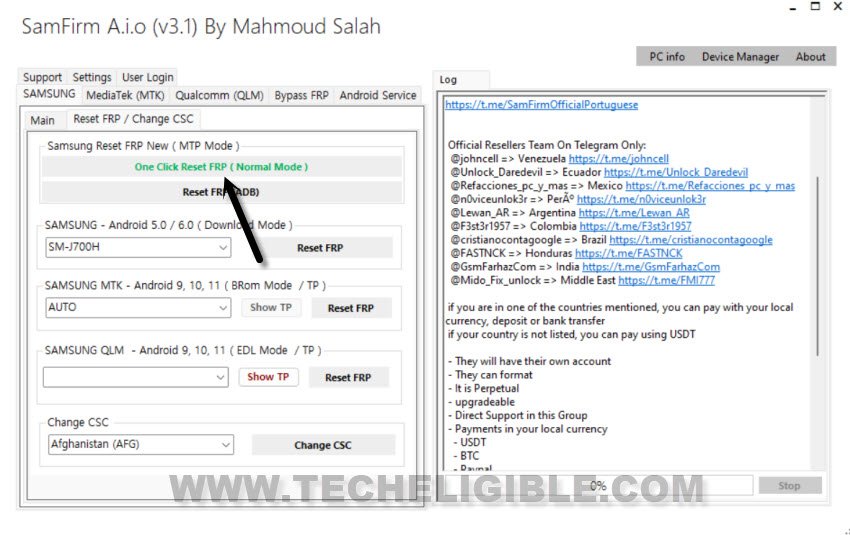
-Connect device with PC using proper USB cable, and click on a button “Once Click Reset FRP (Normal Mode)”.
-You will have a popup message of dialing a code.
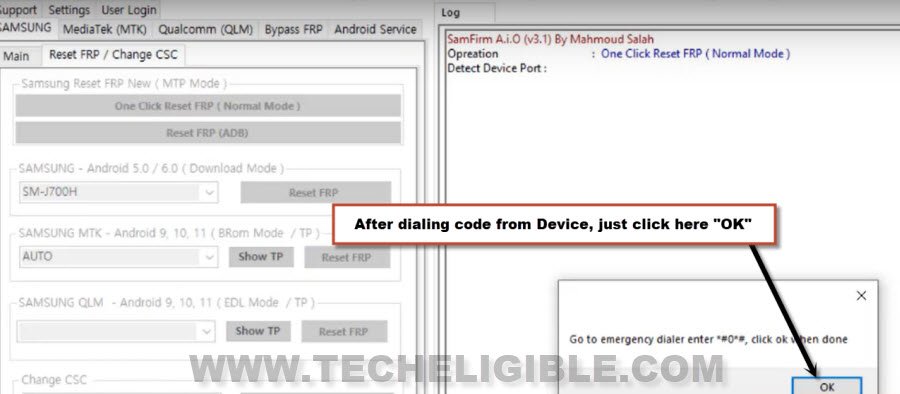
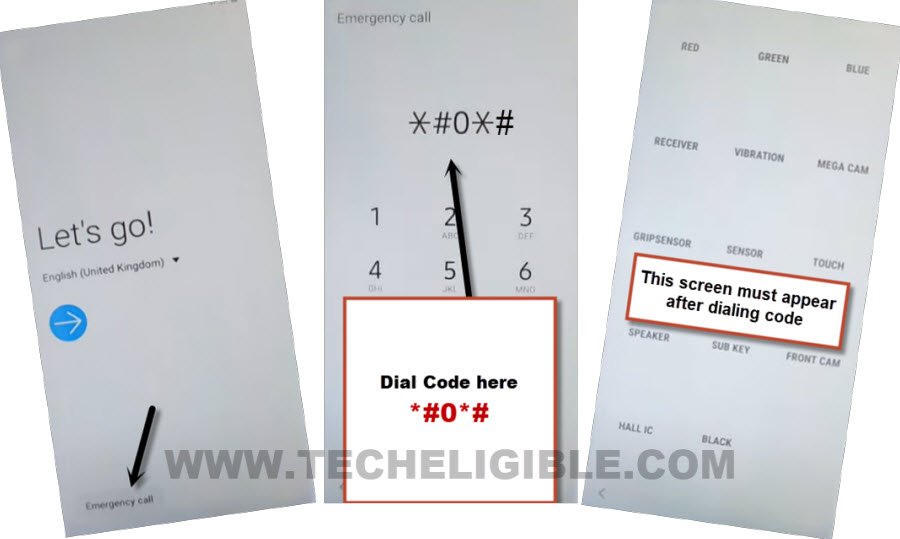
-Go back to first “Welcome” screen from Z Fold2, and then tap on “Emergency Call” option, and dial this code *#0*#, after dialing this code, you will receive a new blank box window in your device.
-Click to “OK” from Samfirm software popup message, now the “Allow USB” message will be sent to your device, just select option “Always Allow from this computer”, and then tap to “Allow” option from the device.

-The frp removal process will be started shortly, and in few seconds, you will revive message in software window, that the “Factory Data Reset Operation done“, congrats, you are all done, now you can disconnect and restart your Samsung Galaxy Z Fold2 and finish setup wizard easily.
Method 2: Bypass Google FRP on Galaxy Z Fold2 [Android 11]
Remove Google FRP Galaxy Z Fold2 Android 11 without any frp tools, using a PC software only for few minutes, we will be able to access chrome browser, afterwards, using other android device, we will be able to restore and backup data in both devices to completely remove google frp.
Tools You Need:
Arrange below tools before starting this method, you are required one more android device to accomplish this process, otherwise you won’t be able to remove frp.
1/ WiFi Connection
2/ Samsung Account (Gmail Account)
3/ Any Other Android Device.
4/ Easy Samsung FRP Tools (You can also try latest version of this tool)
5/ PC or Laptop
Let’s Begin FRP Process:
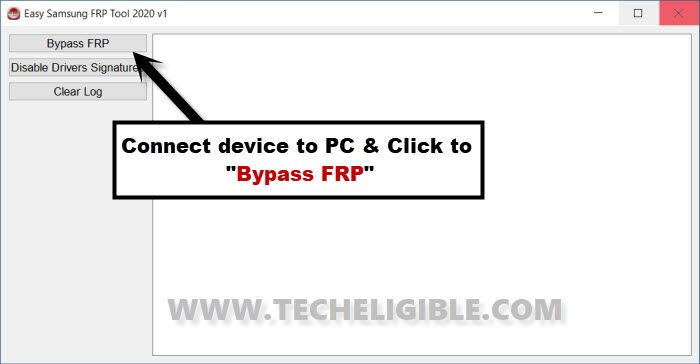
Step 1: Download & Open Easy Samsung FRP Tools in PC [Click here to Download].
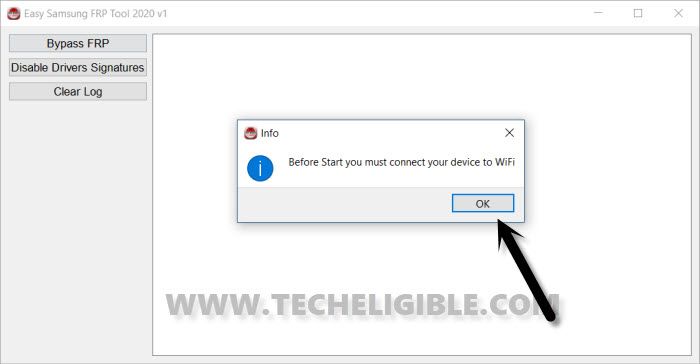
Step 2 :Connect WiFi in Galaxy Z Fold 2 device, and then connect the device with PC using Data cable. (Make sure the Device is turned on).
Step 3:Once the device is detected by the PC, just hit on “Bypass FRP” button from the software, and from the popup window, hit also on “OK”.
Note: If your device is not being detected, then install Samsung USB Drivers.
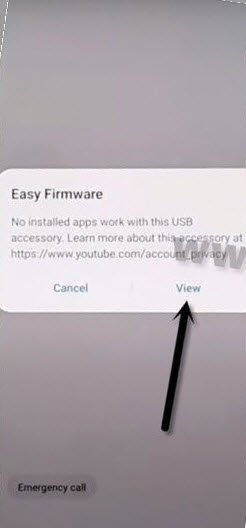
-You will receive a popup box of (Easy Firmware), tap to “View”.
Note: If you don’t see (view) popup message, then click to “Disable Driver Signature” from the software, and then disconnect and connect the device again, and again hit on “Bypass FRP” button from the software, after trying this few times, you will be able to have (VIEW) popup message.
–From the Chrome screen, tap to > Accept & Continue > Next > No Thanks.
Open Galaxy Store app in Z Fold:
Step 4: Type in browser “Download Top Samsung frp tools“, and visit our website searched resul.t
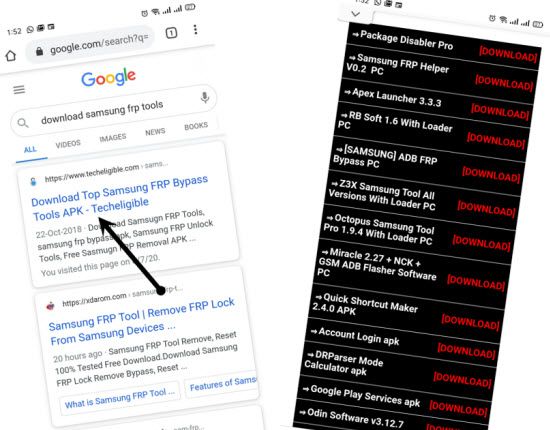
Step 5: Go down and tap on “Open Samsung Galaxy Store“.
Step 6: Hit on “Cross icon” to close the popup message, and then hit on “Centered Option”.
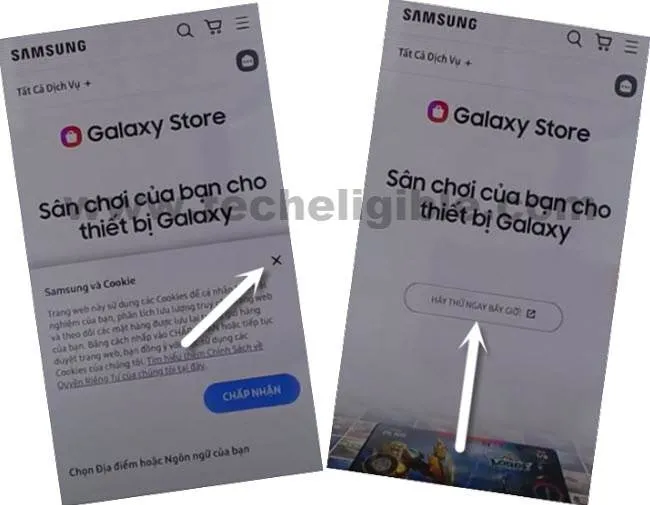
Step 7:Check mark the option “Get new and special offer…”, and then hit on “Agree”.
Step 8:Check mark the option “Automatically update the Galaxy Store”, and then tap to “Update”.
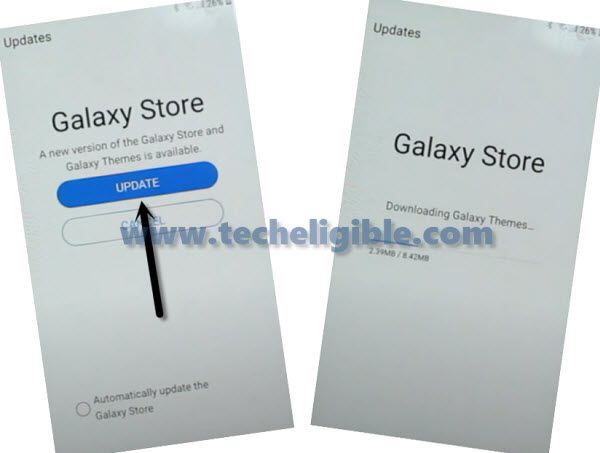
Step 9: Tap on “Centered Option” again by following below image to open Galaxy Store app.

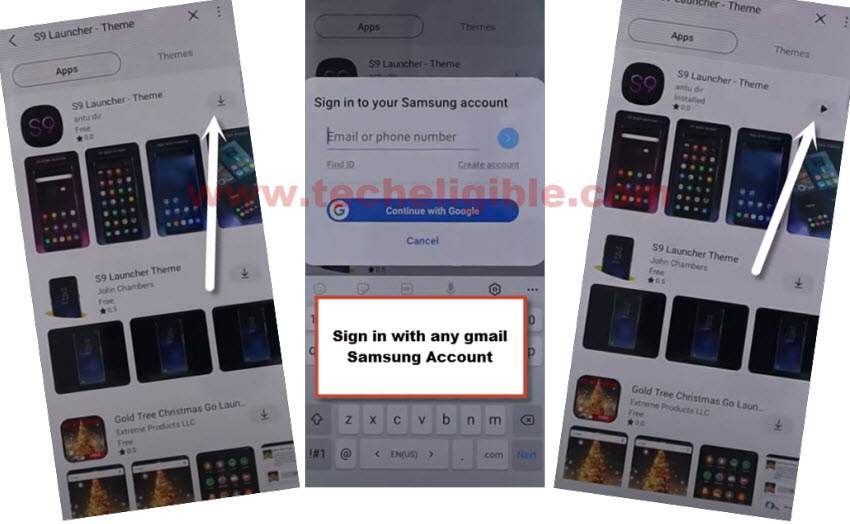
Step 10: Tap to “Search icon” from top corner, and search there “S9 Launcher”.
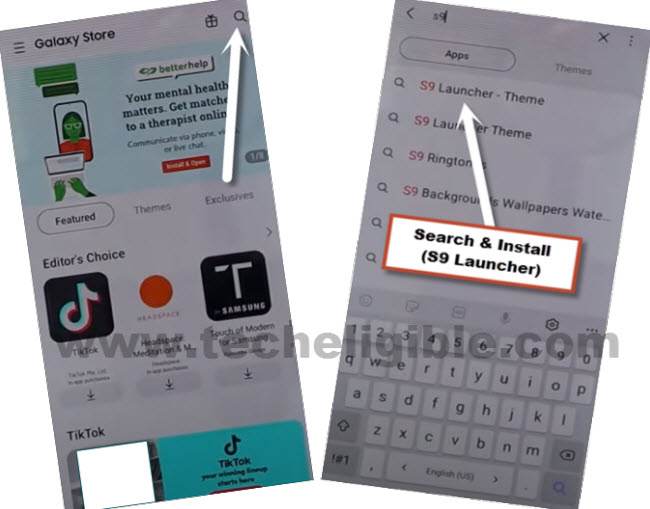
Step 11:Install & Open “S9 Launcher – Theme” app.
Note: Before the installation starts, you will have to sign in with your Gmail account, and this Gmail account should also be signed-in in other android device.
Step 9: Congrats, you have reached to your device home screen, but still plenty of steps remaining to bypass frp completely.
Follow Steps in Other Android Device:
Step 11:Go to > Settings > Accounts & Backup > Accounts.
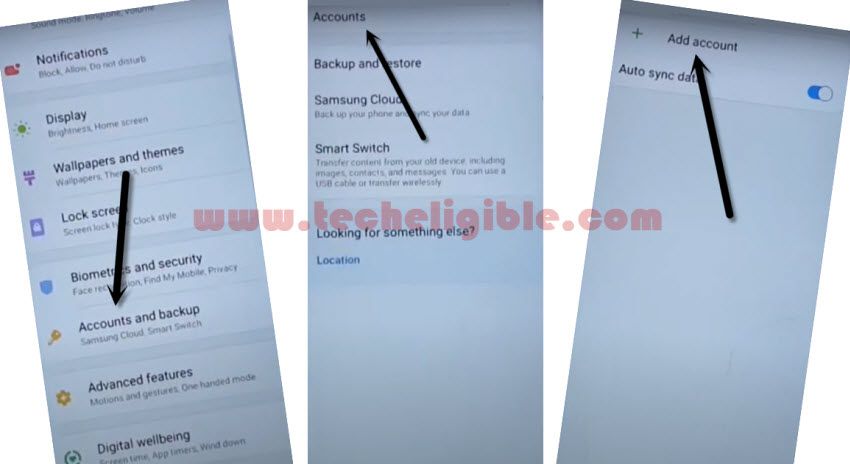
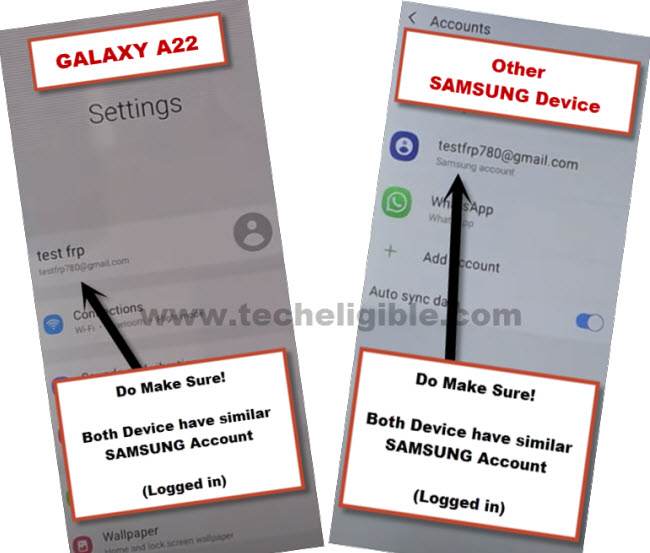
Step 12: Add your Same (Google & Samsung Account) which you have already added in Samsung Galaxy Z Fold 2 device.
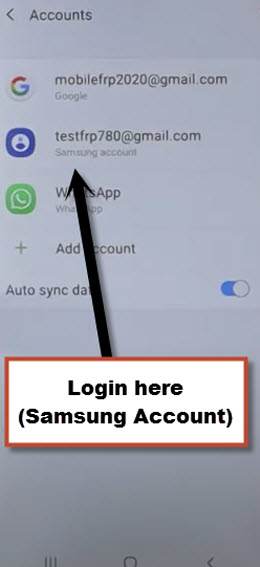
Note: Make sure, your both android devices are on same WiFi network and on Same Samsung/Google Account.
Step 13: Open “Play Store” in other android device, and install “Alliance Shield X” app.

Step 14: Go to > Settings > Accounts and Backup > Backup And Restore > Back up data.
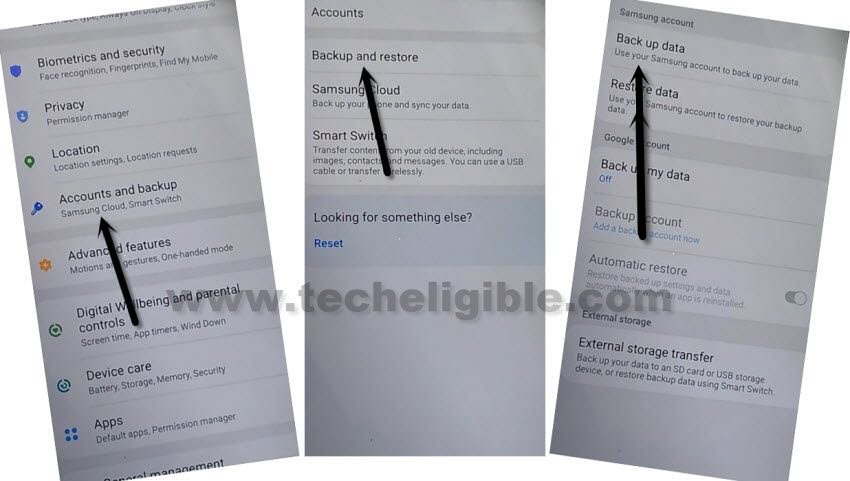
Step 15: Tap to “BACKUP UP” button from below to backup all your apps in Samsung Account, which is already signed-in in your (Galaxy Z Fold 2) phone.
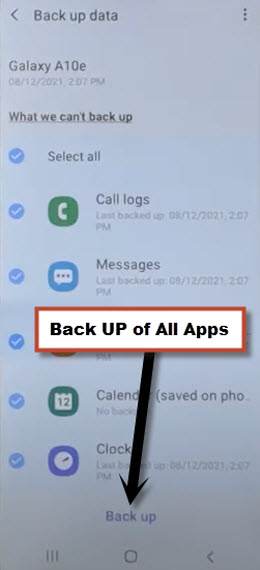
Follow Steps in Galaxy Z Fold 2 Device:
Step 16: First of all make sure, your both devices are on same Samsung/Gmail account.
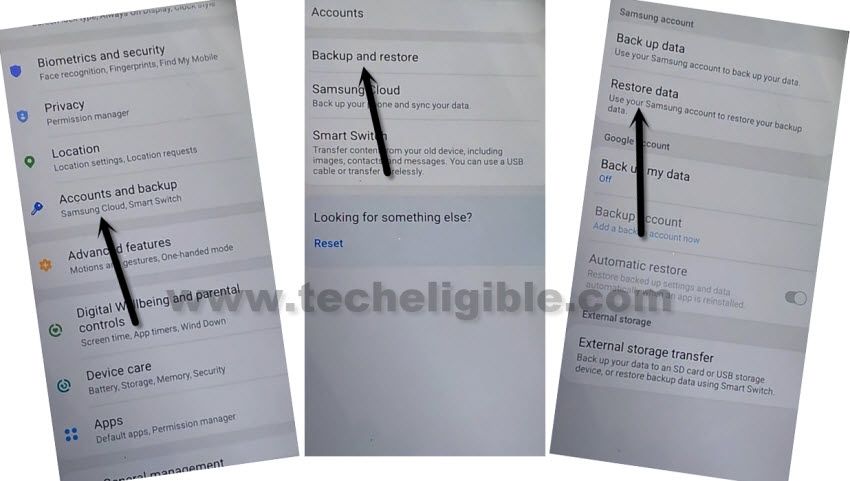
Step 17: From (Settings), just go to > Accounts & Backup > Restore Data > Update.
Wait for few minutes, this will take time in updating all apps.
Step 18: Again hit on > Restore Data > Select all apps > Restore > Install, now wait until restoring data process completes.
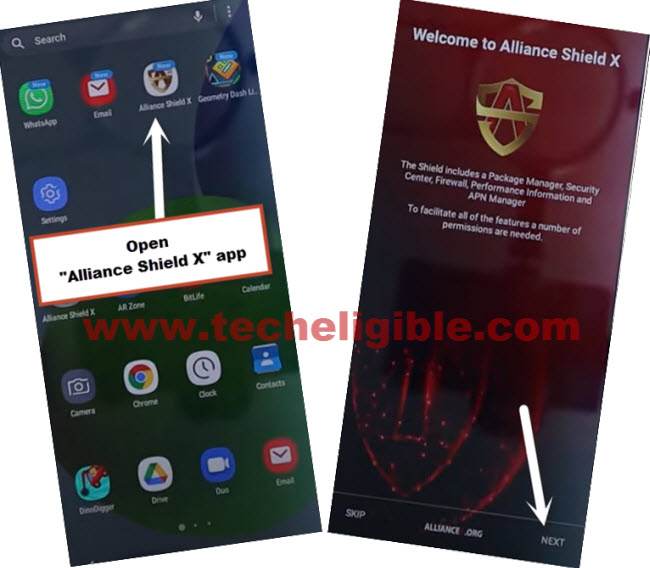
Step 19: Once the restoration process completes, just open (MENU), and you will have there “Alliance Shield X” app, this app has been restored from your other android device because your both devices are on same Gmail account.
Step 20: From the (Alliance Shield X) app, tap to > Next > Next > Next > Got it.
Step 21: Register your new account in (Alliance Shield X) .
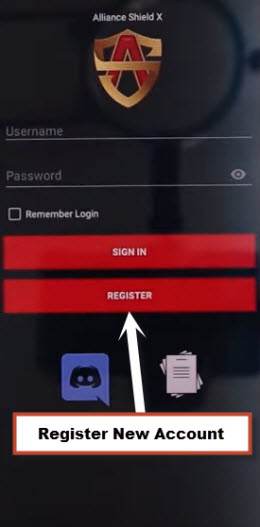
Step 22: Sign-in with your registered account in (Alliance Shield X) app.
Step 23: Type any “Device Name”, and then tap to “Next”.
Step 24: Turn on “Device Admin”, and hit on > Activate > Next.
Step 25:Turn on “Knox”, and select option (i have read and agree…), and tap to > Confirm > Next > Finish.
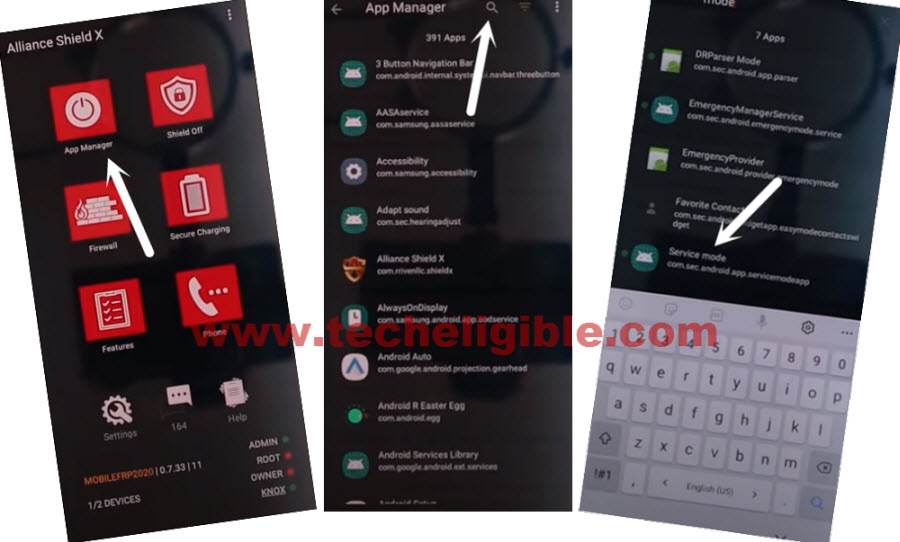
Step 26:Go to “App Manager”, and tap to “Close” from popup box.
Step 27: Hit on “Search icon” from top corner, and search there “Mode”, and tap to “Service Mode”.
Step 28: Tap to “Activities”
Step 29: Go all the way down, and tap on option (com.sec.android.app.modemui.activities.usb.settings).
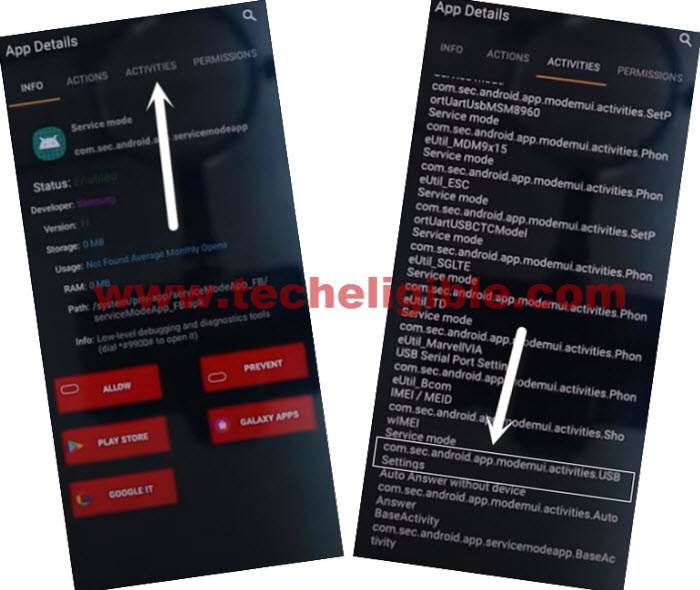
Step 30: Tap again on (com.sec.android.app.modemui.activities.usb.settings), and again hit on “OPEN”, and then select (DM+MODEM+ADB).
Remove Google FRP Galaxy Z Fold2 With ADB :
Step 31: Download & Open below adb tool in your PC.
⇒ FRP-BYPASS-ADB Tool [DOWNLOAD]
Step 32: Connect the device (Z Fold 2) with PC.
Step 33: Extract & Open “FRP Bypass ADB Tool” in PC.
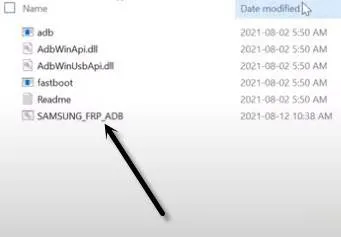
This tool will start automatically, and will bypass frp in few seconds, wait until this process finishes.
Note: In your Samsung Device, you will have a popup widow, just tap to > Allow > Allow, afterwards, the ADB Tool will detect your device and will start bypassing frp lock.

Step 34: After the device starts, Select the (Setup Wizard) icon, and boom, you are in your device HOME SCREEN.
We have to do a factory reset to this phone in order to remove previously added google account completely.
Step 35: Go to > Settings > General Management > Reset > Factory Data Reset > Reset > Delete All.
Step 36: Enter your already signed in Samsung account to start the factory reset process.
Final: The device will auto reboot, and once the factory reset screen finishes, the device will be started automatically, now just finish initial setup wizard to get back your device.
Thanks for visiting us, if you have any query, feel free to ask us in below comment box.
Read More: