
Remove Google FRP Tecno Pova 3 Android 12 With New Way
You can easily Remove Google FRP Tecno Pova 3 just through following some simple steps from here, we will go to this FRP locked device settings to turn on (3 Dots) icon, and will turn off (Google Play Services) app, this is very important app, once you did that, you can easily setup new google account and finish setup wizard.
Note: We highly recommend you to apply this method only on your own device, if you are not owner of this Tecno Pova 3 device, or you found this from some where, you must return this device to its real owner.
Let’s Start to Remove Google FRP Tecno Pova 3:
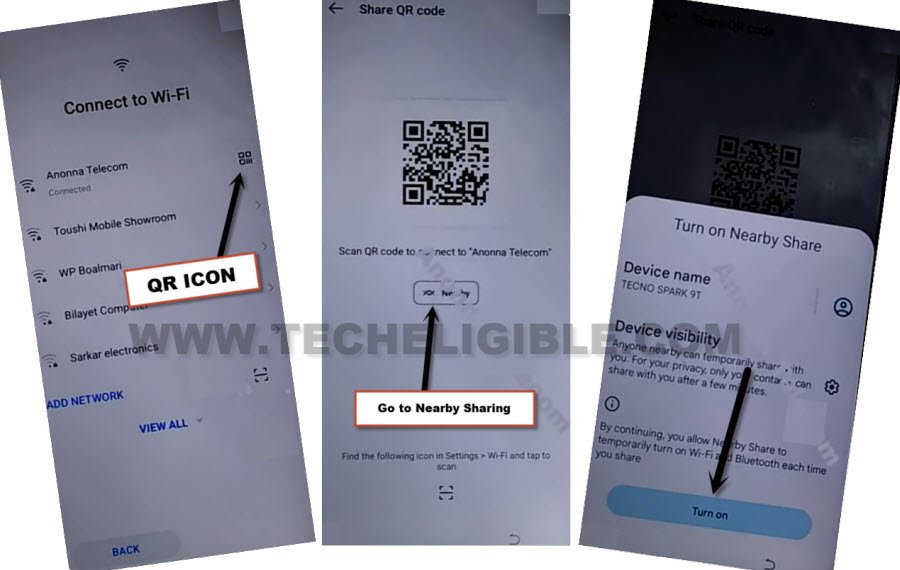
-Let’s begin this process by connecting WiFi, and then from the same screen, ta to “QR code” same as shown in below image.
–Go to “Nearby Share” button, and tap to “TURN ON” button.
–Hit on “Settings” icon from top corner, after that swipe down, now tap to “Learn More”.
![]()
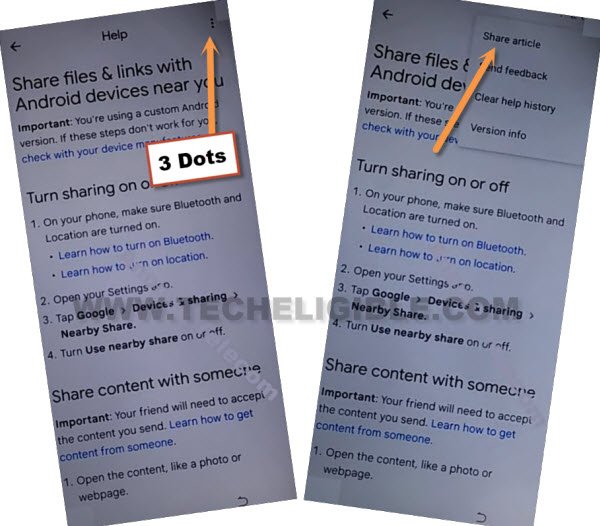
–From help screen, tap to > 3 Dotes > Share Articles.
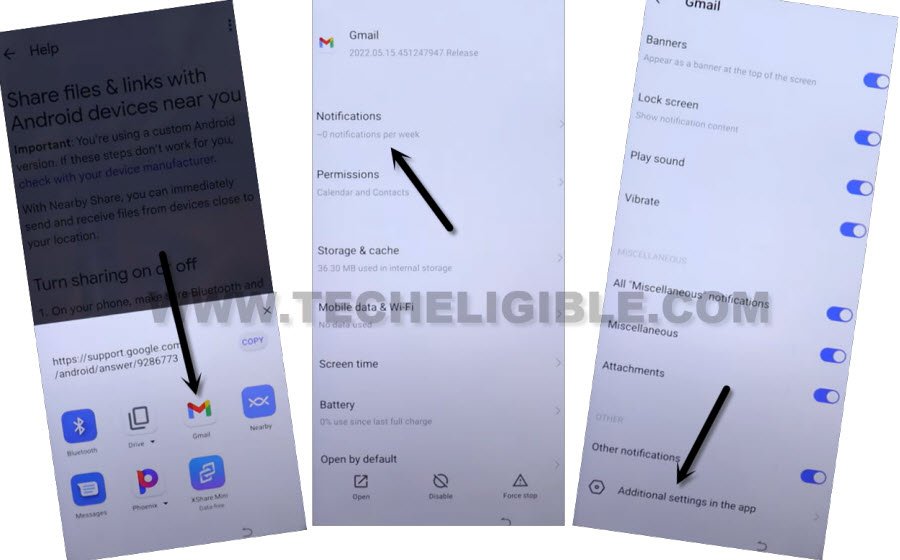
-From popup of shares buttons, long hold on “Gmail” icon.
-Go to > Notifications > Additional Settings in the app.
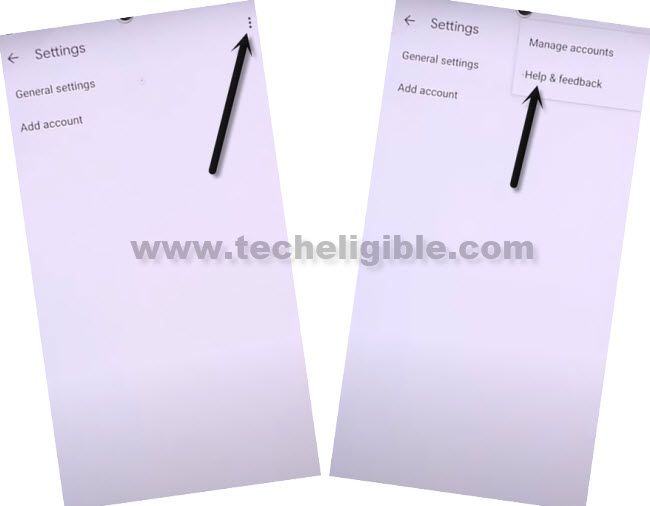
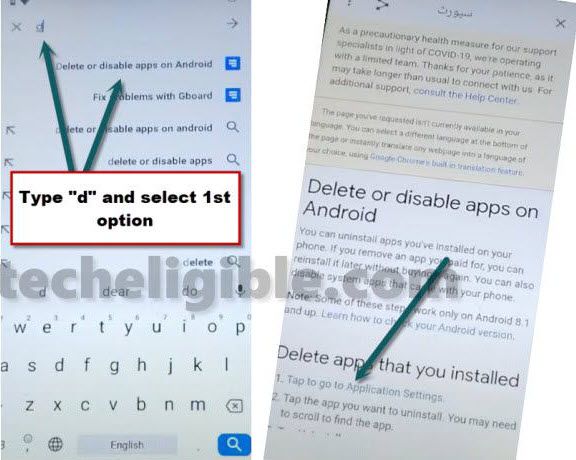
-Tap on “3 dots” from top corner, and go to “Help & Feedback”.
-Search there “delete or disable”, and tap to “Delete, Disable & Manage unused apps….”.
-From that page, just hit on a blue link “Tap to go to application settings“.
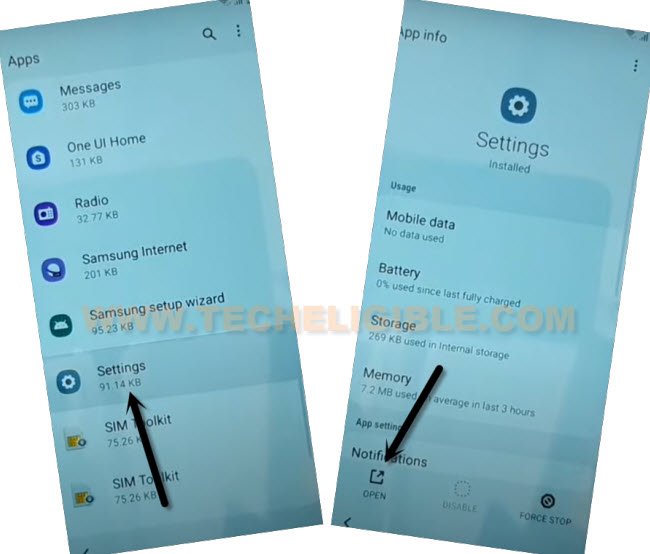
-Find and tap to “Settings” icon, after that, hit on “Open”.
-From there tap on “Special Function”.
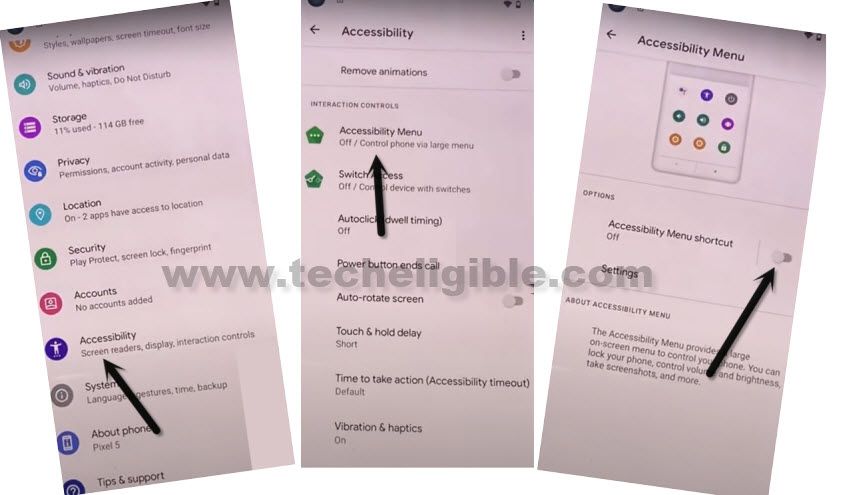
–Go to > Accessibility > Accessibility MENU > Turn on (Accessibility MENU Shortcut) > Allow > Got it.
Note: After turning on menu shortcut, the 3 green dots icon will begin appearing at bottom right side, we must need this 3 dots icon to successfully Remove Google FRP Tecno Pova 3.
Disable Apps from Settings:
-By hitting on back arrow carefully, just get back to same page “Delete, Disable & Manage unused apps….”, from there hit again on “Tap to go to application settings“.
-Find and tap to “Settings” icon, after that, hit on “Open”.
–Hit on “3 dots” from upright, and tap to “Show System”.
![]()
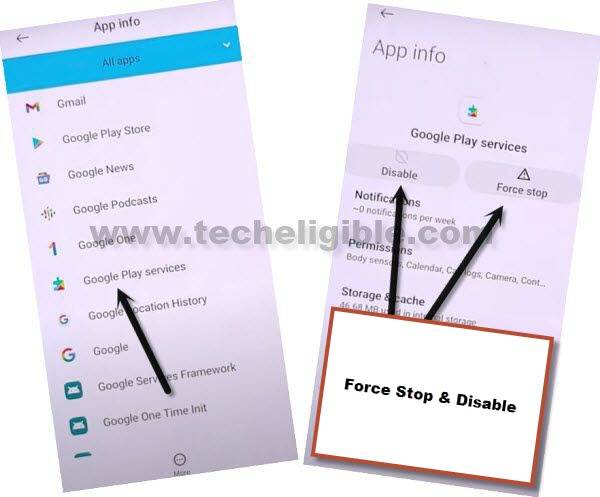
–Tap to “Android Setup” which is settings icon one, and tap to > Force Stop > Ok.
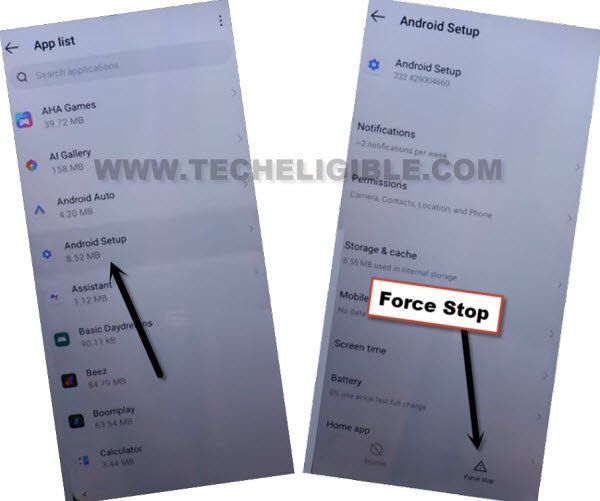
–Get back to (App list) again, find and tap to > Google Play Services > Disable > Disable App.
-Now tap to > Force Stop > Ok.
–By hitting (Back Arrow), just go back to (Connect to WiFi) screen, from there tap on “Back”.
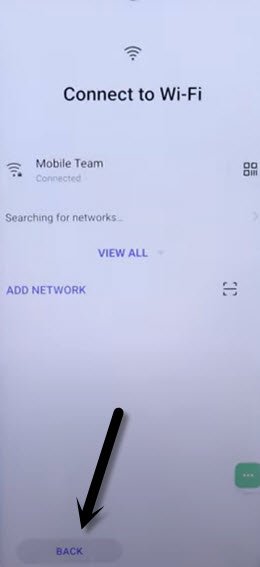
-Now tap to > Skip > Next > i have read and agree > Next > Don’t Copy.
Note: On Connect WiFi screen, if you see any trouble, insert SIM Card with mobile data.
-You will get a loading screen of “Checking for update”, this won’t go away until we turn on back “google play services app”, to do that, there you will have a green color “3 dots” icon.
![]()
Turn on “Google Play Services” app:
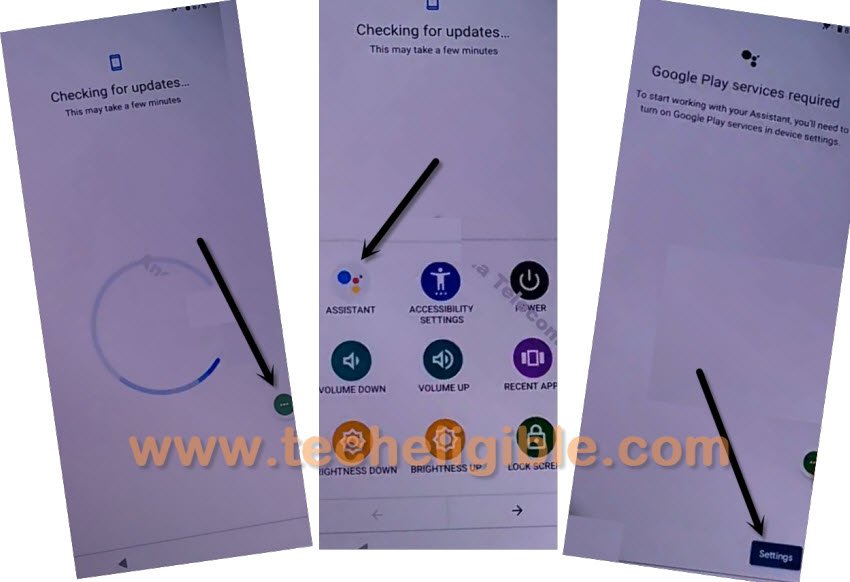
–When you have a screen of (Checking for update…), here we have to enable “Google Play Services” app to finish setup wizard, otherwise this screen will stuck on this message, and you won’t be able to bypass this screen till you follow below steps quickly and repeatedly.
–When you see “Checking for update” screen, just tap on > 3 dots > Assistant.
–Pop will appear, if it does not, just repeat step again, again tap “3 dots” and again hit on “Assistant”, it would be bit difficult for you to tap on “Settings” option properly, once you did that, you will see (Google Play Services) screen, just keep trying hard.
–So hit on > 3 dots > Assistant > Settings.
–You will reach inside google play services app, just hit on “Enable” button.
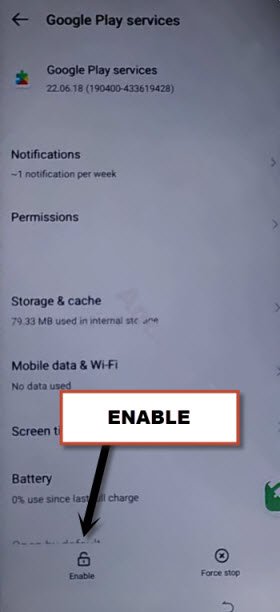
–Once you enabled this app, just tap on “Back Arrow” one time, and you will get back to (Checking for update) screen, but this screen will finish up very soon.
–From google services screen, go to > More > More > Accept.
–You can skip sign in to Tecno ID screen, that’s up to you.
–Setup your new screen lock and finish setup wizard on your own, you are all done from Remove Google FRP Tecno Pova 3.
Read More