
There are lots of benefits using FRP protection security feature on a Samsung F12 device, which is directly linked to your google account. But, despite of FRP feature advantages ,it can give some challenges as well when you forget your registered google account. You could encounter an accessing issue to your Samsung Galaxy F12 after hard reset. Here are two frp bypass ways, you can apply to remove google frp Samsung Galaxy F12.
Disclaimer: Do not try this frp method on a stolen phone, this is a serious crime, if you are trying to bypass frp on a stolen phone, you may also be jailed, this process is for device owner and for educational purpose only.
| ⇒ Method 1: Reset FRP Samsung Galaxy F12 [Android 13 | 12] By PC |
| ⇒ Method 2: Reset FRP Samsung Galaxy F12 [Android 12 | 11 | 10] Without PC |
Method 1: Remove Google FRP Samsung Galaxy F12 Android 13 | 12 [BY PC] With Samfw Tool
If you wanna delete previously added google account on hard resetted device, so you will’ve to Remove Google FRP Samsung Galaxy F12 (Android 13, 12) with the help of this below method, to accomplish all steps successfully, you are required a PC and a WiFi connection, afterwards, all process will be followed up easily without damaging the device hardware.
-Firstly, download free tool in PC or laptop from below link.
⇒ SamFw tool V3.31 in PC [DOWNLOAD]
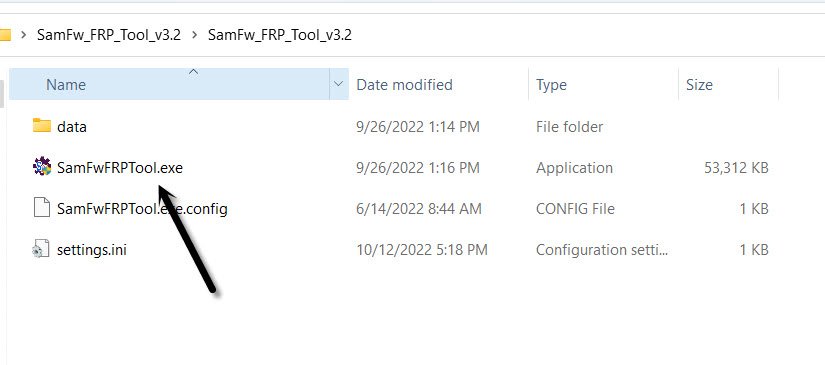 -Afterwards, connect the FRP protected (Samsung F12) device with PC.
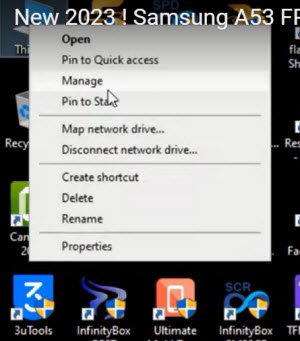
-Do make sure, whether Samsung F12 device has been connected successfully or not, to do this, right click on (This PC / My Computer), and click to “Manage”.
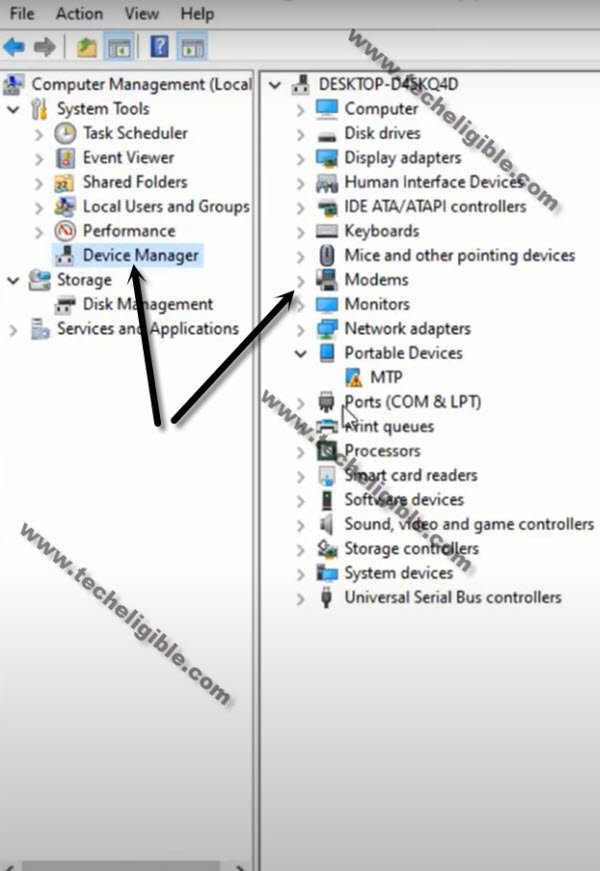
-Go to “Device Manager”.
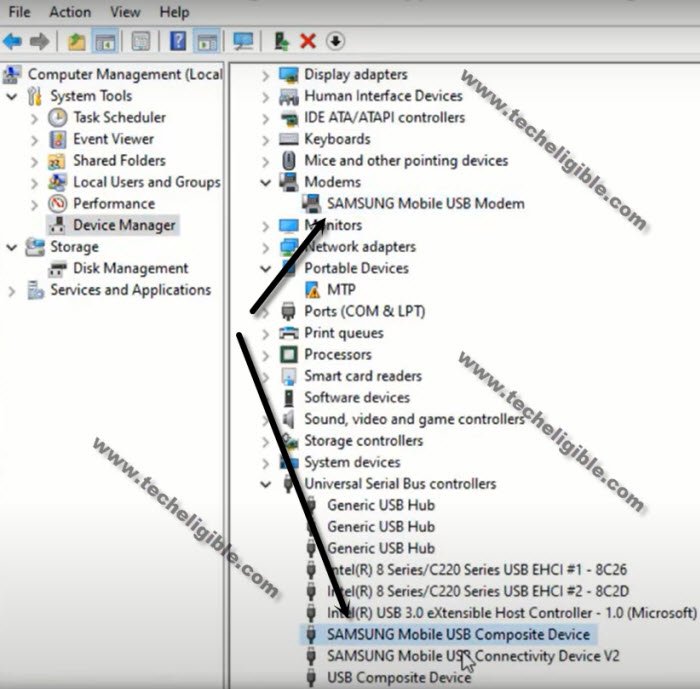
-There you will be able to see your Samsung F12 phone connected detail same as shown in below image.
Note: If you see there any (Exclamation Sign) on your Samsung USB modem hardware, that means your computer is required to install proper Samsung USB drivers, well, while opening (SamFw) tool, you must receive a popup message of installing Samsung USB driver, so you can install those drivers from there easily, you can also Download Samsung drivers here.
Use Samfw Tool to Bypass FRP on Samsung F12:
-Once the Samsung Galaxy F12 is detected successfully, just go to (SamFw) pc software,, and click on “Remove FRP (Aug 2022 security)” button.
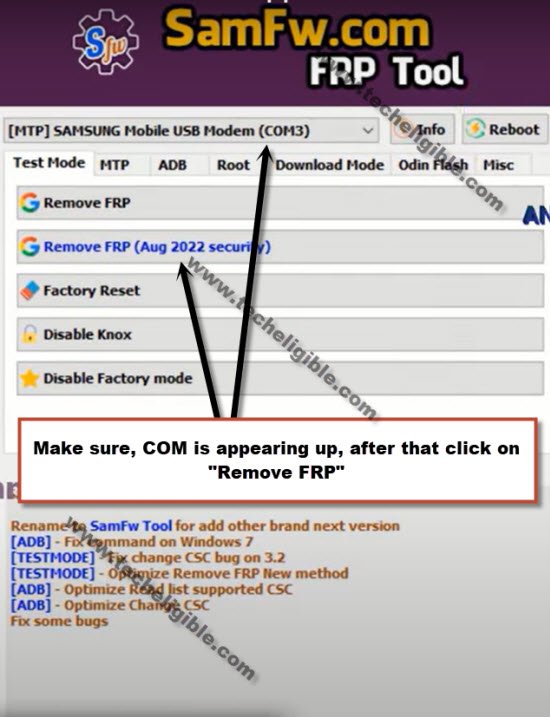
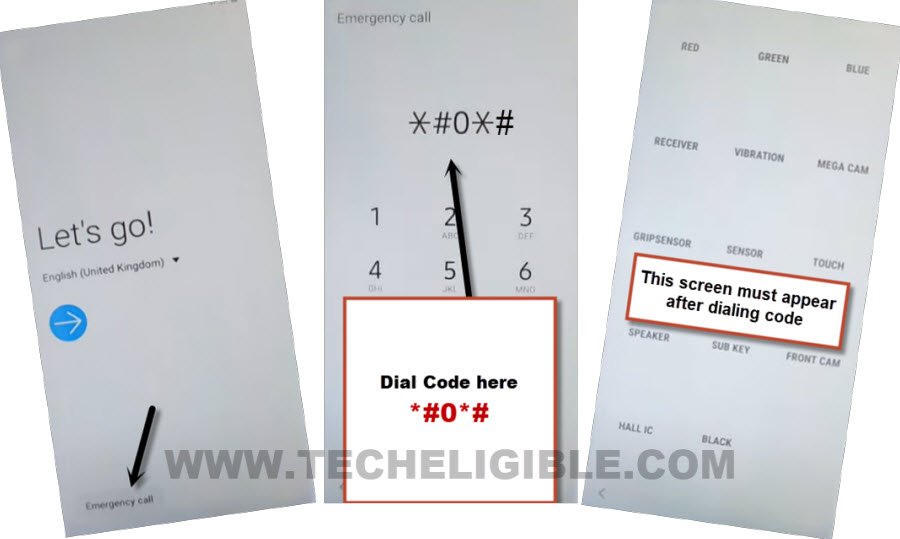
-You will receive a popup in Samfw tool, saying dial code in your Samsung F12, but do not hit on “OK” button.
-Dial this code “*#0*#” from Samsung F12 by tapping on (Emergency Call) option.
-After that, you will see there a (Blank) boxes screen.
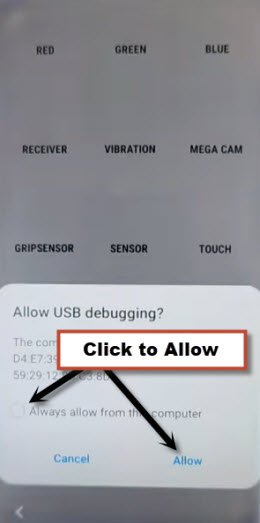
-Go back to your PC screen, and click on “OK” from enable test mode popup, after that you will receive another popup in your Samsung galaxy device screen saying (Allow USB Debugging?).
-Select option “Always allow from this computer”, and after that, tap to “Allow”.
Note: If you face any trouble, reconnect Galaxy F12 and try again.
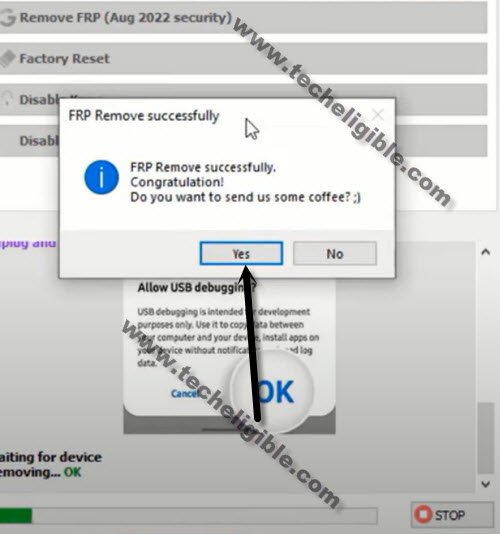
-Within few seconds or few minutes, you will receive popup in your PC screen saying (FRP Remove Successfully), just hit on “Yes” button or you will see “OK” in green color in your software box.
-The Samsung F12 may auto restart, or you just swipe up the screen, wait over there, new popup will appear, just select (Samsung Setup Wizard), and select “Always” to bypass frp.
-Tap on “Always” from Samsung Setup wizard screen, after that, you will see a blinking black screen, just press “Power button” once to turn off screen only, after that press again the (Power Button) to wake up the screen, and swipe up screen this time, just wait over there for few minutes. and you will get into your device homescreen successfully.
Method 2: Remove Google FRP Samsung Galaxy F12 Android 12 | 11 | 10 [WITHOTU PC]
Note: This method will work only on a device which is (Secured by Knox), so you can check this by restarting device, and if you see there on your device logo screen a text (Secured by Knox), that means this method will work on your Samsung F12.
-Switch on Samsung F12 to connect WiFi and then, go back over the first startup page.
-You have to use talkback feature to launch google chrome browser. Let’s long hold both keys (Volume up + Power). Release the keys after having a popup window.
-Tap twice on the (Use) option from popup window.
| Note: If you are unable to turn on talkback, so try with quickly press (Volume UP/Down) keys, if this works, then use these keys to turn on or turn off talkback instead of (Volume UP + Power), even then, if you are failed to turn on talkback, then you will have to use your PC to launch browser directly, for that click here to launch browser via PC. |
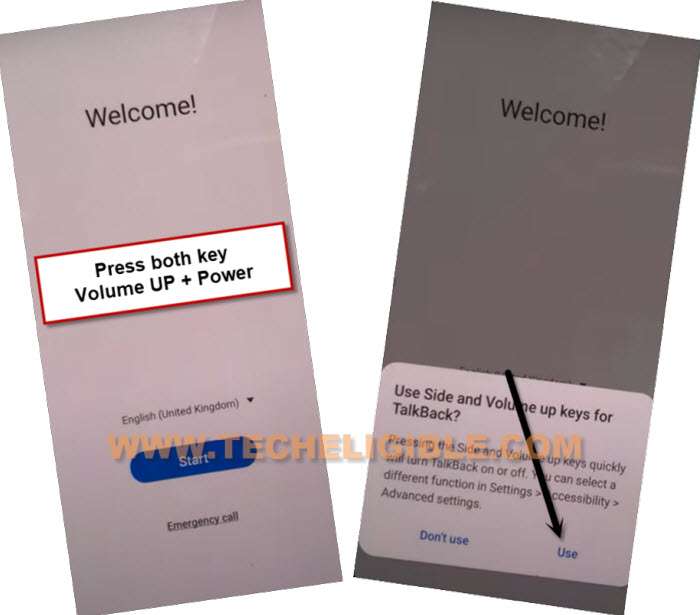
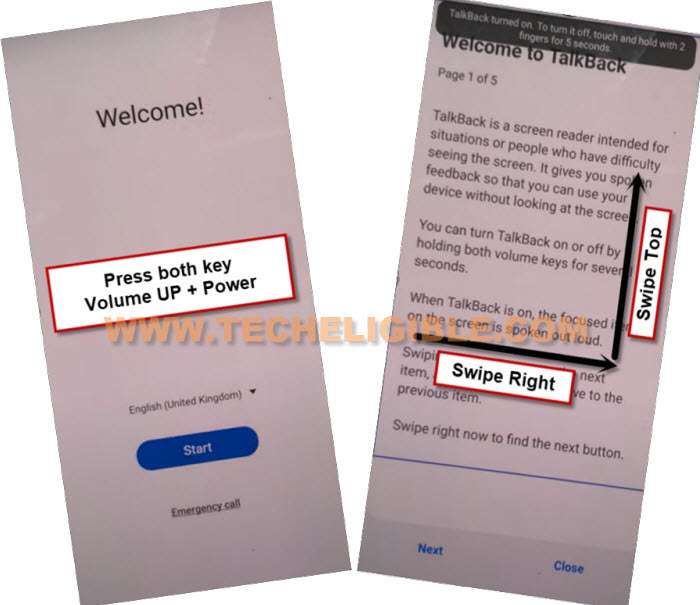
-Long hold again both keys (Volume UP + Power), after that, a flash message will inform you that, (Talkback turned on…).
-You have to swipe right and swipe up on screen. This is a gesture to get voice command option.
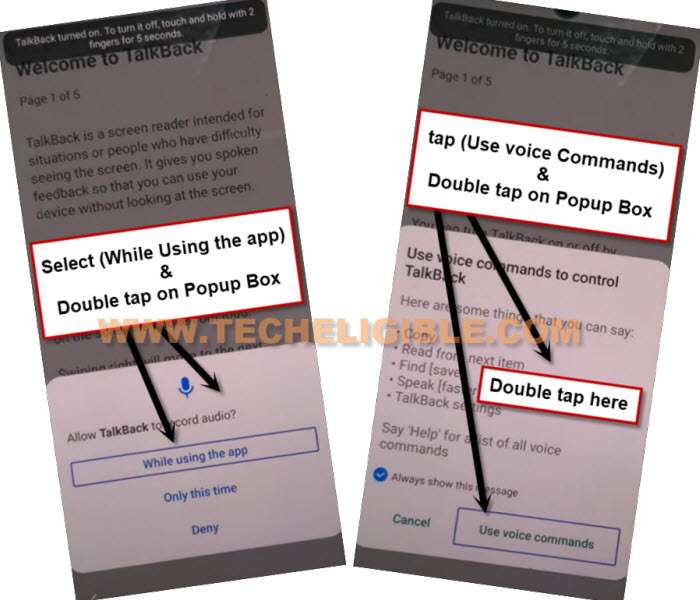
-If you have a mic icon popup window, just double hit on “While using the app”. Afterwards, double hit on “Use voice commands” option.
-Few seconds later, you will see green boarder lines on screen, just speak loudly “Google Assistant”.
-We don’t need talkback function now, you can disable this by long holding both keys (Volume UP + Power). If you see a popup message, just tap to “Turn on” option. After that, long hold again both (Volume UP + Power). This time the talkback function will be fully turned off.
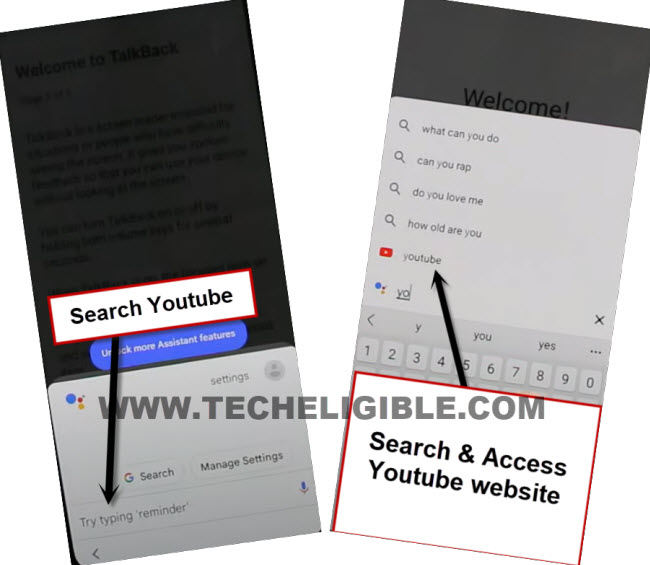
-From google assistant popup, just go to “Keyboard” icon.
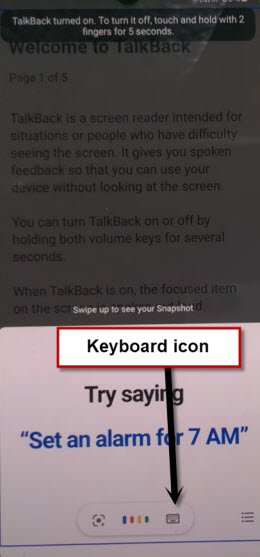
-Search there “You” and hit over the “Youtube” searched result same as shown in below image to bypass frp.
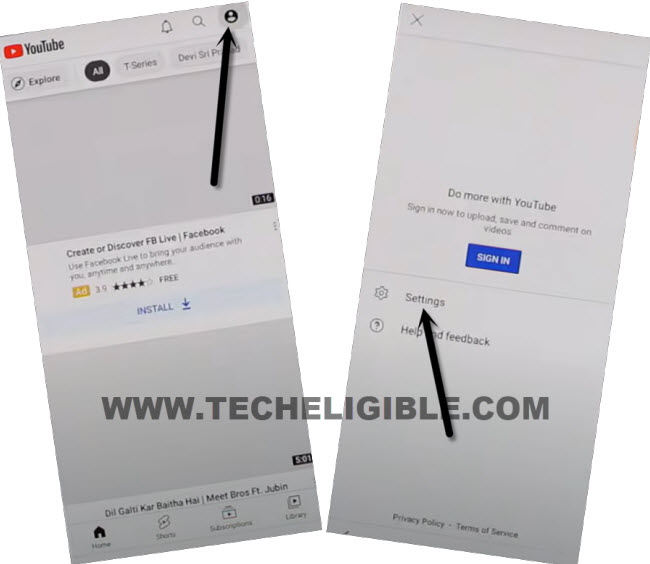
-After you lead to youtube page successfully. Just go over the “Account” option from top corner. After that, go to “Settings”.
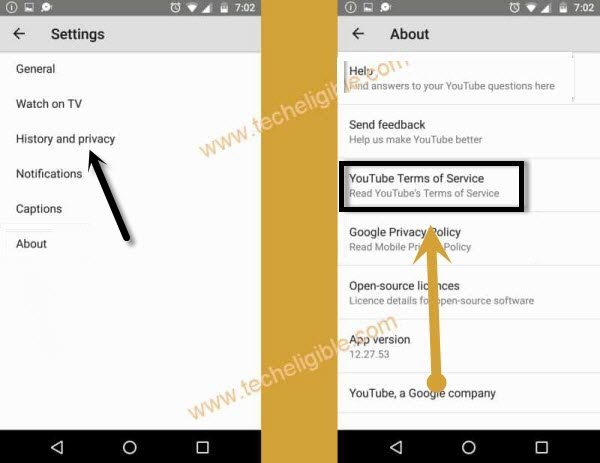
-Hit over the “History and Privacy” option. After that, tap to “Youtube terms of service”.
-You will see a chrome welcome page. Let’s access to chrome browser by tapping on > Accept & Continue > No Thanks.
Install Alliance Shield App for Bypassing FRP:
-Search in chrome search bar with “Techeligible“. After that, go to 1st searched result to reach to techeligible site.
-Let’s tap over the “Menu” option from there.
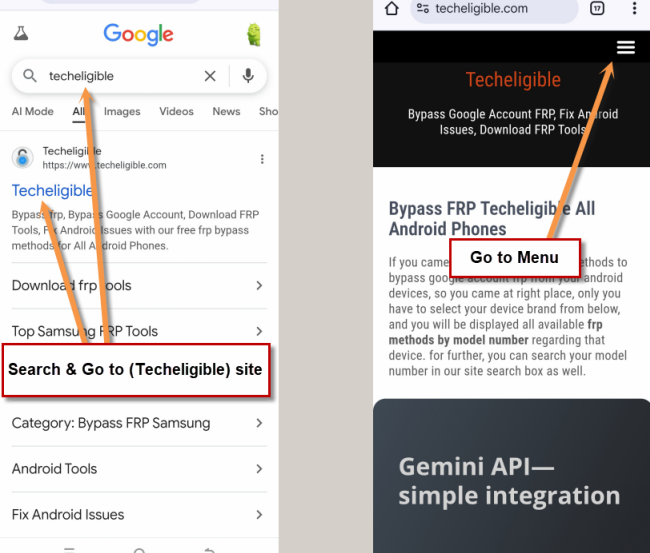
-Navigate to Samsung frp tools screen by going to > Other Free Tools > Samsung FRP Tools.
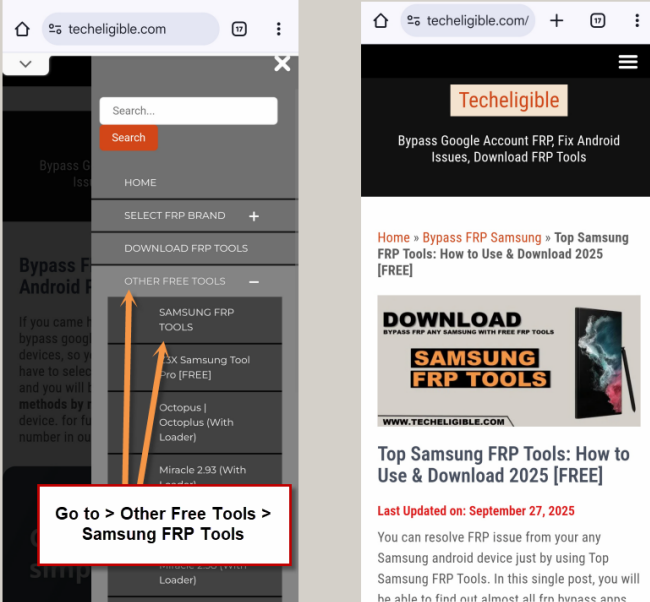
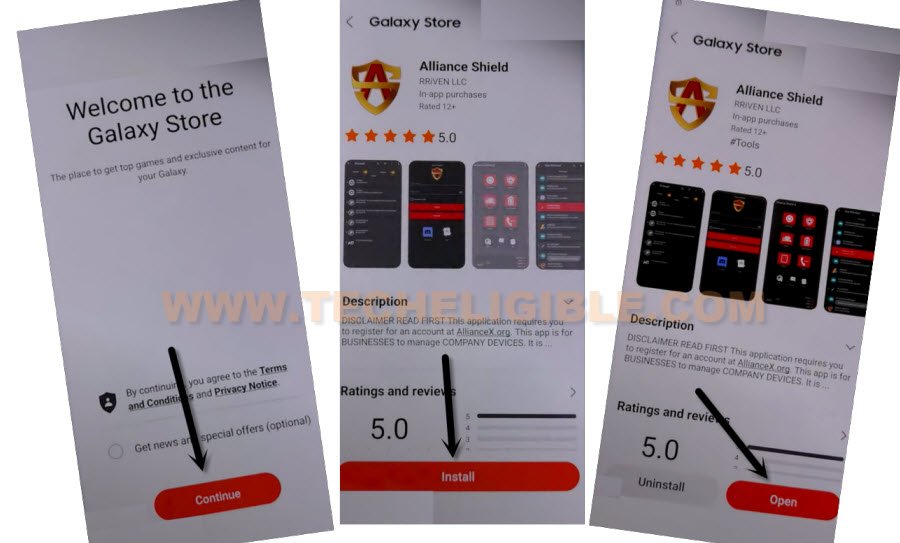
-Tap on this link from there “Install Alliance Shield X from Galaxy Store“. After that, you will be redirected on (Welcome to Galaxy Store) page. From there, tap to “Continue”.
-Let’s install alliance shield x app by tapping on “Install” button. After that, tap to “Open”.
| Note: Sign in there with your Samsung Account in order install this app, if you don’t own Samsung account, you can crate that account in free of cost from their official website. |
Register & Activate Knox on Alliance Shield X to Bypass FRP:
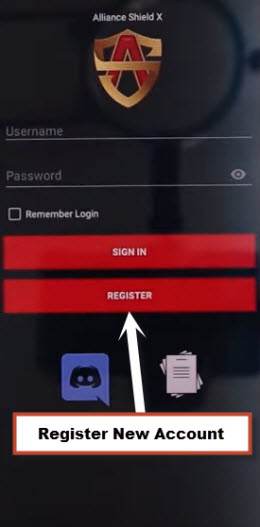
-After accessing to alliance shield app. Just hit over the “Skip” option. After that, you will be displayed a account sing in screen. Enter your alliance shield ap login id and password to login with.
| Note: If you don’t have an account, create your new account by going to “Register” button. After that, sign in with that account to continue frp bypass steps. |
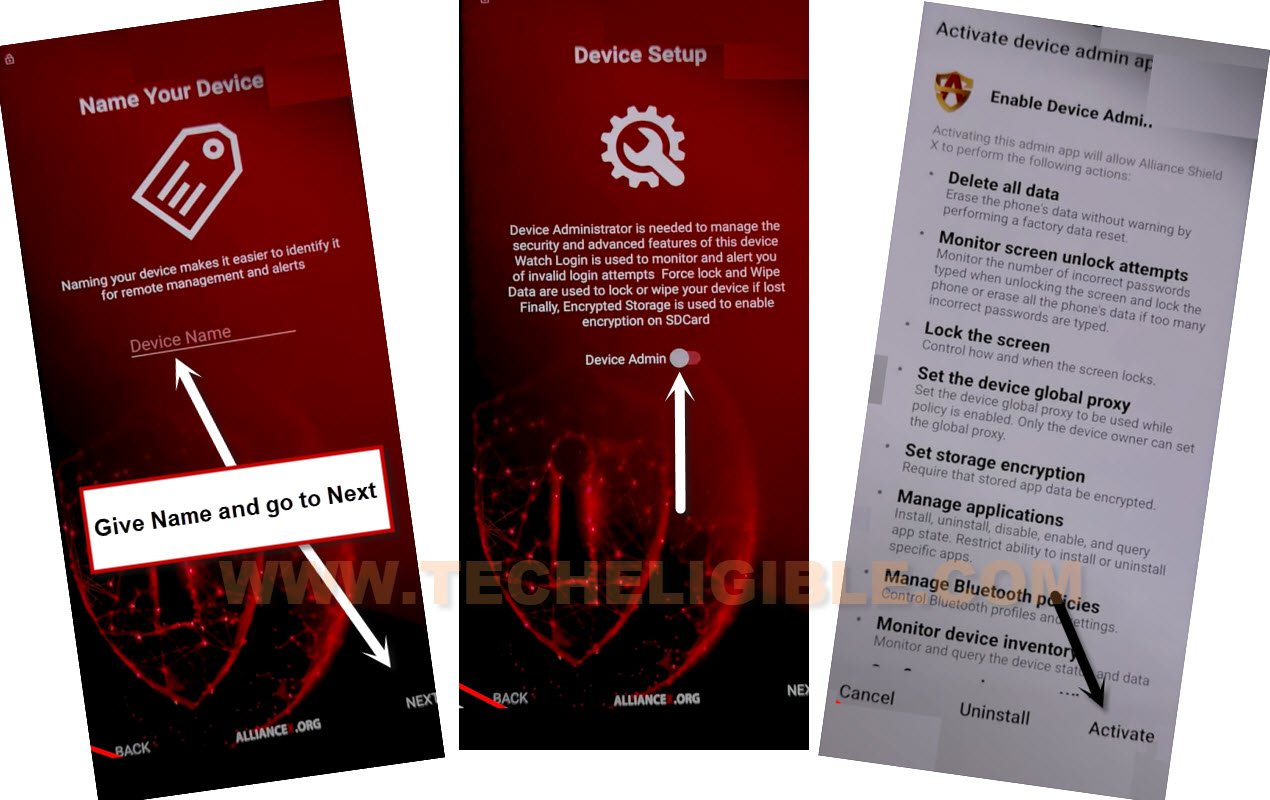
-Give any device name and tap to “Next”.
-Let’s toggle on the (Device Admin) button form the (Device Setup) page.
-After that, hit over the “Activate” button.
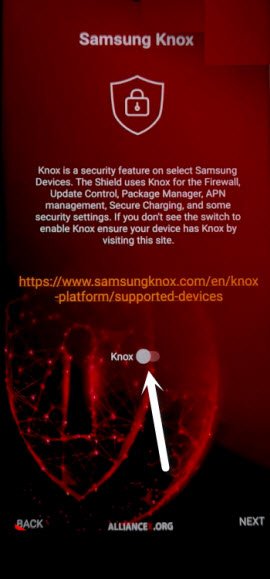
-You have to switch on “Knox” button from Samsung knox screen.
-After that, tap these options respectively > Agree > Next > Finish.
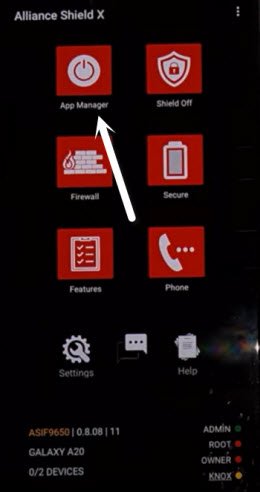
Disable Some Apps on Samsung F12:
-Go to your computer device “App Manager”.
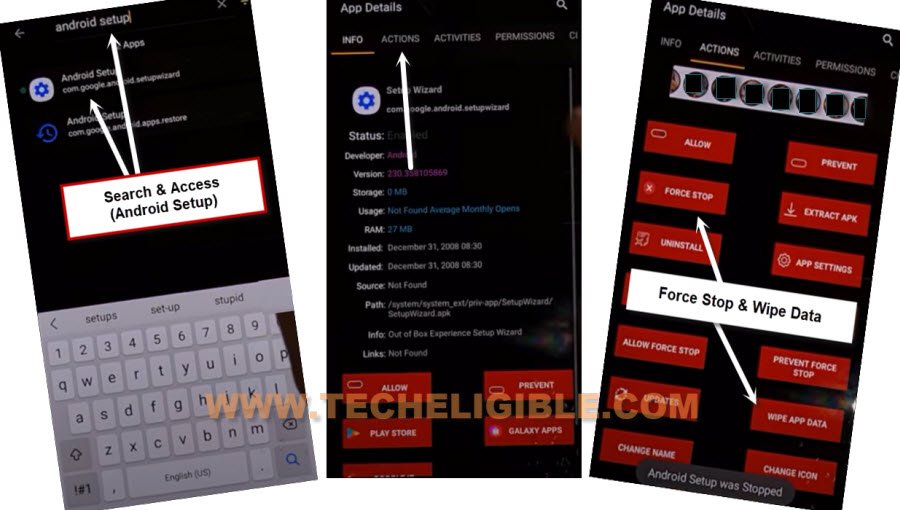
-Go to “Search” icon from top corner. After that, search there “Android Setup”.
-Tap on a gear icon “Android Setup” app as shown in below screen shot. After that, from top bar, hit over the “Actions”.
-Hit on a Force Stop & Wipe Data options.
-Go back by tapping on back arrow from bottom.
-Let’s go back by tapping once on the “Back Arrow” icon.
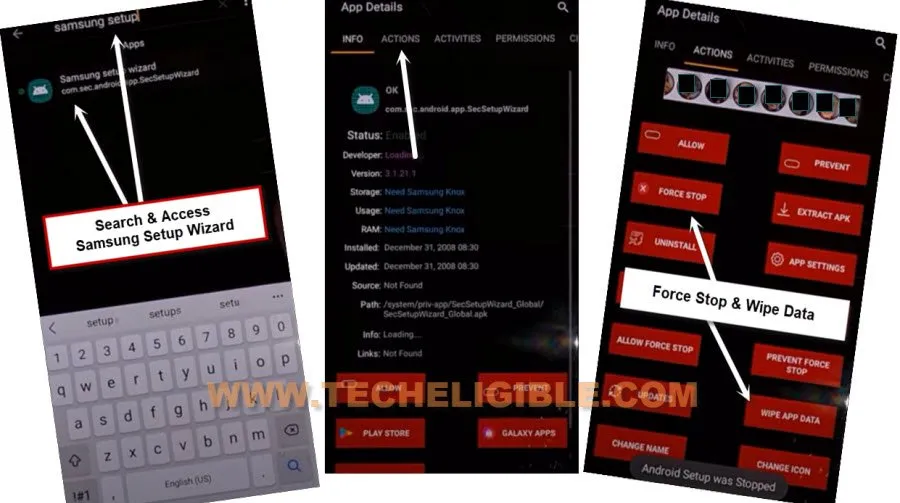
-Search in top search bar with “Samsung Setup”. After that, go to “Samsung Setup Wizard” searched result.
-Tap over the “Actions” from top bar.
-Let’s tap on “Force Stop” button. After that, tap on “Wipe App Data” button.
-Go back to same page again.
-We have to disable one more final app here to Remove Google FRP Samsung Galaxy F12.
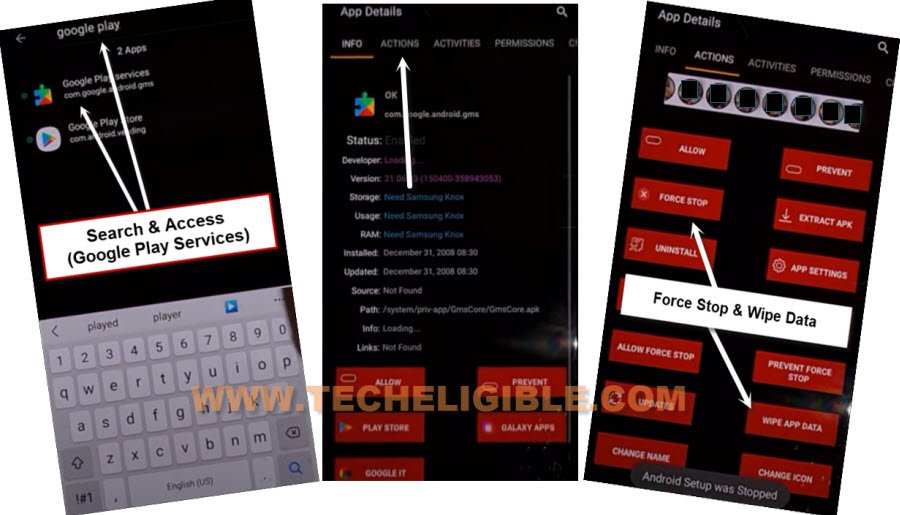
-We’re gonna search there “Google Play” and tap to “Google Play Services” searched result.
-After that, go to > Actions > Force Stop > Wipe Data.
Complete Samsung Setup Wizard Steps:
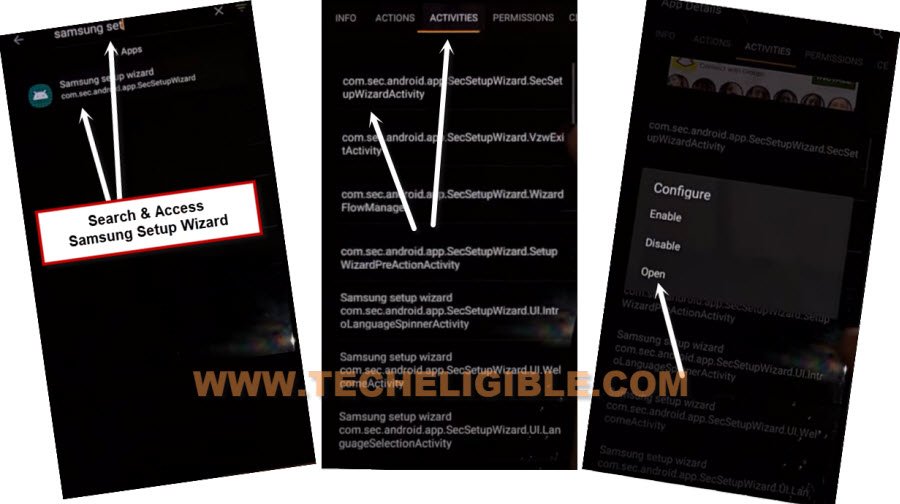
-Go back again. Search in top search bar with “Samsung Setup”.
-Hit on a same “Samsung Setup wizard” app as shown in below image.
-Tap over the “Activities” from top menu bar.
-After that, tap on first (com.sec.android.app….) same as shown in below screen shot.
-Finally, hit over the “Open” option to reach to your Samsung Galaxy F12 setup wizard screen.
-Within few seconds, you will be taken to the (Get recommended apps) page. Just wait over there. After that, tap to “Next” option.
-Go to > Skip > Skip > Finish
-Swipe up the screen, and tap to > Ok > Agree.
-Other some remaining steps can done on your own easily without any help.
Read More: