
Delete FRP LG Aristo 4 Plus, Google Account Remove Without PC
If you are stuck on a google verification screen, you can easily get rid of that screen through Delete FRP LG Aristo 4 Plus (Android 10) with the help of this below method, we will perform a hard reset task right after setup new pattern or PIN lock, and how you can do this all without any paid service, just follow easy guide from here.
Warning: This process is only for device owner of LG Aristo 4, and for educational purpose only. Follow all steps carefully.
Let’s Begin to Delete FRP LG Aristo 4 Plus:
-Lets begin process by turn on device & connect with WiFi, afterwards, go back on (Welcome) homepage.
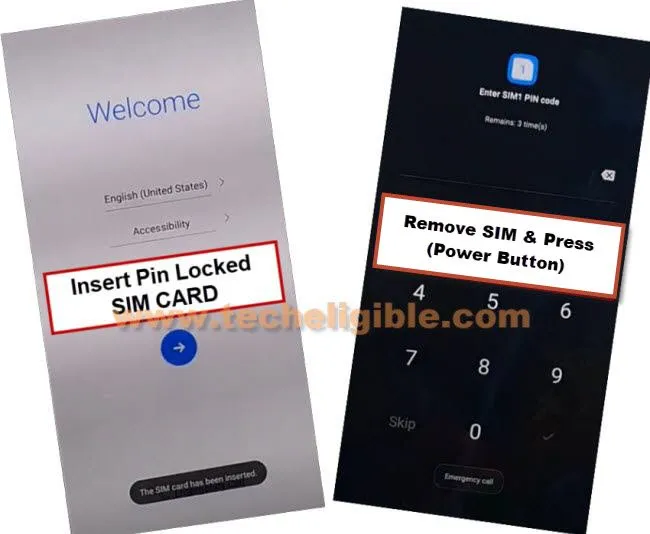
-Insert any PIN locked SIM card, after that, you will see there a (Enter SIM code) screen.
Note: To learn, how setup PIN in SIM card, you can follow up our SIM Setup Pin method here.
-Keep your SIM removal pin in a SIM Tray hole.
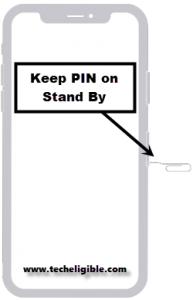
-Quickly press “PIN” to popup SIM tray, after that, quickly press “Power” button to switch off screen only, you have to do this very quickly, there should not be even 1 sec delay between ejecting SIM and press power button, do this as fast as possible.
Note: We mean to say, press power button quickly right after you popup SIM tray.
-Press “Power” button again to wake up screen again, and there, you will have a message on display.
-Lets now wake up screen by pressing (Power) key once, and there you will see “Not Sign in” message on screen.
Note: If you don’t see (Not Sign in), that means you have to repeat step again, the more fast and correctly you remove SIM and press (Power) button, the more chances are there to successfully receive this (Not Sign in) screen.
-Drag down that “Not signed in” message, and you will see there a “Notification Bar” will come up, just long hit on “Bluetooth” icon from there same as shown in below image.
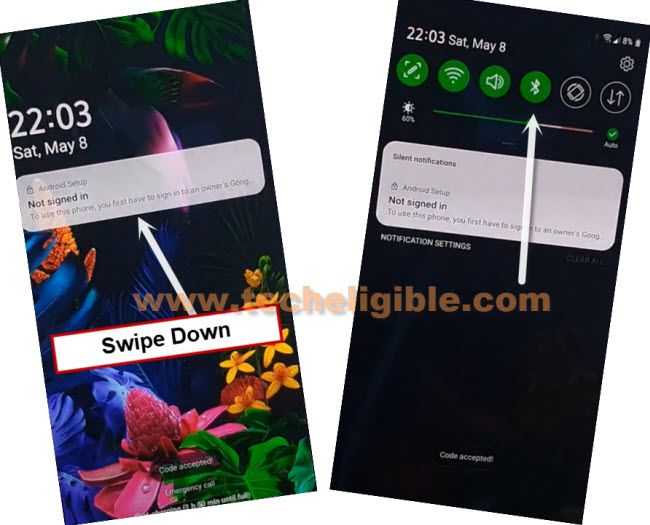
-Turn on “Bluetooth” option to bypass LG frp.
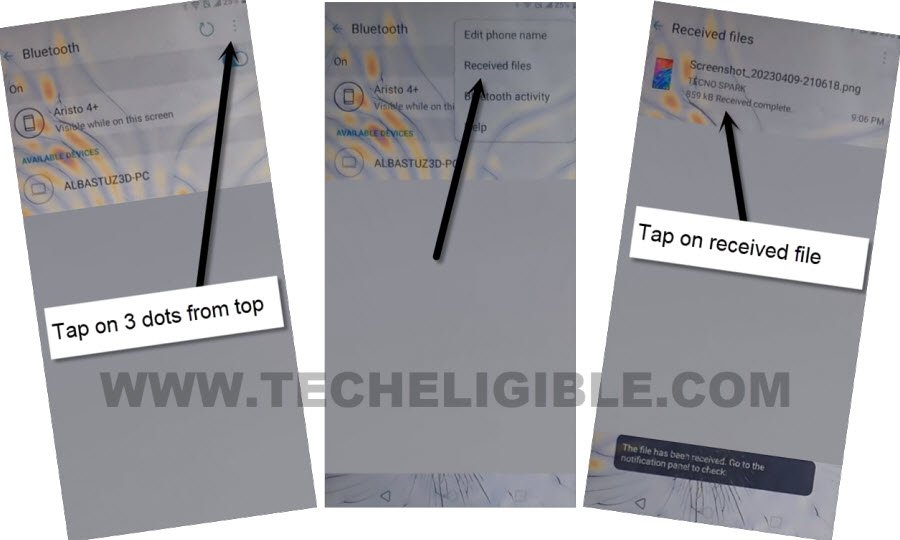
-We have to share any image from other device to this LG Aristo 4 device via Bluetooth.
-Let’s turn on “Bluetooth” in other android phone, and share any image from other android device to our FRP protected (LG Aristo 4 plus) device via Bluetooth.
-You will receive a popup window of file transferring, just tap to “Accept”, once you receive image file successfully, just tap over > 3 dots > Received File > Image.
-Tap to > Share > Email.
Note: If you see a popup bottom of the screen, just tap on “Photos”, and tap to “Just once”, after that, tap on “Allow”, this will open image, and you will be able to share that image easily.
![]()
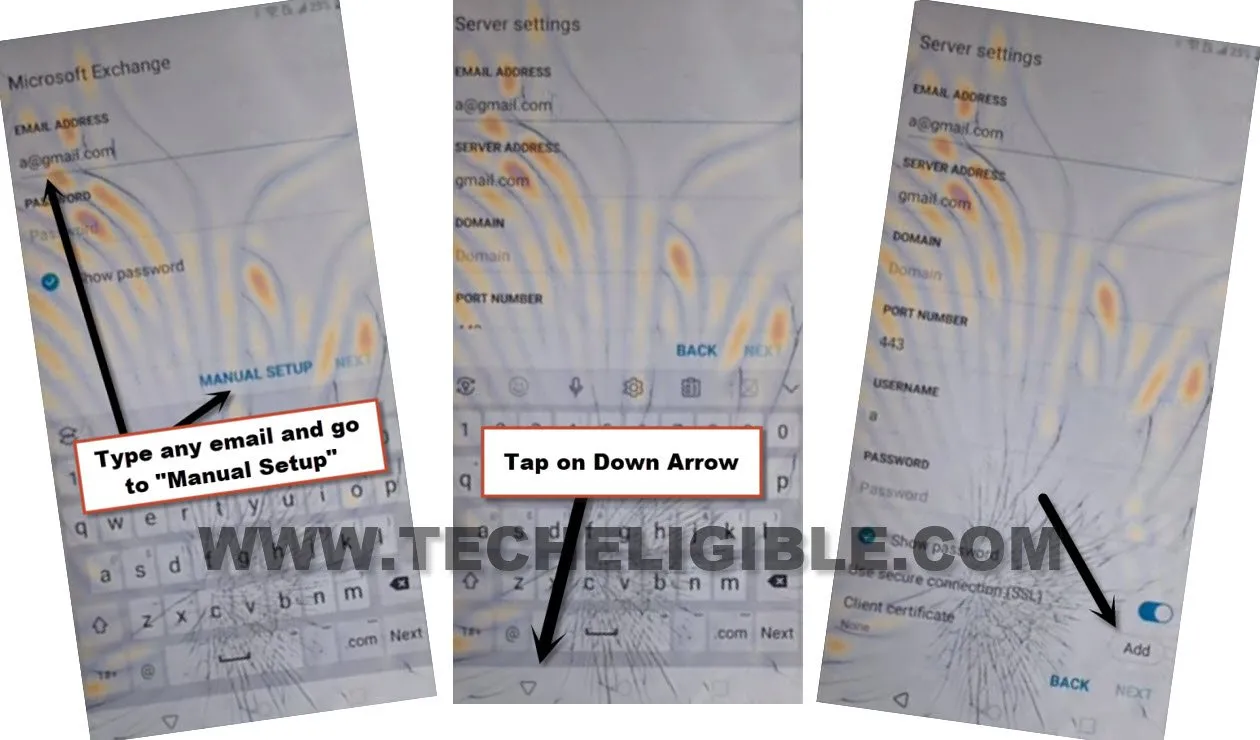
-Hit on > Allow > Microsoft Exchange, and type there any random email account, such as type ([email protected]), and then tap on > Manual Setup.
-Hit over “Down” arrow once to further collapse down more options, hit on > Add > Change
–Pattern > No Thanks > Next.
-Draw any desire pattern lock, and hit over “Next”.

-Draw again same pattern, and hit on “Confirm”.
-Congrats, your pattern lock has been added successfully.
Hard Reset LG Aristo 4 Plus:
-Now, we can easily hard reset our device using pattern lock, that we created recently, after that, old Gmail account will be deleted, and you can setup new account to bypass frp LG Aristo 4 Plus.
-Long press “Power button”, and restart your device.
-Once you see there a (LG) logo, just start long holding both (Volume UP + Power) key.
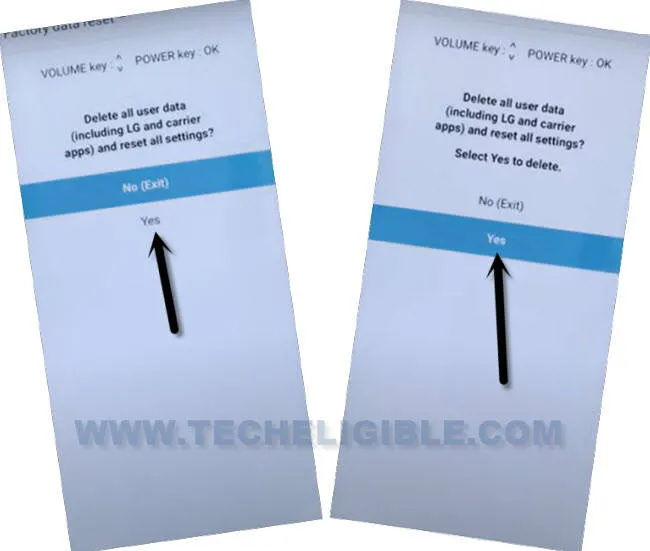
-By doing this, you will get into (Factory Data Reset) screen.
-Select “Yes” option 2 times, and the device will start performing hard reset, just wait there till this process is done, and you are ready now finish setup wizard to Delete FRP LG Aristo 4 Plus.
-Hit over > Skip > Skip from google sign in screen.
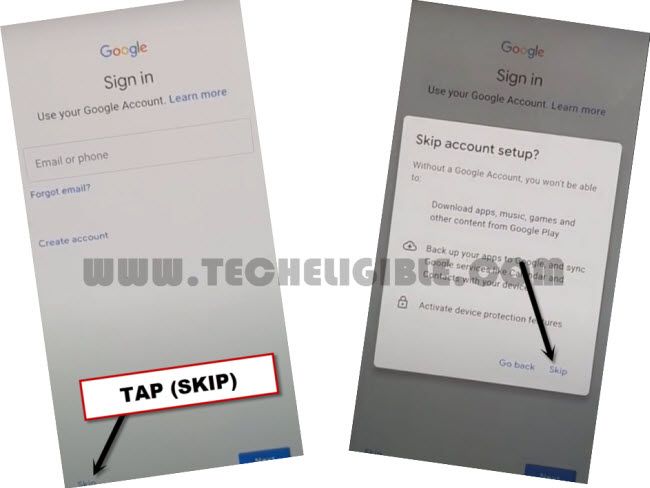
-Once you skip google verification screen, after that, you can easily complete all setup wizard process without facing any problem, thanks for visiting us.
-After skipping google sign in screen, you can finish up complete setup wizard steps by yourself without any help, because you have successfully bypassed frp from this LG device without any software.
Read More: