
Bypass FRP FreeYond F9 Android 12 With Updated Way
If you are still unable to get through google verification screen because of forgetting your own device google account. So, you have another opportunity to easily Bypass FRP FreeYond F9 Android 12 with the help of this method. We will access to frp tools page to install FRP applications, and also turn on some more feature from device settings. Afterwards, you can easily bypass google verification screen with your new updated google account. Follow steps from below.
Warning: This Article is only for educational purpose, try this frp method only to bypass frp your Own Phone.
Let’s Start to Bypass FRP FreeYond F9:
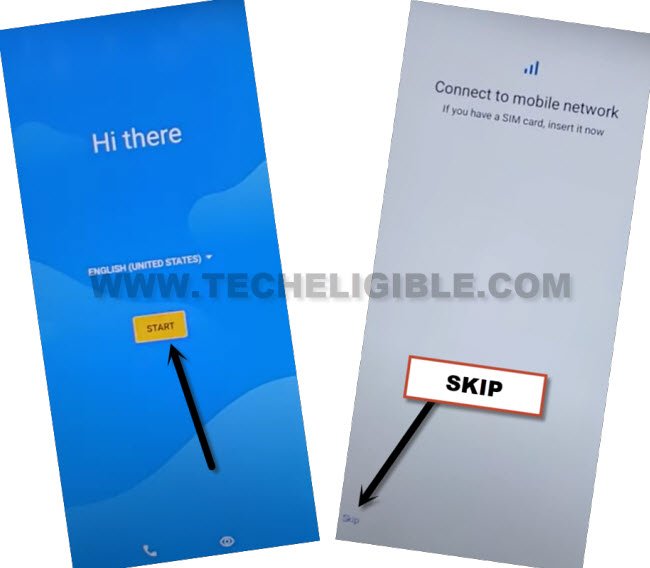
-Turn on device & Connect WiFi. After that, put your device back on first (Hi there) homepage.
-From there, go to > Vision Settings > Talkback. Turn on (Use Talkback) option from there. This will enable talkback feature.
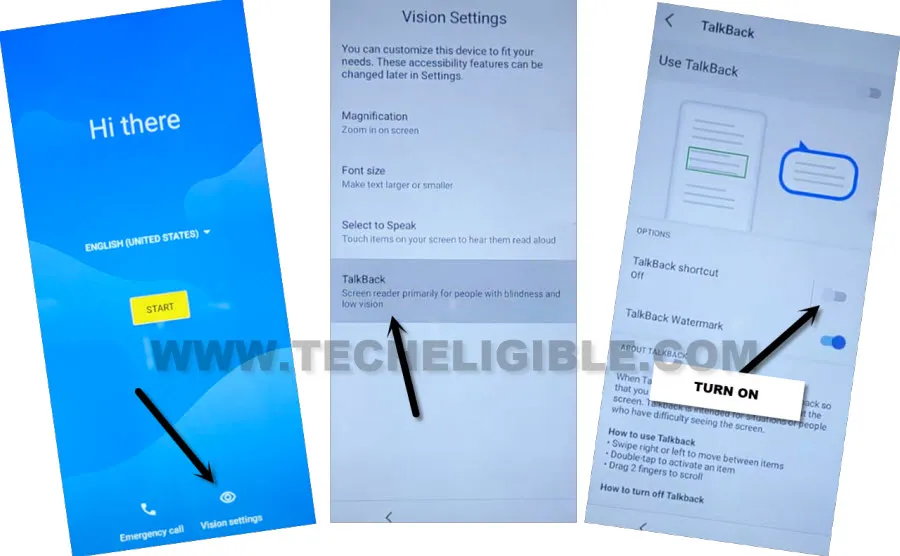
-After turning on (Use Talkback) option, just wait on screen, you will be displayed a (Welcome to Talkback) screen.
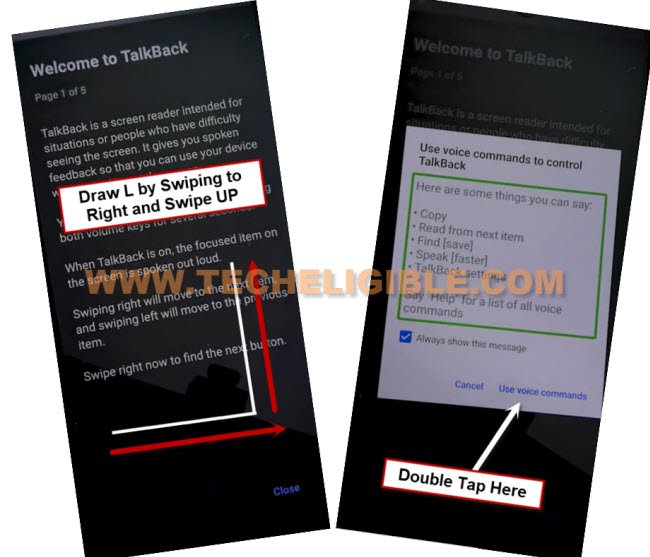
-Make a reverse “L” shape on screen by swipe right, and then swipe up.
-Afterwards, double tap over > While using the app > Use Voice Command.
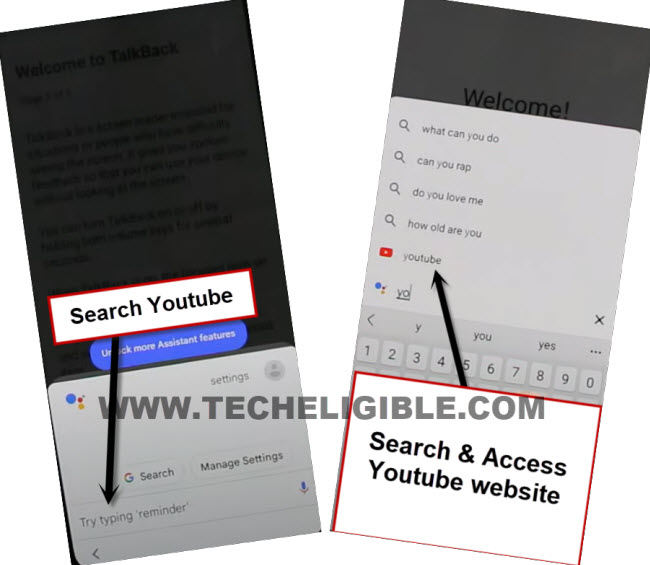
-After seeing green colored boarder on screen, just speak loudly “Open Google Assistant”. This will popup a (Try Saying) window.
-Double tap on “Keyboard” icon to search youtube there.
![]()
-Long hold both (Volume UP + Down) buttons simultaneously to completely disable talkback feature. If you are unable to disable talkback, you will have to follow below steps using (Double tap) on single option.
-Search and access to (Youtube) website by following below screen shot.
-Go to > Profile icon > Settings.
![]()
–Go to > About > Youtube terms of service > Accept & Continue > Next > No Thanks.
Access to App info Page:
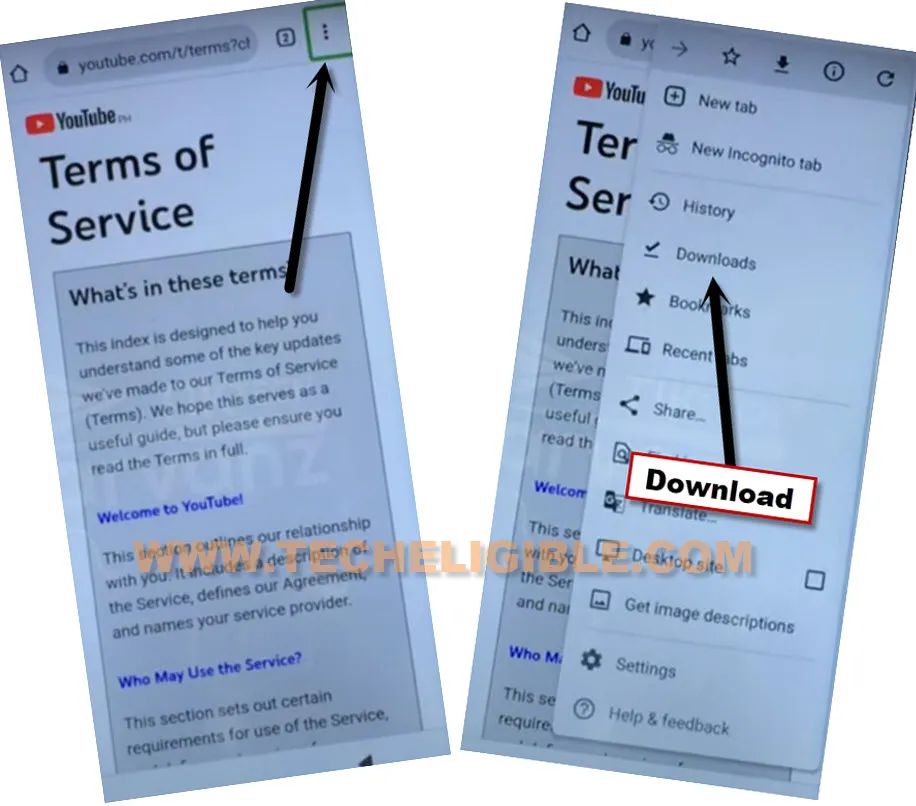
-Tap over “3 dots” icon from top right corner. After that, go to “Downloads”.
-Hit on > Settings icon > Exclamation icon.
![]()
-After that, hit on “Tap to go to application settings”.
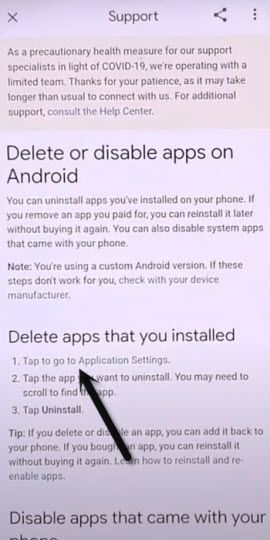
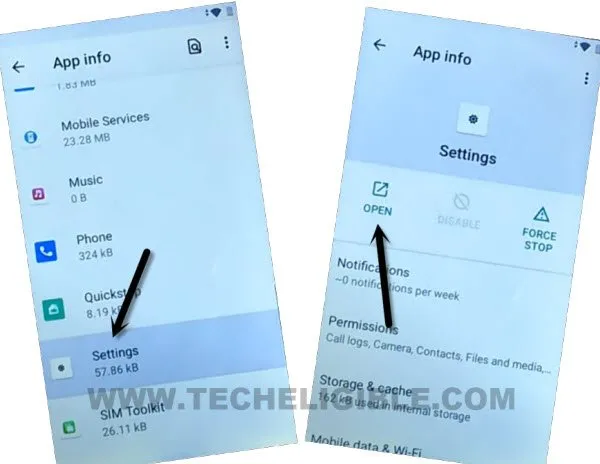
-From there, find and go to > Settings > Open.
-We have to turn on (Accessibility feature), from settings, go to > Accessibility > Accessibility MENU.
-Turn on “Accessibility MENU Shortcut”, and hit on “Allow” from popup window.
![]()
-After enabling accessibility shortcut option, the (3 dots) icon will stick at the bottom right corner of your device screen.
-The green colored “3 dots” icon will stick at right edge corner of the screen. Later on, we will use these 3 dots to enable google play services app.
![]()
Note: If your talkback feature is still enabled, so you can easily disable talkback now. Just hit on “Back Arrow” from top to get back on (Accessibility) screen. From there, tap to “Talkback”. After that, turn off “Use Talkback” option from there.
-By tapping few times on “Back Arrow” from bottom, just go back on “All App” screen same as shown in below image.
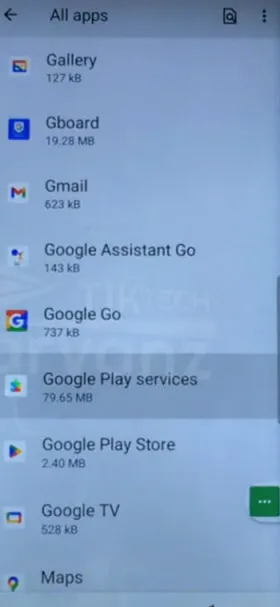
-From there, find and go to > Google Play Services > Disable > Disable App.
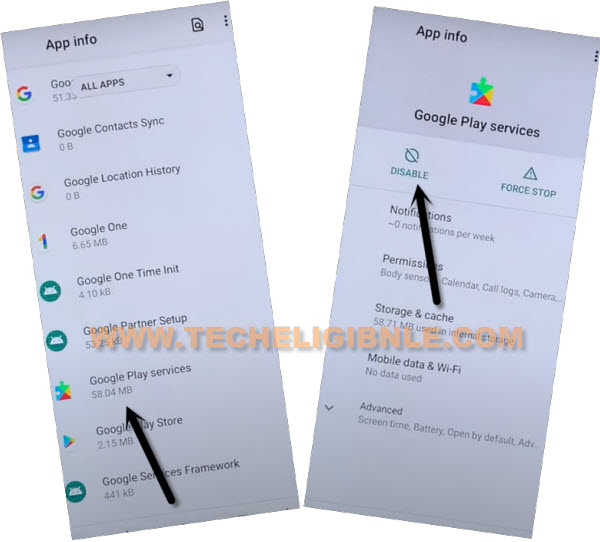
-After that, go to > Storage & Cache > Clear Cache.

-Go back, and tap to > Force Stop > Ok.
-Long press “Power key”, and restart your device.
-From (Hi there) screen, tap to > Start > Skip.
-Wait on loading screen, after that, tap to “Don’t Copy” option.
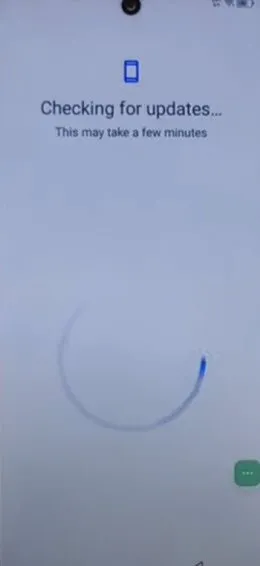
-Wait 20-30 sec on (Checking for update) screen.
Follow Steps Repeatedly and Fastly to Enable Google App:
-This (Checking for update) screen will not complete until we turn on (Google Play Services).
-To enable google services app, we have to use green colored (3 dots) icon here. But, you will have to do this multiple times until you successfully hit over “Profile” icon from popup window.
-Tap over > 3 dots > Assistant > Profile icon.
Note: You may miss (Profile icon) sometimes, but don’t worry, keep trying, tap again > 3 dots > Assistant > Profile icon.
![]()
-After hitting over “Profile” icon successfully, you will go to “Settings” screen same as shown in below image.
-Go down, and tap to “Terms of service”.

-Hit over > Share icon > Gmail icon > Skip.
-From (Enable Google Play Services) popup window, just tap over “Enable” button.
![]()
-After that, go to > Storage & Cache > Clear Cache.
-By tapping on back arrow 5-6 times, just get back to (Checking for update..) screen again. This screen will finish up within few seconds. After that, you can easily complete all remaining initial steps on your own without facing any google verification screen. Thanks for visiting us.