
If you have Lenovo device, and lost access to your device because of FRP protection feature. You can learn from here, how to Remove FRP Account LENOVO Zuk Z1 without a PC and paid services. From (Verify your Account), we can access directly to your our device main (Settings) page. After that, we will erase previously synched Gmail account through backup & reset option. Follow guideline from below.
Warning: Do not try this frp method on a stolen phone, this is a serious crime, if you are trying to bypass frp on a stolen phone, you may also be jailed, this process is for device owner and for educational purpose only.
Let’s Star to Remove FRP Account LENOVO Zuk Z1:
-Connect WiFi first, and go to (Verify your account) screen.
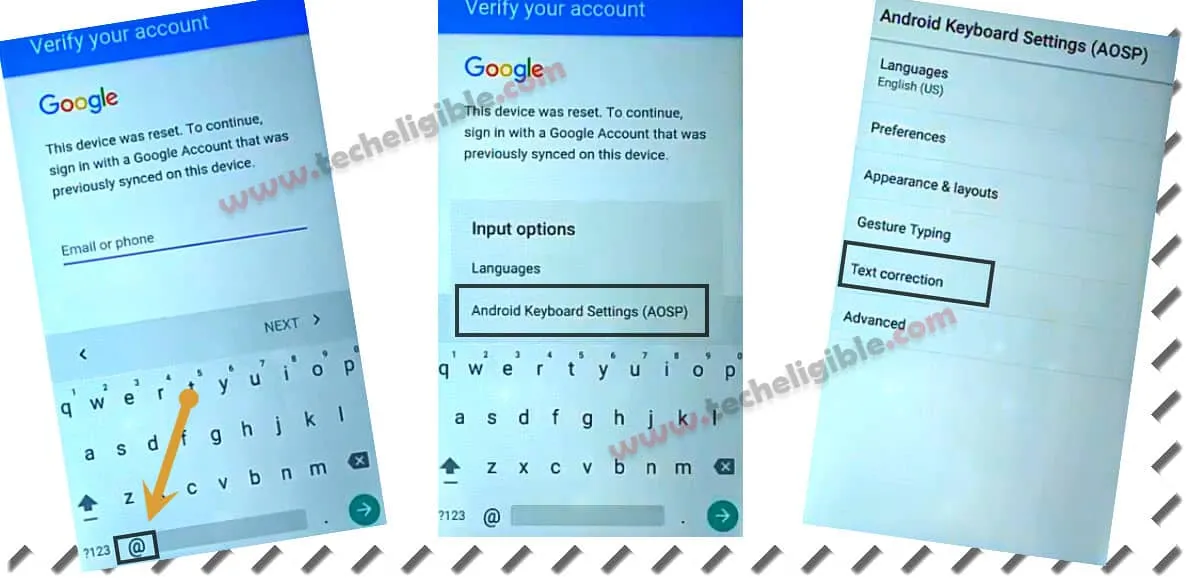
-Tap to (Email or phone) field tab to bring keyboard.
-Long hit on “@” icon and swipe up your finger to “Settings” icon.
-By doing this, you will be displayed a popup window of (Input Option), just tap on “Android Keyboard Settings (AOSP)”.
-Tap over “Text Correction”.
-Go to > Personal Dictionary > English (United States).
-Hit on a “+” icon from top.

-Type any word in both field tab. Afterwards, tap on “Search” icon from top.
-Search there “Ke”, and tap to “Keyboard & Input methods”.
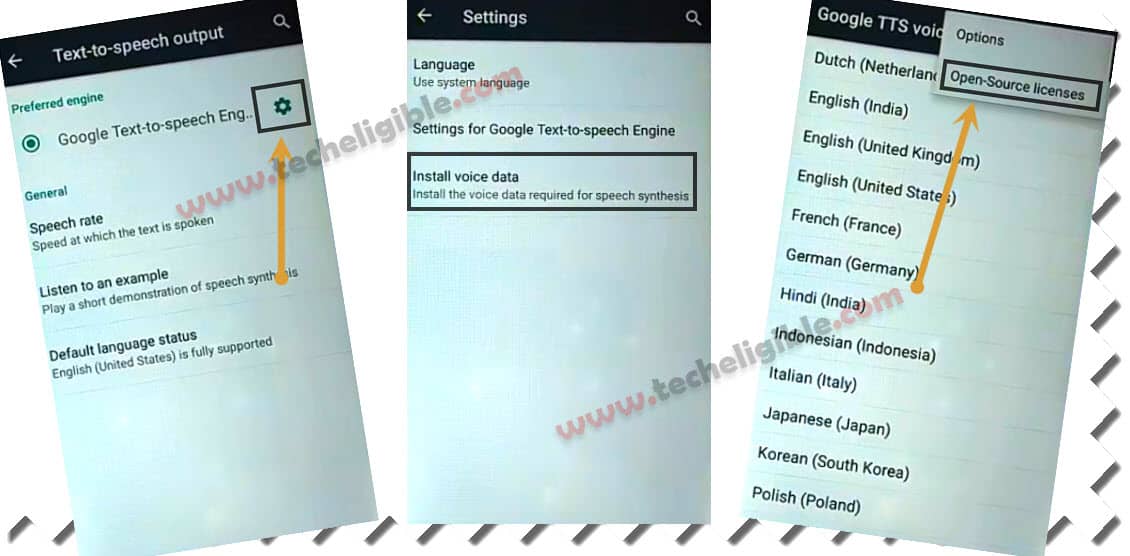
-Tap over “Text-to-Speech output”.

-Go to > Settings icon > Install voice data.
-After that, hit on “3 dots” icon from top right corner of the screen. And go to “Open-Source licenses”.
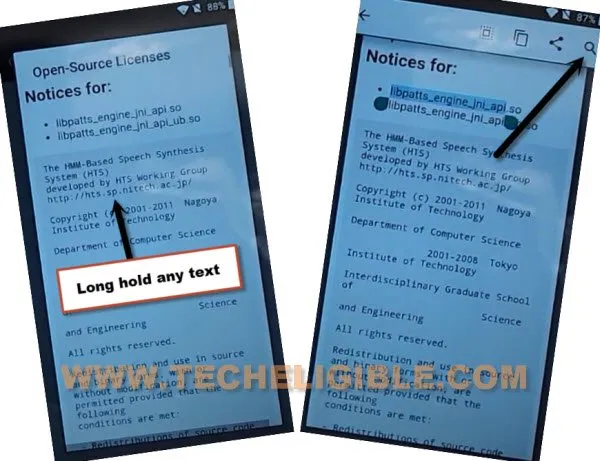
-From source licenses page, long tap on any text, after that, go to “Search” icon from top of the screen.
-Search and access to Lenovo device main settings to Remove FRP Account LENOVO Zuk Z1.

Let’s Enable OEM & Reset Device:
-Go to > About Phone > Device information.

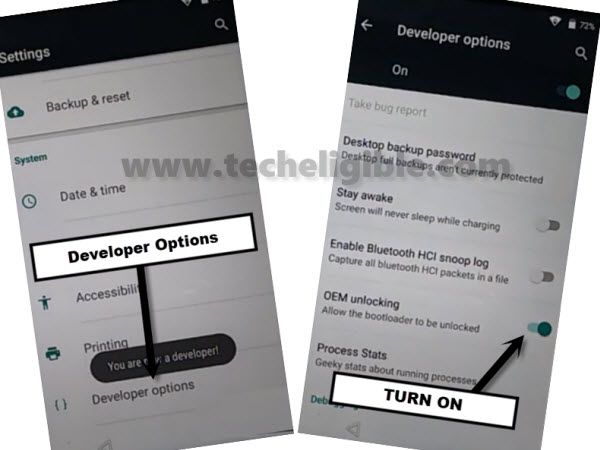
-Tap 7 times rapidly on a “Build Number”. This will enable developer option for you.
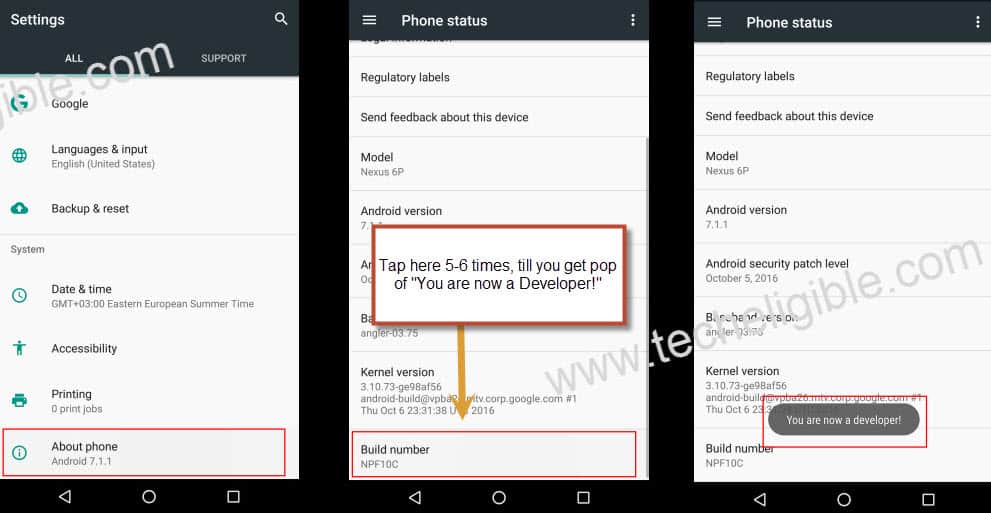
-Get back to (Settings) page through back arrow from top.
-Tap to “Developer Option”. Turn on “OEM Unlocking” option from there.
-Go back to (Settings) page by tapping back arrow from top.
-We are going to reset device completely, this will delete all your data including old google account. Tap to > Backup & Reset > Factory data reset > Reset Phone > Erase everything.
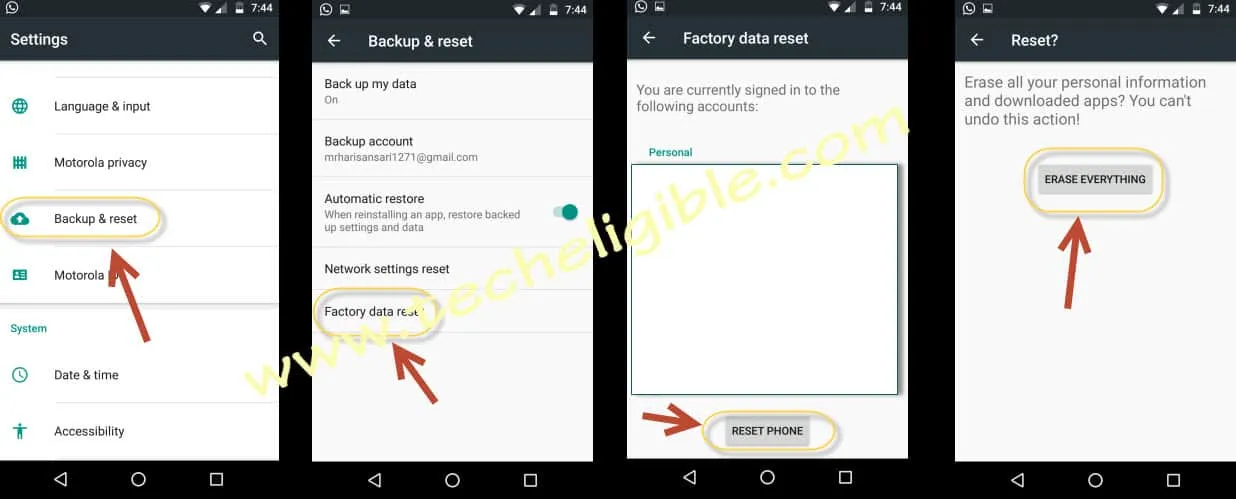
-After soft reset process is done, the device will auto restart. After that, you will be able to go through google verification screen easily. Thanks for visiting us.