
Remove FRP Account Motorola Edge Plus Android 11 Without PC
Remove FRP Account Motorola Edge Plus (Android 11) with this best easy method, without using any paid tool or computer, we will access to our device settings from (Emergency Call) option, afterwards, we will turn on (Accessibility Shortcut MENU), and this will assist you to easily get into your device homescreen, and you can also add new google account for future use, let’s Follow steps from below.
Warning: This Article is only for educational purpose, try this frp method only to bypass frp your Own Phone.
Remove FRP Account Motorola Edge Plus:
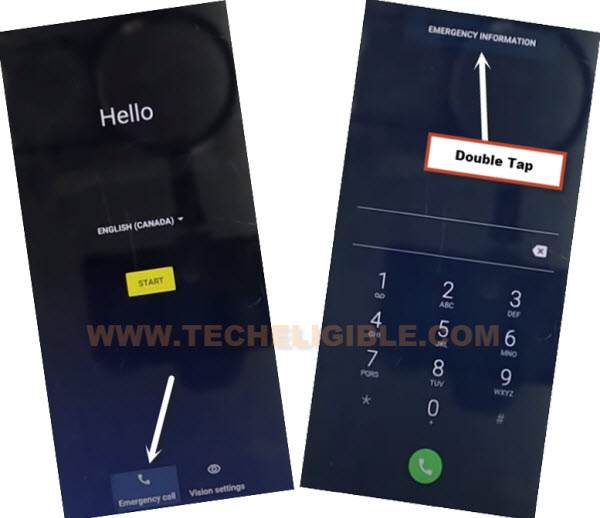
-Connect WiFi, and double tap to “Emergency Call” option from hello screen, now double tap “Emergency Information”.
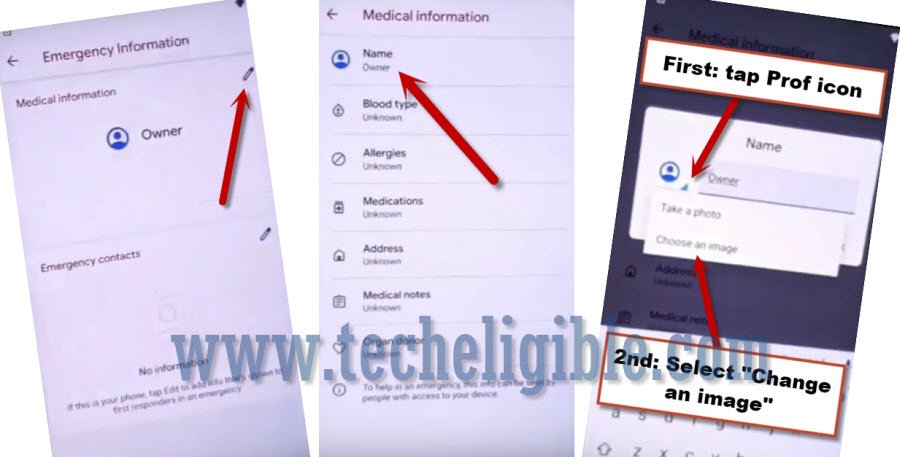
-Pencil icon > Name > Down Arrow underneath the image > Choose an image.
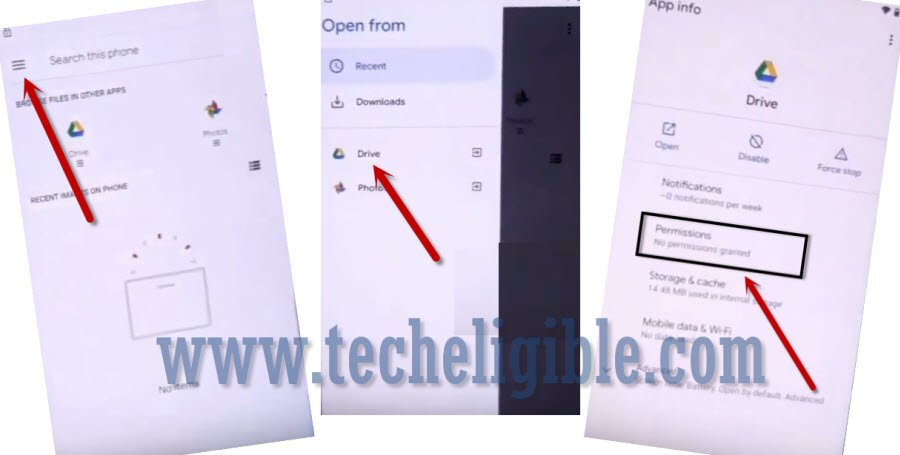
-MENU icon > Drive > Permissions.
-Tap on “Search icon” from top corner, and search there “Settings”.
-Go to > Settings > Open.

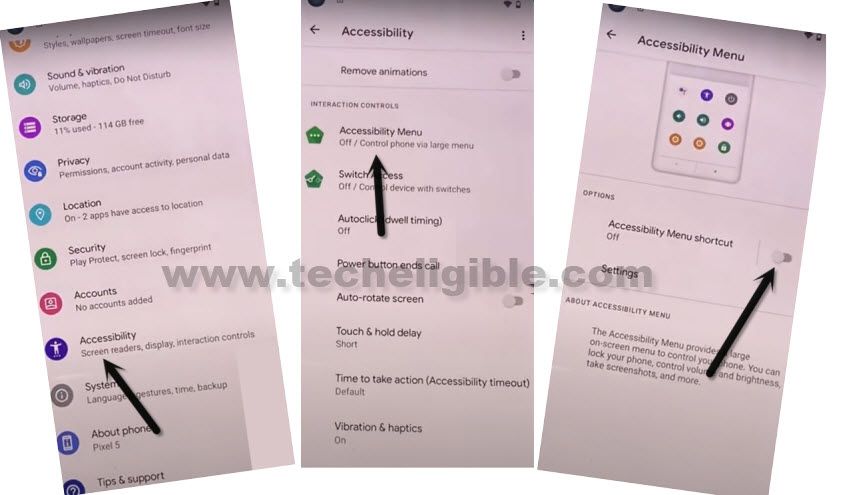
-After reaching inside (Settings), tap to > Accessibility > Accessibility MENU > Turn on > Allow > OK.
-Go back to (Settings), from there tap to > Apps & Notification > See All Apps.
-Tap on > 3 dots > Show system Apps to Remove FRP Account Motorola Edge Plus.
![]()
Let’s Disable Some Applications:
-Find blue color settings icon “Android Setup” same as shown in below image.
-Tap to > Force Stop > OK.
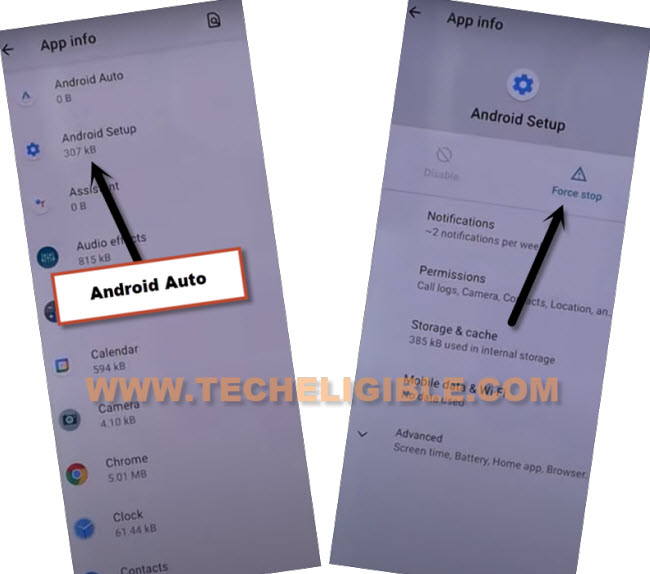
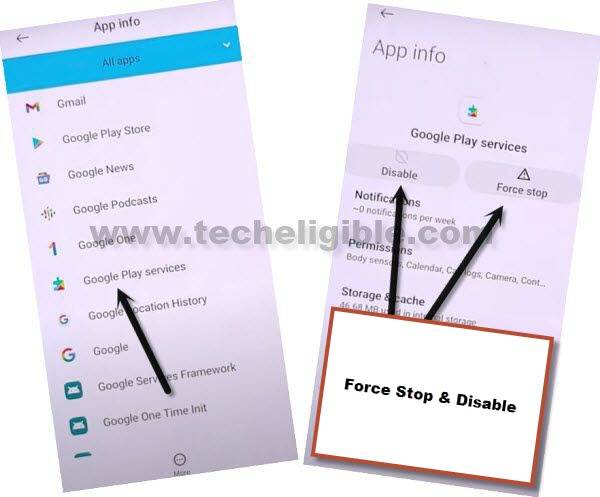
-Find and tap to > Google Play Services > Disable > Disable.
-Now tap to > Force Stop > OK.
-Tap on “Back Arrow” few times, and you will automatically get back to first (Hello) screen.
Enable Google Play Services:
We have to quickly bring the shortcut menu by swiping up from bottom, and after that, quickly tap to (Assistant), and then (Settings), if we accessed to (Google Play Services) screen, that means we succeeded, if we do not access to that screen, then you will have to repeat below steps for many times.
-Tap to > Start > Skip > Don’t Copy.
-As soon as you see (Checking for updates…) screen, using two fingers together, swipe up the screen from bottom, and quickly tap to > Assistant > Settings.
![]()
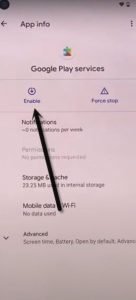
-Congrats, we have successfully reached (Google Play Services) screen, just hit on “Enable” button from there, and this option will bypass google verification screen.
-Tap on “Back Arrow” and then you will see (Google Services) screen, just tap to > More > Accept.
-Hit on > SKIP > SKIP.
![]()
-Tap to > OK > Accept & Continue.
-Turn off all options, and tap to > Next > Get Started > Next > Next > Next > Go to Settings.
-Tap on “Back Arrow” from top left corner.
-Now you have accessed to your device home screen successfully, we just have to reset this device now to Remove FRP Account Motorola Edge Plus.
-Go to > Settings > System > Advanced > Reset Options > Erase all Data > Erase all Data.
-Wait this till process completes, and after that you are all done, because the previously added google account has been removed now through performing the erase all data process. Thank You
Read More: