
Bypass FRP Alcatel Pixi 3 (10) tablet, Access Device Directly
This method will guide you to Bypass FRP Alcatel Pixi 3 (10) tablet with help of some easy screen, and you can setup your own latest Gmail account as well, in this process, we will use only (Quick Shortcut Maker) app, this is the best and free app, which will be downloaded later on after opening chrome browser PIXI 3 tab.
Warning: Do not try this frp method on a stolen phone, this is a serious crime, if you are trying to bypass frp on a stolen phone, you may also be jailed, this process is for device owner and for educational purpose only.
Let’s Start to Bypass FRP Alcatel Pixi 3 (10):
-First go to (Verify your account) screen, from there bring keyboard by tapping on (email or field tab), now tap to “Keyboard” icon from bottom right corner.
![]()
-Select “English (UK)” from popup window.
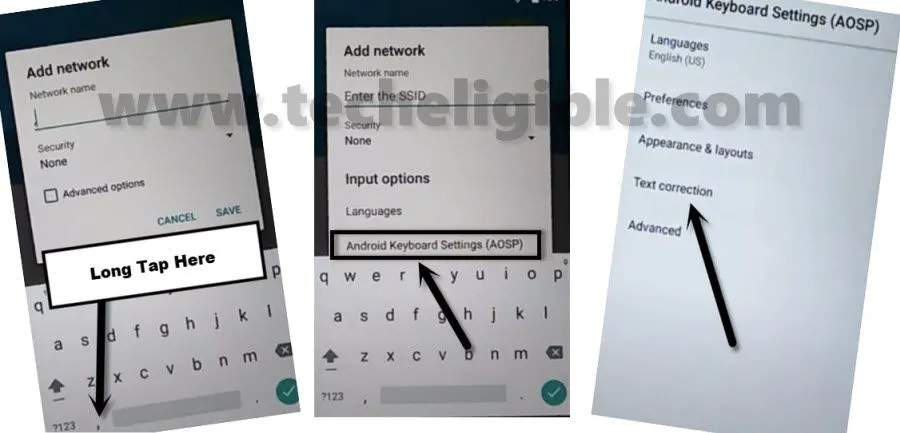
-Long tap on “@” icon, and drag this to “Settings” icon.
-From popup window, tap on “Android Keyboard Settings”.
-From there, tap on “Text Correction”.
-Go to > Personal Dictionary > English (United States) > Search icon.
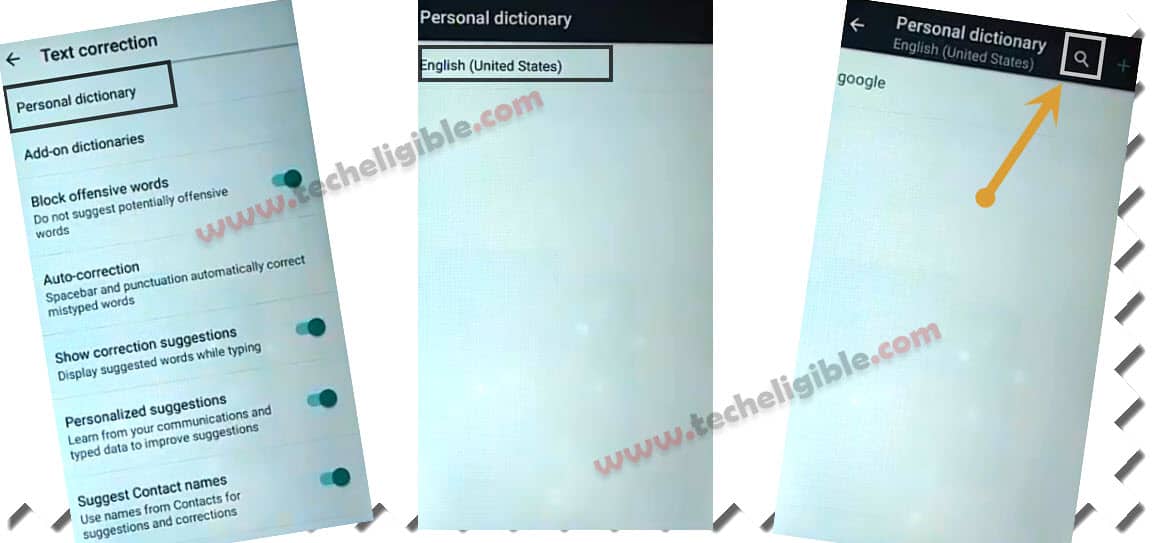
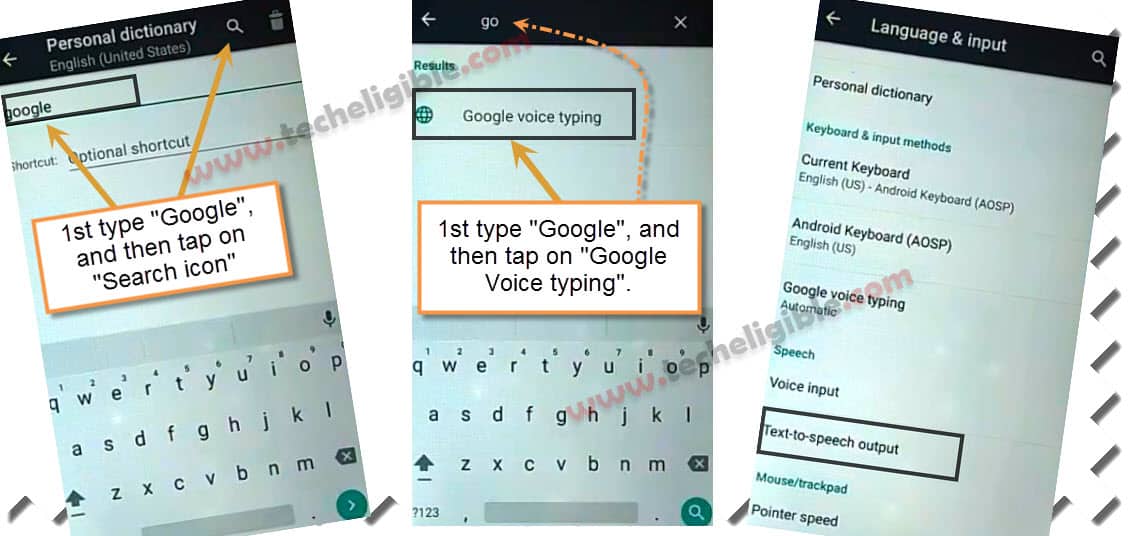
-Enter there “Google”, and then tap on “Search icon”.
-Type again “Google” and select “Google Voice Typing” from searched result.
-Tap on “Text-to-speech output”.
Note: If you don’t see there “Text-to-speech output”, then search and go to “Voice input settings”.
-Long tap at any text from there, and tap to “Web search” from top right corner, these options will appear only, if you long hold text.
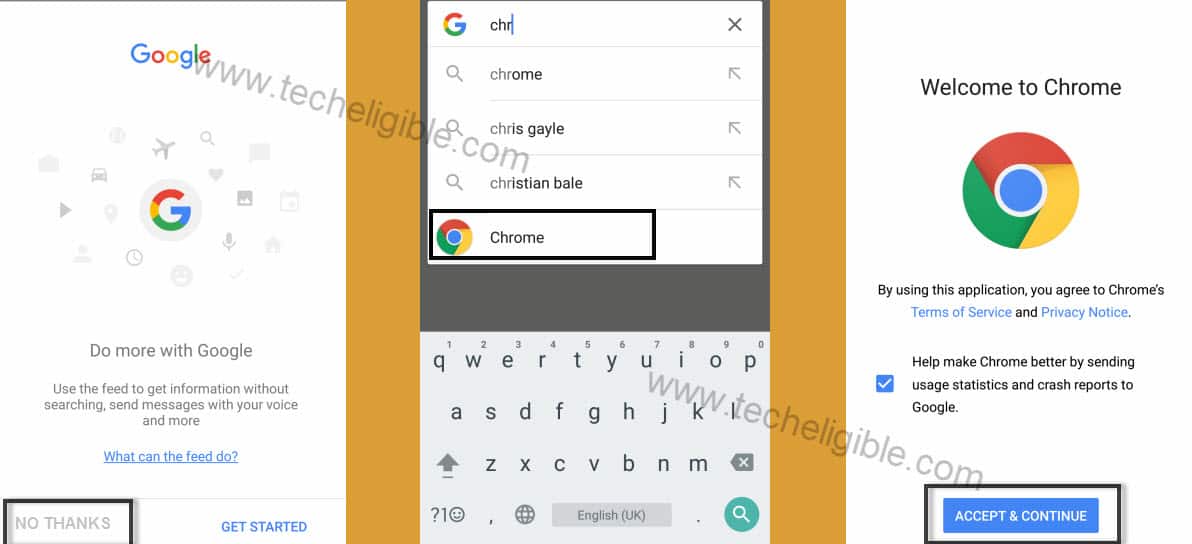
-Now search and go to “Chrome” browser.
-After that, go to > Accept & Continue > No Thanks.
Download FRP Tools:
-Search in browser “Download frp tools” and go to our website searched result.
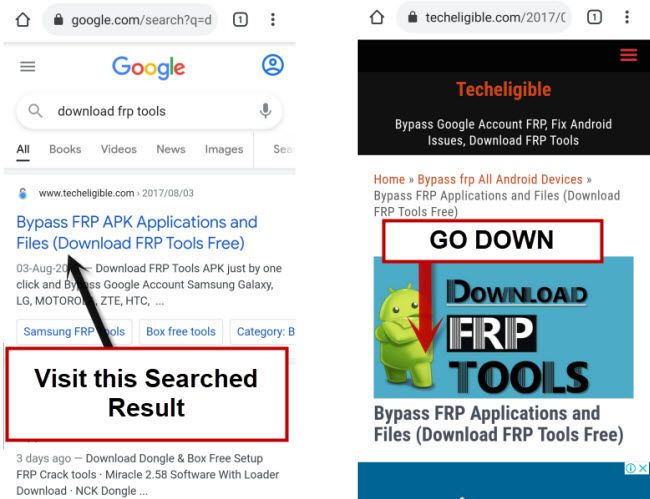
-From there, you have to download “Quick Shortcut Maker 2.4.0“.
-Once downloading process is done, just go back to (Google App) search area, where from you opened (Chrome browser), tap 3-4 times on back arrow carefully to reach back to google search area.
-Search & open “File Manager” app to reach inside downloaded app.
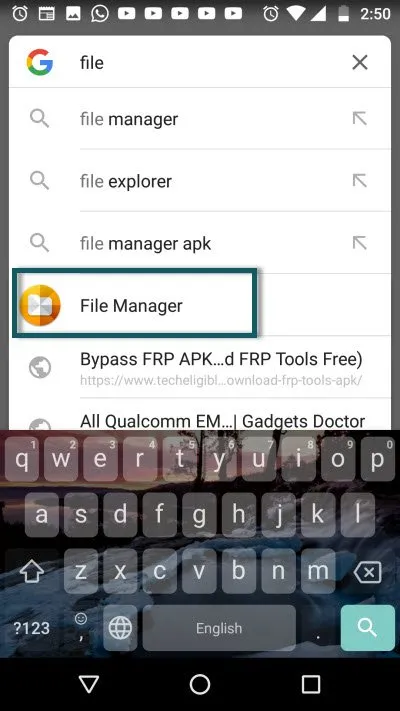
-If your downloaded apps goes inside internal storage, then select “internal storage” from there, and then go to “Download”.
-Tap on “Quick Shortcut Maker” app, and hit on “Settings” from popup, now turn on “Unknown Sources” option.
-Tap on “Back Arrow”, and again hit on > Quick Shortcut Maker > Install > Accept > Open.
-After Opening “Quick Shortcut Maker”, type in search bar “Google Account Manager“, tap on google account manger to expend it.
-From list of google accounts managers, select one of them that appears with “Type Email and Password“, just tap on that, all are mentioned in below images:
-Tap on “Try”.

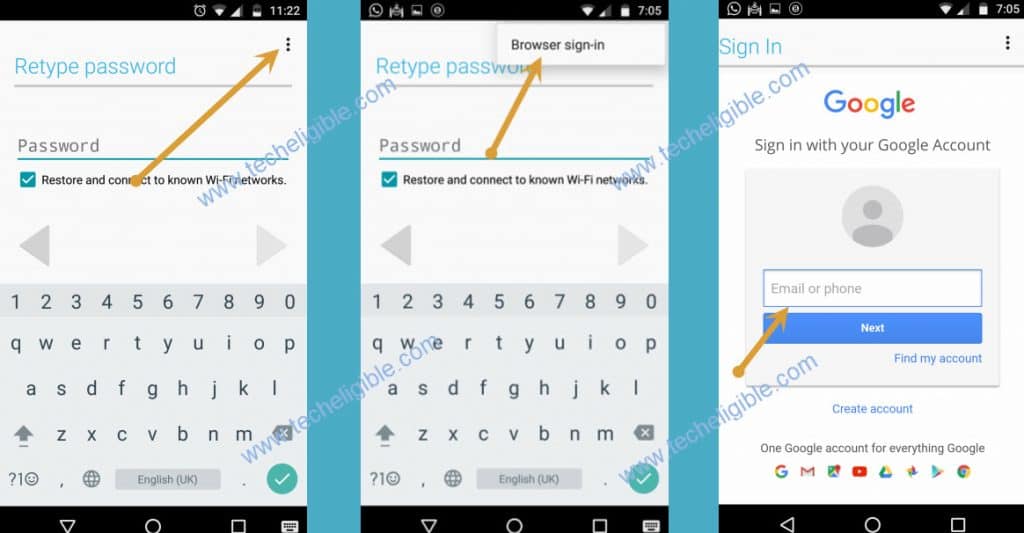
– Tap on “3 Dots” from top right corner.
-After that, select “Browser Sign-in”, now just sign in with your any active google account to completely Bypass FRP Alcatel Pixi 3 (10).
-Go all the way back to first homescreen by tapping on back arrow several times, after that, finish your initial setup wizard easily without facing any frp locking issue.
Read More: