
How to Remove FRP Samsung A72 Latest Security Update 2021
Hey, are you still in search for a working frp method, so you can at right site, you can Remove FRP Samsung A72 (Android 11) latest security patch level, but to finish this process completely, you do required another Android device or any other Samsung android device, because we will transfer Gmail Account.
There are some tools required before the beginning this process, once you arranged these all tools. you will not face any difficult in following this simple process.
Tools You Need ?:
–Latest Samsung USB Driver [Download]
–Easy Samsung FRP Tools [Download]
–Other Android Phone / Galaxy Device
–OTG.
Note: Above 2 tools (Driver + Samsung FRP Tools) will be used for PC.
Lets Begin to Remove FRP Samsung A72:
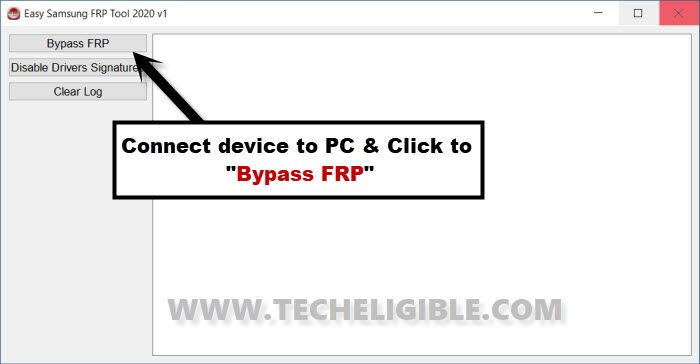
1. Install and open “Easy Samsung FRP Tools” in your PC or Laptop.
2. Install USB Drivers as well, so you may not face any issue when you connect Samsung A72 to the PC.
3. Let’s connect WiFi in Samsung A72 device.
4. After that, Connect Samsung device with PC.
5. Once the device is detected by PC, just click on > Bypass FRP > OK.
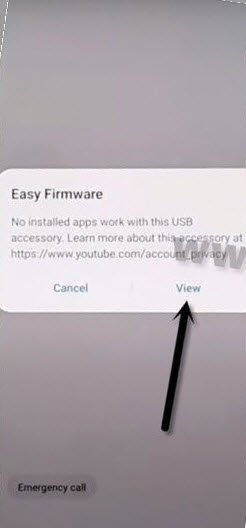
6. You must see popup window of (Easy Firmware) in your frp locked device screen, just tap to > View > Accept & Continue > Next > No Thanks. Congrats, we have accessed to Chrome browser, now we will be able to Remove FRP Samsung A72.
Access to Samsung A72 Settings:
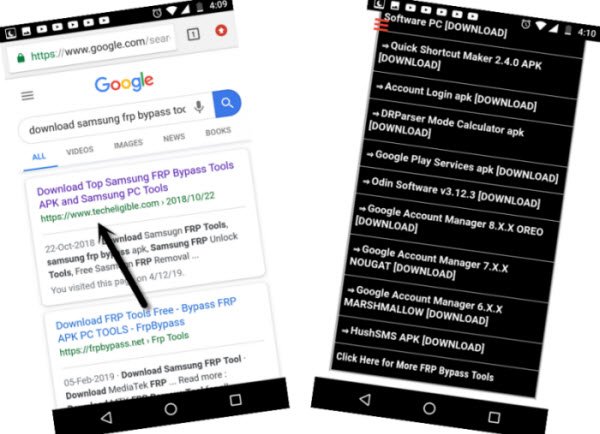
7. Type in chrome search area “Download Samsung FRP Tools“, and go to our website searched result. (For help, see below image).
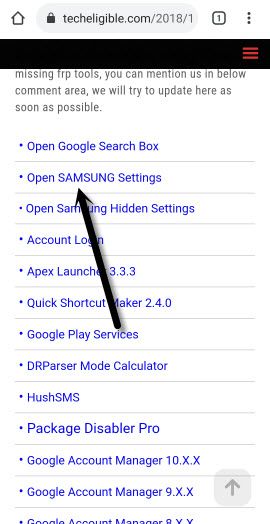
8. Access to device settings easily through a shortcut way, for that. tap on “Open Samsung Settings“.
Open Smart Switch App:
9. After accessing inside your device settings, we will go to > Accounts & Backup > Bring Data from old device > Download.
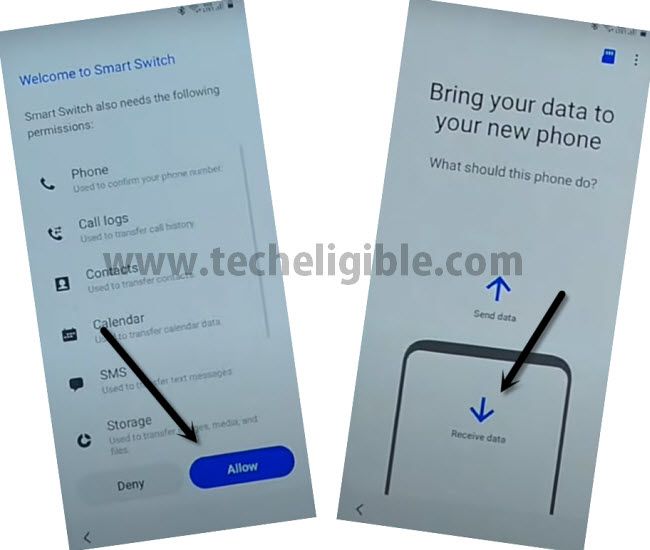
10. There you will have a downloading screen, just wait and then from (Welcome to Smart Switch) screen, hit on > AGREE.
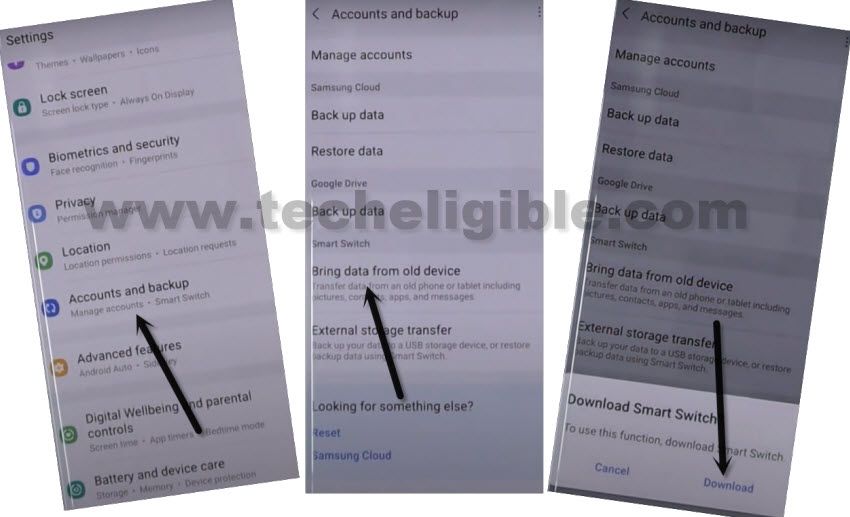
11. Go to > Agree > Allow > Receive Data > Galaxy > Cable.
In Other Android Device:
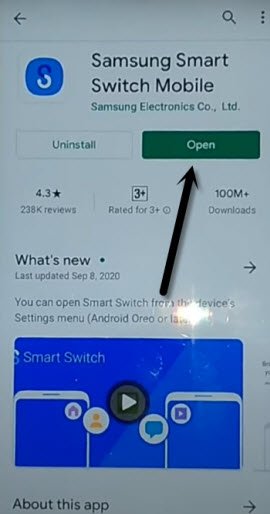
12. Install & Open (Smart Switch) App in other phone through google play store, to do this, just Open “Galaxy Store”, download & open “Smart Switch” app from there.
13. We will open “Google Play Store / Galaxy Store” to install and open “Smart Switch App”.
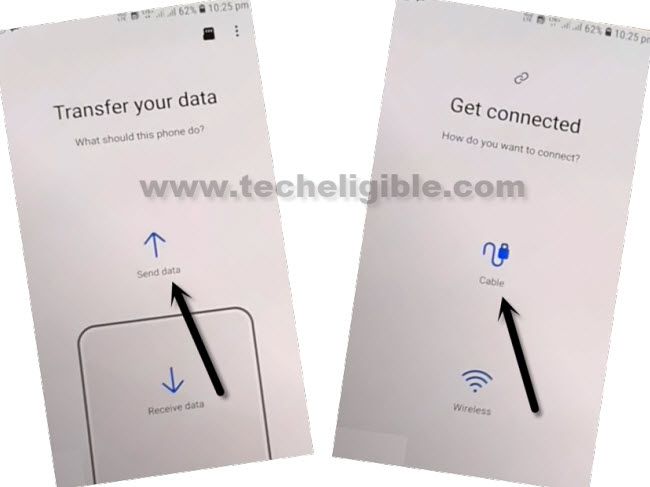
14. From Smart Switch App, Go to > Send Data > Cable.
Let’s Start Transferring Gmail ID:
15. We will transfer already added Gmail ID from non frp lock android device to frp locked Galaxy A72, so your both device will use same Gmail ID, you can delete that later once you successfully Remove FRP Samsung A72.
16. Use OTG to transfer and receiving data, OTG should be connect to your “Galaxy A72” device, and normal USB end will be inserted to other android device or Galaxy device.
17. Hit “Allow” on both smartphones.
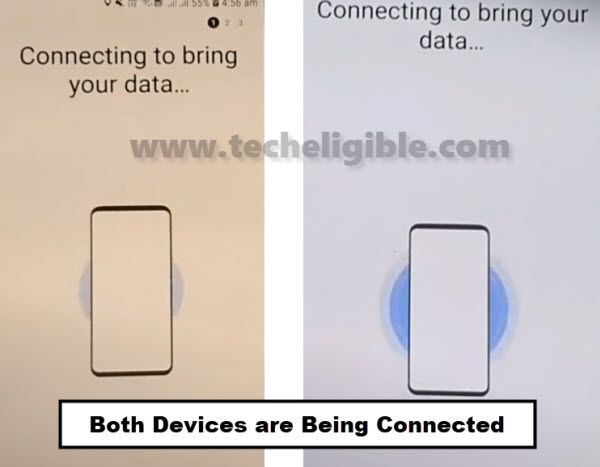
Choose Data to Transfer:
18. You only have to select 2 options (Accounts) & (Settings) from the list, and hit on “Transfer”.

19. Tap on “COPY” from other Smartphone.
20. You will be asked for verify identity in your other android phone, after that this will start transferring its (Account & Settings) to the Samsung frp locked device for Remove FRP Samsung A72.
21. Tap on “GO TO THE HOMESCREEN” button from Galaxy A72.
Congrats, now your Samsung A72 device has also be logged in with the same Gmail Account that is already logged in other Android device, if you wan’t to add your other Gmail Account, for that complete initial setup first in Samsung A72 to access device homescreen, and from the “Settings > Accounts & Backup) you can add or remove your Gmail Account easily, Thanks for visiting us.
Read More:
How to Remove Google Account Samsung A71 ?
How to Remove Google Account Samsung A70 ?
How to Bypass frp All Samsung Galaxy Android 11 ?